
To properly replace locomotive camshaft bearings, start by selecting engine-specific tools and inspecting oil channels and seals. Lubricate new bearings with EP additive, then use precision drivers to insert bearings, aligning oil holes carefully. Apply steady, controlled force—never hammer at an angle—and check for ≤0.004” misalignment. After installation, measure clearances and alignment, verifying everything meets manufacturer specs. If you’re aiming for maximum reliability and bearing longevity, the next steps will guide you through each essential detail.
Key Takeaways
- Select high-quality, engine-specific tools and bearings, ensuring material and dimensional compatibility with the locomotive engine block.
- Thoroughly inspect and clean oil channels, replace seals, and apply EP lubricant to all bearing contact surfaces before installation.
- Carefully align camshaft bearings with oil holes and galleries, using precision tools to achieve ≤0.004” misalignment and ≤0.001” runout.
- Insert bearings with controlled force using dedicated drivers, avoiding hammering or generic tools that may cause misalignment or damage.
- After installation, measure clearances and alignment with calibrated instruments, then verify oil flow and proper lubrication during dynamic testing.
Tool Preparation and Selection
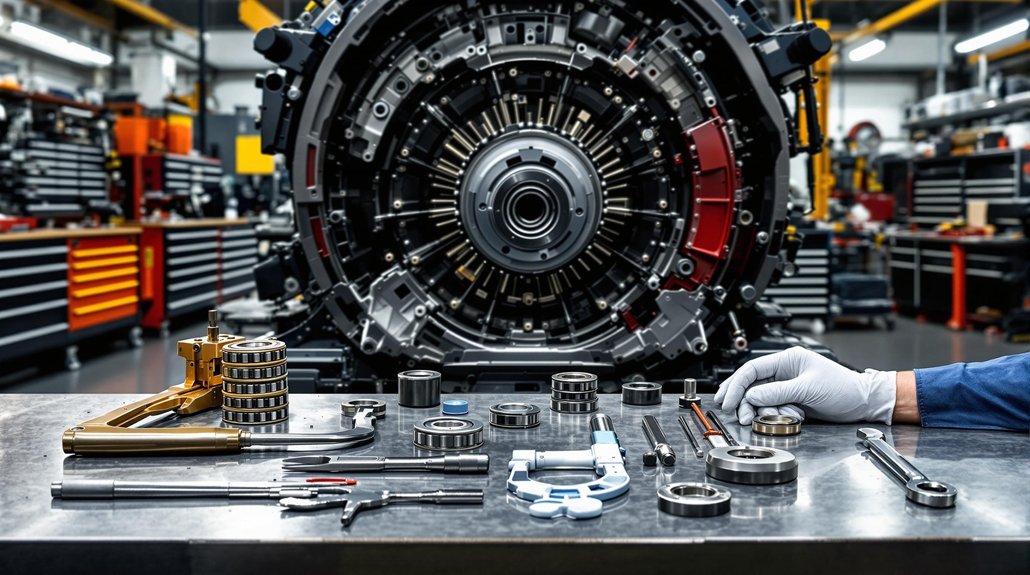
Before you start replacing camshaft bearings, select and prepare your tools with precision, as the right equipment guarantees both safety and accuracy. Evaluate tool compatibility by matching your tool kit’s bearing diameter range to the engine specifications—choose mandrels and adapters that accommodate sizes like 1.25″–2.69″ or 0.875″–1.00″. Assess material selection: use aluminum adapters for corrosion resistance or steel mandrels for high-torque jobs.
Expandability matters, so select adjustable mandrels or split driving plugs for flexibility across engine types. Ascertain your set includes core components: driving shafts, expander units, guide cones, and reaction mandrels for controlled, precise bearing installation. Inspect for kit completeness and storage cases to maintain organization. A blow molded case is often included with professional camshaft bearing tools, making storage and transport easier while keeping components protected and organized. Prioritize American-made, durable tools, and source from reputable brands to guarantee safe, accurate camshaft bearing replacement.
Lubrication and Pre-Assembly Steps
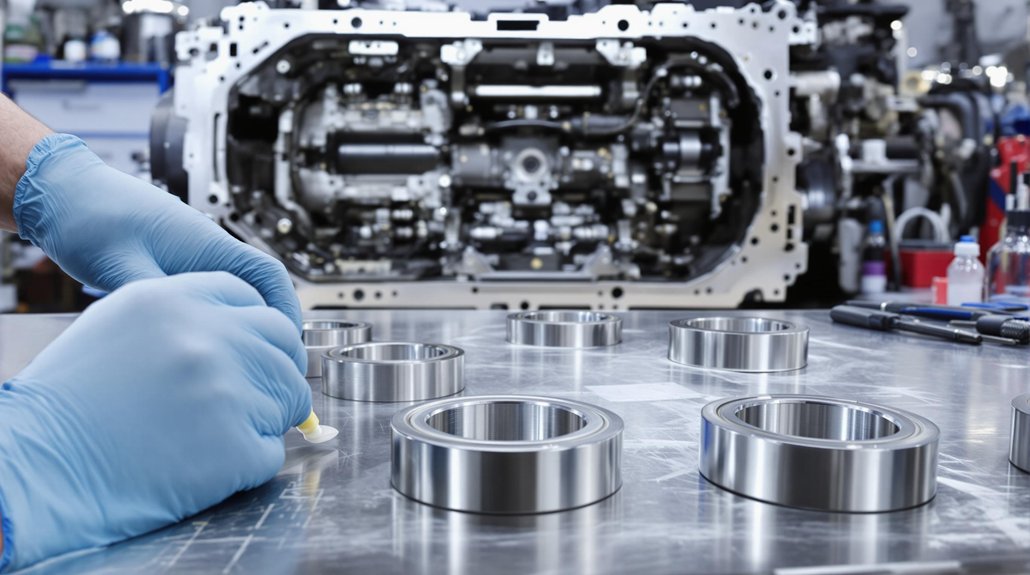
Although it may seem straightforward, proper lubrication and pre-assembly steps are critical to guaranteeing reliable camshaft bearing performance and preventing premature wear. Begin by conducting thorough pre-assembly checks: inspect oil channels in stub shafts, confirm all camshaft galleries are clear, and verify seal integrity at both camshaft ends. Replace all seals and confirm lube oil filters are new to prevent particulate ingress. Use appropriate lubrication techniques—apply an extreme-pressure (EP) additive lubricant to all bearing surfaces and pack bearings to establish a hydrodynamic film at startup.
Verify oil pressure specifications (8–12 psi at idle, 25–29 psi at full load), check scavenging pump operation, and validate relief valve settings for system safety. The main lubricating oil system supplies oil under pressure for cooling and lubrication, which is essential for preventing friction damage during initial engine operation. Align bearings with stub shafts, confirm camshaft concentricity, and check axial clearance per manufacturer tolerances. Finally, secure stub shaft fasteners with threadlocker. These steps, when executed precisely, create ideal conditions for bearing installation and long-term reliability.
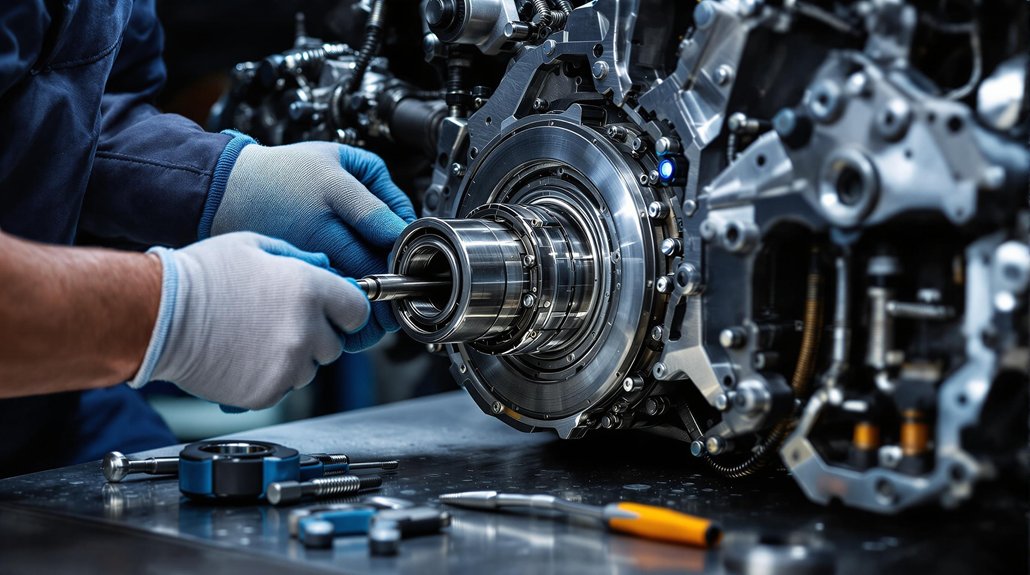
Bearing Insertion Techniques
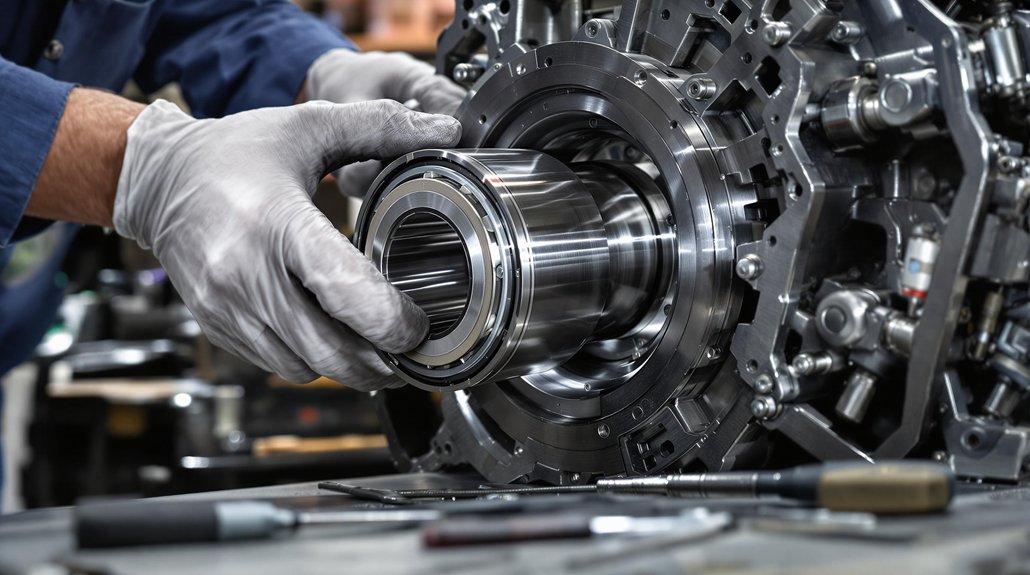
Now, you’ll select the correct cam bearing installation tool, making sure it matches your engine’s bore size and configuration. Carefully align each bearing with the oil hole and gallery passage, using visual guides to keep orientation exact. Proper positioning of bearings is crucial to avoid damage and ensure long-term reliability. Apply steady, controlled force with your tool to avoid distorting the bearing surface or damaging the block.
Selecting Proper Insertion Tools
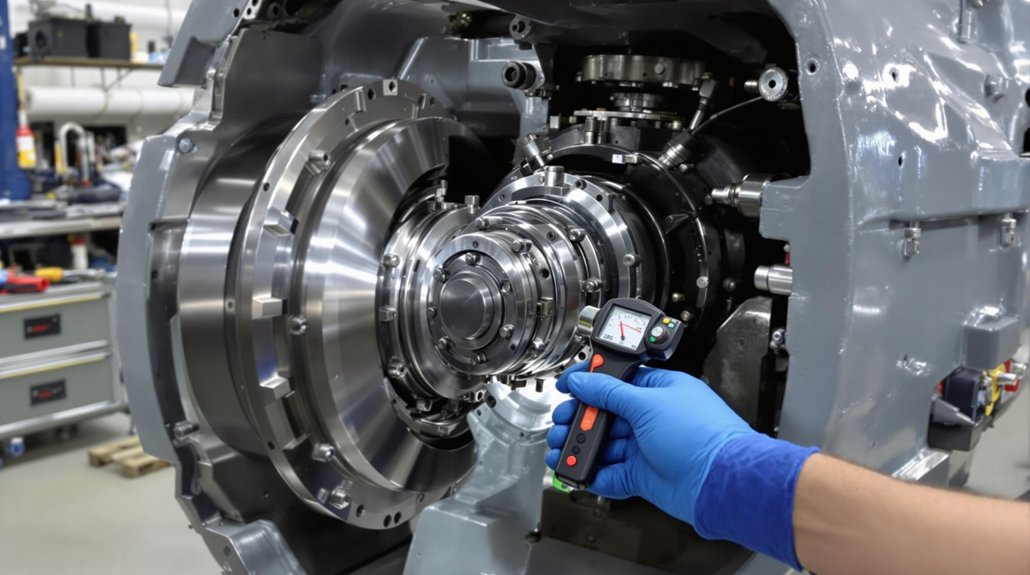
Tool selection plays a critical role in successful camshaft bearing installation, ensuring proper fit, alignment, and minimizing the risk of engine damage. Begin by matching your insertion tool to the bearing diameter—expandable mandrels and universal kits like Lisle’s offer broad tool compatibility for 1.25″ to 2.69″ bearings. For large-bore or GEVO engines, hydraulic ram systems and anchor mandrels are essential for safe, controlled installation.
Use engine-specific adaptors for brands like Cummins and CAT to boost installation efficiency and avoid damage from improper sizing. Adjustable tools with split plugs or collapsing mandrels allow you to adapt to slight bore irregularities, while fixed mandrels provide rigidity for perfect bores. Always check that ancillary components—drive extensions, bar guides, and replacement parts—are in prime condition for safe operation. Expandable mandrels are especially valuable because they instantly adjust to undersize cam bearings, as seen in modern cam bearing tool designs.
Ensuring Precise Bearing Alignment
While precise camshaft bearing alignment is critical to engine reliability, you can achieve it by combining careful preparation with the right insertion techniques. Begin by thoroughly cleaning and inspecting housing bores—any dent or sharp edge can tilt the bearing and throw off alignment tolerances. Use alignment techniques like optical or laser tools to confirm centerline accuracy, and guarantee your insertion driver is perfectly centered.
As you insert each bearing, apply steady, incremental pressure, monitoring for abnormal resistance. Always verify alignment with feeler gauges; your target is ≤0.004” misalignment and ≤0.001” runout. For added accuracy, proper oil hole orientation is essential during cam bearing installation, as misaligned oil holes can lead to low oil pressure and premature bearing wear.
| Common Pitfall | Consequence |
|---|---|
| Rushed alignment | Engine failure risk |
| Ignored tolerances | Costly bearing replacement |
| Misaligned installation | Dangerous system stress |
Never compromise safety—verify every measurement before finalizing assembly.
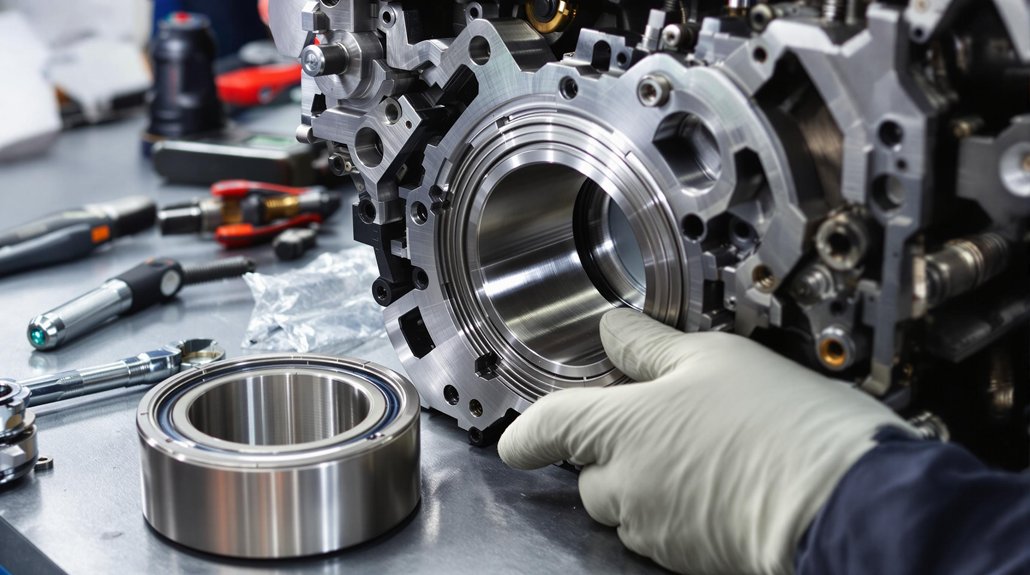
Preventing Bearing Surface Damage
Achieving precise camshaft bearing alignment lays the groundwork, but you must also protect the bearing surfaces throughout installation to avoid premature wear or catastrophic failure. Always use purpose-designed cam bearing drivers to guarantee straight insertion—never force bearings at an angle, as this can score sensitive bearing materials. Prepare your installation environment by thoroughly cleaning oil gallery holes and applying anti-corrosive lubricant to bearing O-rings.
Proper alignment during installation is essential, as camshaft bearings must be driven into position perfectly straight with oil galley holes aligned to ensure optimal function. Avoid abrasive honing, which risks embedding debris in the bearing surface; precision reaming is safer for tight fits. During insertion, employ controlled hammer blows with a nylon drift, advancing incrementally. Confirm oil feed holes align properly. Test-fit bearings and verify bore diameters before final assembly. These methods protect bearing surfaces, guaranteeing reliable operation and extending service life.
Alignment and Position Verification

Before seating the camshaft bearings, verify their alignment and position to assure reliable oil delivery and proper engine function. Use alignment strategies that account for block orientation: align the bearing oil feed holes at the 2 o’clock position when the block is upright, or at 8 o’clock if inverted. This guarantees feed holes correspond with oil galleries and 360° oil grooves for ideal hydrodynamic support.
Rely on visible position checks, using alignment marks on both the bearing and block, and confirm proper fit before final installation. Always keep a consistent reference axis—front or rear of the block—to avoid rotational misalignment. Safety demands all oil galleries and bearing surfaces remain clear of debris during these procedures. Distortion during installation can affect the bearing shape and size, so take care to press bearings evenly and avoid introducing stress that could compromise camshaft rotation.
- Visually confirm oil feed hole alignment with galleries using reference marks.
- Verify block orientation and translate clock positions accordingly for correct installation.
- Inspect and clear oil grooves and channels before proceeding to the next installation step.
Hydraulic Press Application Methods
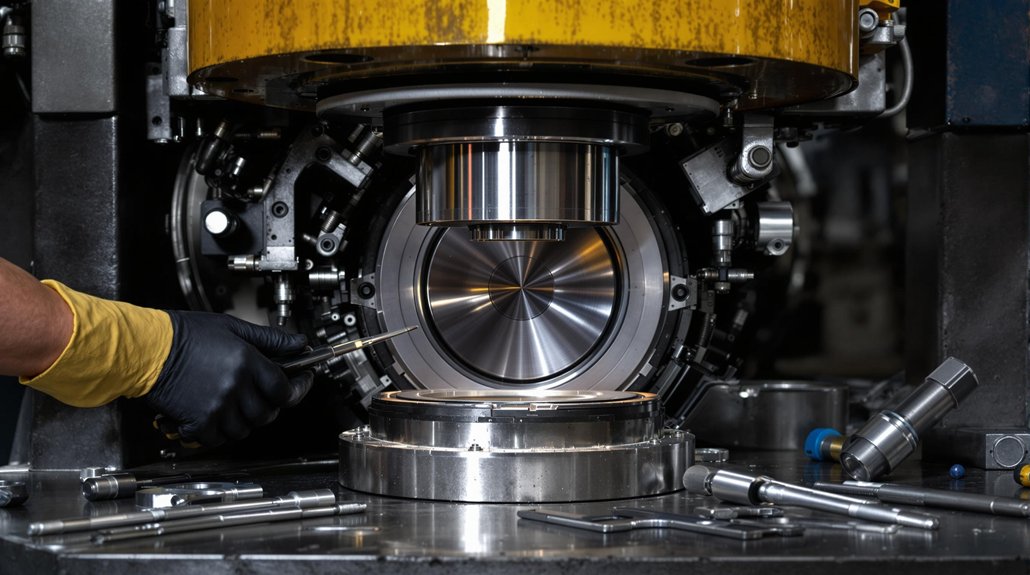
When you use a hydraulic press to install camshaft bearings, apply steady, controlled pressure in small increments to prevent distortion or misalignment. Always verify that each bearing seats fully and evenly by checking for uniform contact around the circumference. Pause periodically to inspect alignment and adjust force as needed, prioritizing safety and consistent fit throughout the pressing process. Proper hydraulic press application helps maintain the oil clearance critical to camshaft bearing longevity and engine performance.
Controlled Pressure Application Steps
While the hydraulic press provides the necessary force for camshaft bearing installation, precise control and correct tool selection are critical for safe and effective results. Always utilize controlled pressure to prevent bearing distortion and guarantee stability throughout the process. Begin by selecting the correct tool combination from the provided chart for your specific bearing size. Carefully align Tooling B’s chamfer with the bore face, and confirm the bearing oil hole matches the camshaft bore’s oil access. Use Tooling C for bearings three through six to maintain bearing stability and distributed pressure. Monitor the hydraulic pump output for uniform force application and avoid sudden spikes.
For best results, ensure proper alignment during installation, as misalignment of less than .001 can usually be compensated for with adequate clearance but larger misalignments may cause premature bearing wear or engine failure.
- Select tool combination per Table 2 for bearing size.
- Align oil hole and apply controlled pressure until seating.
- Use Tooling C for multi-bearing stability and even load.
Bearing Seating Verification
Although the hydraulic press streamlines camshaft bearing installation, you must verify seating accuracy to affirm reliable engine performance and prevent premature wear. Start by visually inspecting each bearing seat for metal shavings or debris. Use an LS-specific driver and guarantee even force distribution so the bearing aligns concentrically within the housing.
Maintain perpendicularity with the cam bore axis during pressing to avoid eccentric seating, which compromises bearing stability. After pressing, check for proper oil hole alignment and inspect for trapped contaminants. Measure cam journal runout with a dial indicator to confirm concentricity, and use a micrometer to verify bearing ID matches specifications. Documenting all measurements is important to track wear trends over time and ensure ongoing reliability. Test the camshaft for free rotation—any binding may indicate compromised seating accuracy. Always document your measurements for future reference.
Incremental Force Techniques
To achieve precise camshaft bearing removal and installation, incremental force application with a hydraulic press guarantees controlled, consistent load distribution and minimizes the risk of housing or bearing distortion. Begin by setting the hydraulic press to the correct demounting force—up to 63.5 metric tons for railway-specific applications. Use the semi-automatic or fully automatic operation modes to manage the press cycle (2 minutes per cycle), ensuring the ram stroke and extension speed match the bearing size. Always rely on the carriage’s automatic positioning and rack-and-pinion alignment to center the axle journal. This prevents uneven force application and potential damage.
- Set adjustable jaws for the specific wheel diameter.
- Engage the hydraulic ram gradually, monitoring force application.
- Use automated cycle management to maintain incremental force and maximize safety.
Post-Installation Inspection and Testing
Once you’ve installed new camshaft bearings, it’s critical to conduct a thorough post-installation inspection and testing sequence to guarantee proper function and longevity. Begin your post installation analysis by measuring camshaft journal and bearing bore diameters with calibrated micrometers and bore gauges. Compare recorded clearances to manufacturer specs—any discrepancy over 0.0005″ means immediate attention. Confirm bearing alignment using straightedges, and perform clearance analysis with plastigage or feeler gauges to detect tapering or end-play issues.
Next, inspect cam journals for out-of-round or lobe wear, using micrometers and dial indicators for precision. Mount the camshaft in V-blocks for runout testing; TIR should not exceed 0.002″. Dynamic testing under operational rotation is essential—monitor for abnormal noise, oil film distribution, and proper valve train motion. Always record your findings for traceability and safety.
| Step | Tool Used | Spec/Action |
|---|---|---|
| Measure Clearance | Micrometer/Bore G. | ≤0.0005″ discrepancy |
| Check Alignment | Straightedge | Visual/Measured conformity |
| Test Runout | Dial Indicator | ≤0.002″ TIR |
| Dynamic Testing | Accelerometer | Noise/vibration monitoring |
Maintenance of Tools and Equipment
Proper maintenance of tools and equipment is essential for achieving accurate results and guaranteeing safety during camshaft bearing replacement. Adhering to rigorous tool maintenance and equipment storage protocols minimizes the risk of measurement errors and accidents. Begin each workday by visually inspecting hand tools and machinery for wear, rust, or damage. Calibrate precision instruments such as torque wrenches and force gauges per OEM timetables, documenting all calibration activities for regulatory compliance. Always store tools in climate-controlled, secure environments to prevent corrosion and unauthorized use.
Consistent tool maintenance and careful storage are critical for accuracy and safety when replacing camshaft bearings.
Follow these best practices for effective tool maintenance and equipment storage:
- Daily Inspections: Check tools for physical defects, replace worn parts, and guarantee all mechanisms function smoothly.
- Scheduled Calibration: Maintain up-to-date calibration according to manufacturer and railroad SMP requirements, especially for critical measurement devices.
- Proper Storage: Use labeled, secure storage in dry areas, isolate unused tools, and follow ergonomic handling to reduce fatigue and prevent contamination.
Consistent application of these procedures sustains operational integrity and safety.
Troubleshooting Common Installation Issues
Although camshaft bearing installation may seem straightforward, several common issues can compromise the reliability and longevity of your work. You’ll often encounter bearing distortion from improper bore geometry or use of generic tools. Installation misalignment—especially failing to square bearings in the bore—causes restricted camshaft rotation and premature wear. Always verify bore roundness and alignment with precision gauges before installing new bearings.
Misalignment of oil holes and grooves can starve the camshaft of lubrication, leading to increased friction and bearing failure. Use cam-specific tools to avoid pressing bearings unevenly. Don’t rush: improper chamfering or hammering bearings before they’re fully seated will shed metal shavings and reduce clearances. Finally, always match bearing material and dimensions to the engine block’s requirements.
| Problem | Potential Consequence |
|---|---|
| Out-of-round bores | Bearing distortion |
| Misaligned oil holes | Lubrication failure |
| Generic installation tools | Installation misalignment |
| No chamfer on bore edges | Metal shaving/galling |
| Material mismatch | Premature bearing wear |
Frequently Asked Questions
How Often Should Locomotive Camshaft Bearings Be Replaced?
You should determine your locomotive camshaft bearing replacement schedule by following rigorous bearing maintenance protocols and OEM recommendations, typically every 1,000–2,000 engine hours. Don’t ignore warning signs like increased oil consumption, power loss, or visible bearing wear. Always track service intervals and bearing condition in your maintenance logs. Prioritize safety by inspecting for contamination and misalignment, ensuring you replace bearings promptly to prevent catastrophic engine damage and maintain peak locomotive performance.
What Are Signs of Worn Camshaft Bearings During Operation?
When monitoring for bearing wear, you’ll notice operational signs like knocking, chirping, or metallic noises that match engine RPM—these often worsen at startup. Watch for low oil pressure, erratic engine behavior, or excessive crankcase pressure. If you detect overheating, surface discoloration, or rhythmic clattering, act immediately. Always prioritize safety: shut down the engine and inspect the bearings closely, since ignoring these symptoms can lead to catastrophic failure or further component damage.
Can Upgraded Bearings Improve Locomotive Performance or Lifespan?
When you install upgraded bearings, you’ll see clear performance enhancements thanks to advanced bearing technology. You’ll benefit from improved load capacity, better lubrication, and longer lifespan, all of which support high-RPM, high-torque locomotive engines. Always align oil holes precisely and use specialized hydraulic tools to prevent misalignment or bearing damage. Prioritize safety by maintaining anti-contamination protocols and applying correct load-control—these steps maximize both reliability and operational efficiency for your locomotive.
Are OEM and Aftermarket Bearings Interchangeable?
You can’t always interchange OEM and aftermarket bearings due to differences in OEM compatibility and bearing quality. OEM bearings offer precise tolerances, seamless construction, and consistent materials, critical for safety and performance. Aftermarket options may lack exact fitment, have variable quality, or require special tools, risking misalignment or failure. Always check dimensional specs, material composition, and manufacturer guidelines before attempting substitution to guarantee safe, reliable operation and to avoid voiding warranties.
What Safety Precautions Should Be Taken During Bearing Replacement?
Don’t throw caution to the wind—always prioritize safety when replacing bearings. You should wear proper safety gear like gloves and eye protection to guard against debris and lubricant splashes. Ascertain your work environment is clean, well-lit, and free of trip hazards. Isolate all power sources before starting. Use tools as recommended, avoid shortcuts, and follow lockout/tagout procedures. Double-check components for secure handling and alignment to prevent workplace accidents.