
Unplanned downtime hurts schedules and budgets. A failing grid box can cascade into traction loss, overheating, and costly component damage. Maintenance teams need clear signs, practical diagnostics, and safe remedies. This guide delivers expert, field-tested steps to reduce risk. Use it to shorten outages, protect traction motors, and sustain reliable locomotive power delivery across demanding railway operations.
To maintain reliability and prevent rapid escalation of problems, follow these steps for inspection and documentation, and use the table for quick reference.
| Action | Purpose |
|---|---|
| Verify alarms early | Small issues can become major failures quickly |
| Log symptoms with time, load, and ambient temperature | Creates a record to correlate conditions with behavior |
- Check the connections to grids, blowers, and power supply circuits.
- Inspect moving parts around resistor banks for debris and looseness.
- Measure voltage drops across grid sections under load.
- Confirm good electrical contact at terminals and bus bars.
- Clean the enclosure; dust traps heat and moisture.
- Ensure blower airflow meets OEM specs at each curve of ducting.
- Use a manual to standardize tests and torque values.
- Plan spares for common issue components and wire harnesses.
Signs of Malfunction in a Locomotive Grid Box
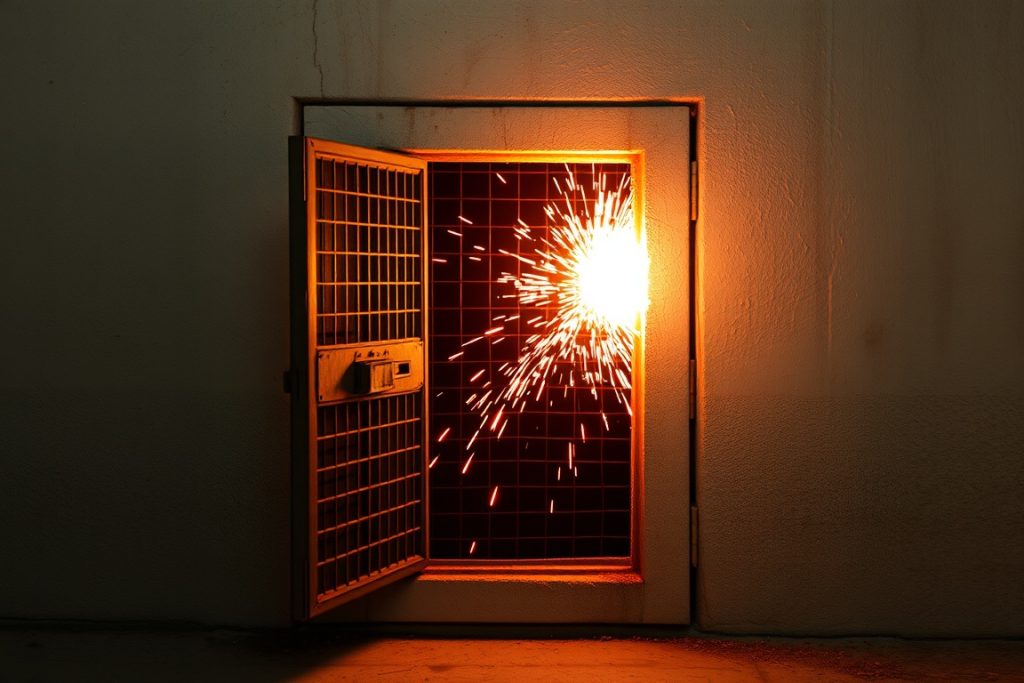
The grid box dissipates dynamic braking energy as heat. When it malfunctions, the locomotive can show erratic braking effort, protection trips, or persistent overheating. Crews may report a loss of performance on long descents. Inspect resistor elements, gear-driven blower systems, and electrical contact points. Check the controller logs for fault codes and voltage anomalies. A systematic troubleshoot approach prevents secondary damage to traction motors and axle bearings.
Unusual Noises
Unusual noises often indicate mechanical or airflow problems in the grid box enclosure. Rattling can come from loose panels, warped grids, or failed mounts. Grinding suggests blower bearing wear or misaligned fan gear. A high-pitch whine points to airflow restriction or damaged blades. Inspect mounts, wire supports, and guards. Check for debris drawn from the rail environment. Verify blower speed against specifications and confirm smooth rotation by hand with power isolated.
Overheating Issues
Overheating arises when heat cannot dissipate from resistor banks. Causes include blocked ducts, weak blowers, poor electrical contact, or uneven load distribution. Use infrared scans to identify hot spots across sections of grids. Measure airflow and voltage across each bank. Clean the enclosure and verify all panels seal correctly to direct air. Tighten terminals to proper torque. Replace degraded wire and burnt bus bars. Restore design airflow to prevent thermal trips and insulation damage.
Loss of Power or Performance
Loss of power or braking performance may reflect grid fragmentation, open circuits, or controller derates. The locomotive may struggle on long grades, or dynamic braking may fade. Check the connections from the controller to the grid box and measure continuity through each element. Inspect for cracked resistors, heat discoloration, and loose lugs. Review recorded voltage and current during events. Calibrate sensors and verify software limits. Address root causes to restore consistent, reliable operation.
Diagnosing Locomotive Grid Box Issues
Downtime often starts with small, hidden faults in the grid box. Heat, vibration, and load cycles stress moving parts, wiring, and electrical contact surfaces. Our comprehensive guide helps teams inspect, test, and troubleshoot with confidence. Use these steps to limit risk to traction motors and the controller while restoring good electrical performance under real railway conditions.
Begin with a manual-guided visual survey to check for damage and loose hardware, then examine connections at terminals, lugs, and bus bars for discoloration. Measure voltage drop under load across each grid section, verify blower gear condition, and confirm airflow on each curve of the ducting. Inspect wires for abrasion along railside vibration points and axle routes. Log fault codes from the controller before clearing alarms, and use IR scans to map hot spots across the resistor banks. Re-torque components per specification to restore good electrical contact, clean the enclosure to keep dust off insulation and coils, and re-test to validate corrective actions and confirm overall stability.
| Task | Purpose/Detail |
|---|---|
| Visual survey and connection check | Identify damage, loose hardware, and discoloration at terminals, lugs, and bus bars |
| Performance measurements | Measure voltage drop under load and confirm airflow with blower gear across duct curves |
| Wiring inspection | Look for abrasion along railside vibration points and axle routes |
| Diagnostics and thermal mapping | Log controller fault codes before clearing alarms; use IR scans to find hot spots on resistor banks |
| Restoration and validation | Re-torque per spec, clean the enclosure, and re-test to confirm stability |
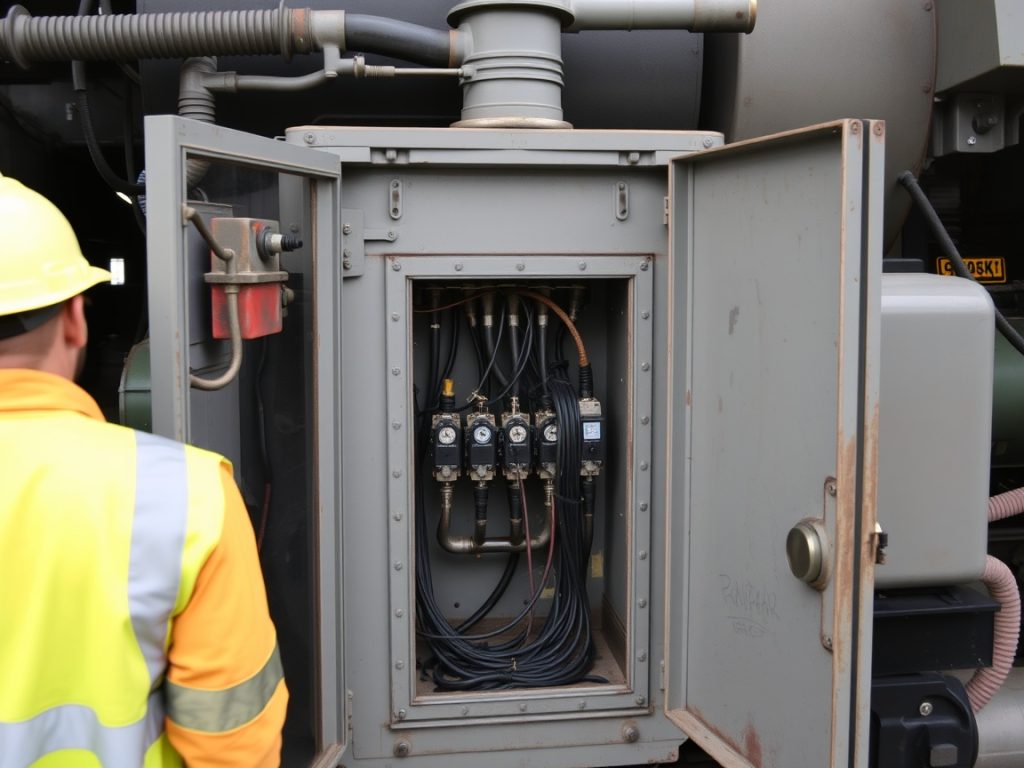
Visual Inspections
Begin with a deliberate, methodical inspect routine. Isolate power supply, tag-out, and open the grid box. Look for warped resistor elements, darkened insulators, and cracked ceramic supports. Check mounting bolts, gear guards, and the blower housing for looseness. Examine wire insulation near high-heat zones and along sections of track-facing panels for abrasion. Confirm guard screens are intact to prevent debris ingress from the rail environment. Note any rub marks on loco panels that suggest vibration. Record findings to support a structured troubleshoot path and repeatable maintenance.
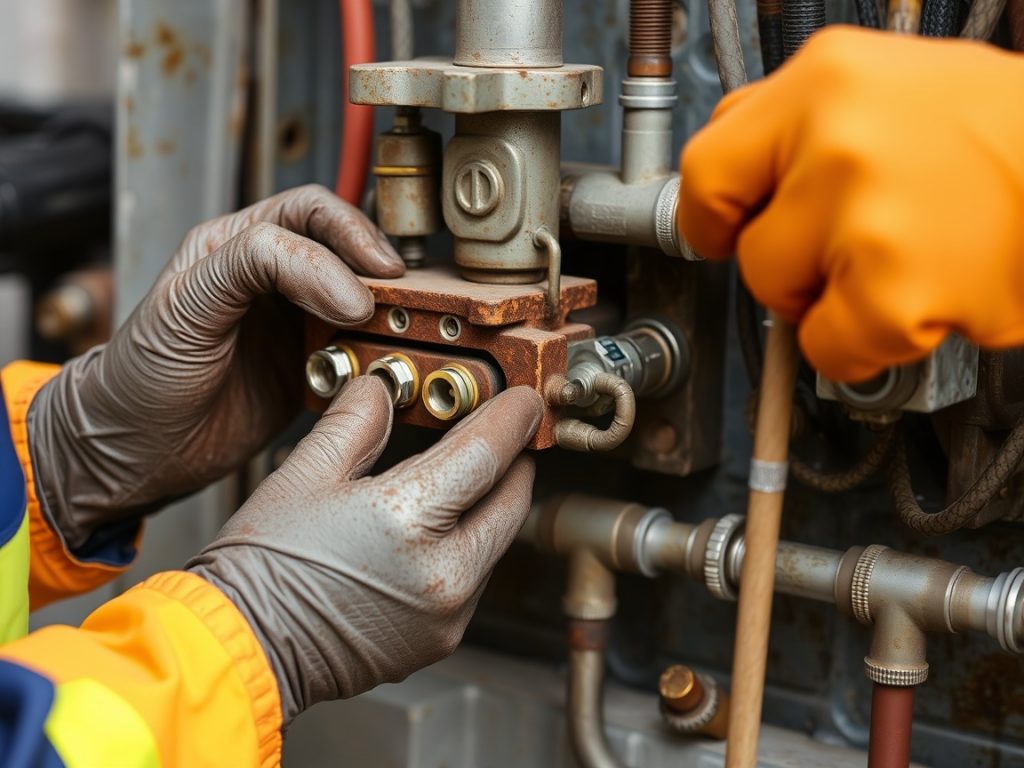
Testing Electrical Connections
Electrical faults often hide at the interface. Perform a torque check on terminals and bus joints to restore good electrical continuity. Measure millivolt drop across each joint under a controlled load. Rising voltage drop indicates resistance build-up and heat risk. Inspect lugs for pitting from micro-arcing and replace damaged hardware. Clean contact surfaces and reassemble per manual specs. Verify insulation resistance on wires from the controller to the grids. Ensure equal current sharing across banks to prevent overload of one rail-aligned section. Document results before moving to component-level repairs.
Using Diagnostic Tools
Use diagnostic tools to turn symptoms into data. An infrared camera spots hot grids and poor connections instantly. Clamp meters capture current balance between elements. A high-resolution logger trends voltage and blower speed during a simulated descent. Listen for bearing defects with an electronic stethoscope at the blower gear. Use a calibrated anemometer to verify airflow at each duct curve. Pull controller fault codes and map them to time, load, and ambient temperature. These tips for troubleshooting provide evidence-based decisions and minimize guesswork during repair.
Common Issues and Their Solutions
Most railway delays from grid box faults trace back to heat, power imbalance, and vibration. These common issues damage wires, gears, and electrical contact surfaces. They also push the controller into protective limits. Here are focused actions to restore good electrical performance and reduce downtime risk on any loco running heavy rail duty.
Perform the following checks to ensure safe and reliable operation:
- Inspect connections at terminals and bus bars for signs of heat tint.
- Check for looseness in all connections and tighten as necessary.
– Verify blower gear and bearings; listen for roughness across speed ranges.
– Measure voltage and current balance across grid sections under load.
– Inspect moving parts, guards, and mounts for vibration wear.
– Clean the enclosure and confirm sealed airflow paths.
– Re-torque hardware to spec to improve electrical contact.
– Log fault codes from the controller before resets.
– Use IR scans to locate hot spots quickly.
– Confirm power supply cabling integrity from the controller to grids.
– Retest after repair and document results for trend analysis.
Addressing Overheating
Overheating in the grid box stems from blocked airflow, weak blowers, or high-resistance joints. Start with a deliberate inspect. Isolate power supply and open panels safely. Verify blower speed, gear lash, and bearing condition. Use an anemometer to confirm airflow at each curve of ducting. Measure voltage drop across joints; excess millivolt indicates poor electrical contact. Tighten and clean terminals per manual. Replace darkened lugs and burnt bus bars. IR scans reveal hot resistor elements and uneven loading. Restore sealing foam and screens to keep debris off grids and railside intakes. Retest under controlled load profiles.
Resolving Power Loss
Power loss or weak dynamic braking indicates open circuits, fragmented resistor elements, or controller derates. Begin with continuity checks through each grid section. Measure voltage under load and compare banks for balance. Check the connections from the controller to the grid box for abrasion and micro-arcing. Inspect wires around vibration points near axle routes and track-facing panels. Recalibrate sensors tied to the controller limits if data drifts. Replace cracked ceramic supports and warped grids that interrupt current paths. Validate current sharing across elements to prevent single-bank overload. A structured troubleshoot plan shortens outages and preserves traction performance across demanding railway duty.
Fixing Noisy Operations
Noisy operation often signals mechanical looseness or airflow issues. Rattling points to loose panels, mounts, or guards. Grinding suggests blower bearing wear or gear misalignment. A high-pitch whine can indicate airflow restriction or damaged blades. Inspect moving parts carefully and verify blower alignment. Confirm torque on hardware per manual to stop vibration at the source. Look for debris drawn from the rail environment, especially around intake screens. Replace worn isolators to decouple vibration from loco panels. After corrective action, record vibration levels and blower speed to confirm stable operation and protect long-term reliability across the railway schedule.
Preventative Maintenance for the Locomotive Grid Box

Unplanned failures in the grid box cost time and money. Preventative care keeps the locomotive braking system stable and safe. Our comprehensive guide focuses on practical routines that improve good electrical continuity, airflow, and controller reliability. The goal is fewer faults, safer descents, and predictable maintenance windows across your railway duty cycle. Focus on consistent inspections, precise torque practices, documented test data, and timely parts replacement to avoid cascading defects and costly downtime.
Regular Inspections and Cleanings
Set a disciplined inspect schedule tied to mileage, axle-load profiles, and seasonal dust. Start by isolating the power supply and opening panels per manual. Check the connections at terminals, lugs, and bus bars for discoloration and millivolt rise. Verify blower gear, bearings, and guards. Clean the enclosure to remove conductive dust from railside environments. Confirm seals at each curve of ducting to preserve airflow. Use IR scans to map hot grids and note trends. Re-torque per specification. Document results to build a repeatable troubleshoot baseline across the locomotive fleet.
Upgrading Components as Needed
Aging grids, fatigued wire, and worn blower assemblies raise risk. Plan upgrades before protection trips occur. Replace high-resistance joints, heat-tinted bus bars, and warped resistor elements. Fit enhanced bearings, improved isolators, and higher-temperature insulators where duty cycles demand. Update the controller firmware to optimize voltage and current sharing under dynamic braking. Add better screens to limit debris from the rail environment. Where feasible, use improved duct seals to lift airflow efficiency. Verify performance with load tests and IR scans. These targeted upgrades stabilize sections of track operations and extend loco service life.
Training for Maintenance Teams
Skilled teams reduce downtime and prevent repeat faults. Train technicians to read controller logs, capture voltage drop data, and assess airflow with anemometers. Practice safe tag-out and precise torque techniques for reliable electrical contact. Teach bearing condition checks, gear lash measurement, and vibration root-cause methods. Standardize troubleshoot steps using a clear manual and checklists. Encourage data logging so crews can see trends across the railway schedule. Refresh training after component changes to align procedures with new designs and keep the locomotive fleet compliant and dependable.
Conclusion
Mikura International understands that every hour of delay impacts crews, freight commitments, and budgets. Our approach emphasizes early detection, precise measurements, and proven remedies. With three decades in locomotive systems, we deliver parts, guidance, and support that maintenance teams trust. Keep your loco dependable with evidence-based practices, quality components, and transparent maintenance records anchored to operational realities across heavy rail duty.
Recap of Key Signs and Solutions
Watch for overheating, noisy blower gear, and loss of dynamic braking. Confirm airflow through each curve of ducting and clean the enclosure. Check the connections at terminals and bus bars, and measure voltage drop under load. Inspect moving parts for wear and vibration. Use IR scans to pinpoint hot spots. Calibrate the controller and validate current balance across grid sections. Replace degraded wire and burnt hardware. Retest, document, and trend results to close the loop on each repair.
Importance of Timely Interventions
Small defects escalate fast under heavy braking. Early action protects traction motors, prevents insulation damage, and avoids controller derates. Timely torque checks, airflow verification, and electrical tests keep good electrical performance steady on long grades. Scheduled inspections convert surprise outages into planned work. Reliable data gives managers confidence, reduces spare consumption, and improves locomotive availability across the railway network.
Commitment to Reliable Operations
Reliable operations demand discipline and trusted partners. Mikura International supports maintenance teams with certified parts, application engineering, and straight answers. We acknowledge complexity and never overpromise. Our guidance helps you troubleshoot faster, reduce risk, and extend service intervals. Adopt a structured maintenance routine, invest in practical training, and upgrade components when evidence points there. Your trains, rails, and schedules will run smoother and safer.
FAQ
What are the most common signs that a locomotive grid box is malfunctioning?
Common signs include intermittent power loss or stuttering at speed, erratic operation under digital command control (DCC), overheating of the locomotive, burning smells or visible smoke, failure to respond to decoder commands, and inconsistent lighting. In model railroad setups these symptoms often coincide with poor connectivity from dirty track or worn locomotive wheels.
How can I tell if the problem is the grid box and not dirty track or wheels?
Start by cleaning the track and locomotive wheels with a track cleaning tool or track cleaning car and see if the issue persists. If problems continue after thorough track and wheel cleaning, isolate the locomotive on a known-good section of powered rail or test it on a friend’s layout. If the locomotive still stutters or the decoder fails to respond while other locos run fine, the grid box or onboard electronics are likely at fault.
Can decoder faults mimic grid box failure and how do I differentiate them?
Yes, a failing decoder can show many of the same symptoms as a malfunctioning grid box, such as erratic speed and lighting issues. To differentiate, swap the suspected locomotive with another with a known-good decoder or test the suspect decoder in a different scale locomotive. If the issue follows the decoder, replace or reprogram the decoder. If the problem stays with the locomotive chassis regardless of decoder, the grid box or power pickup components are suspect.
What steps should I take to troubleshoot connectivity and power pickup problems?
Check locomotive wheels and pick-ups for dirt, oxidation, or bent contacts. Clean locomotive wheels and the rail surface, and inspect wheelsets for proper gauge and free rotation. Verify good electrical continuity along the rails and at feeder connections, especially in larger railroad layouts or Midwest model railroad clubs where long runs can introduce voltage drops. Use a multimeter to check voltage consistency and check DCC bus wiring for loose connections.
Are there safe ways to test or repair the grid box on a scale locomotive?
Yes—start by removing the shell and visually inspecting the grid box and surrounding wiring for burned components, cracked solder joints, or corrosion. Use an ohmmeter to test for shorts or open circuits. Replace visibly damaged capacitors, resistors, or diodes with appropriate equivalents. If unsure, consult a professional or the manufacturer; for N scale and other small models, work under magnification and use low-heat soldering techniques to avoid damage.
How does poor track cleaning affect grid box performance and what cleaning methods work best?
Poor track cleaning leads to intermittent electrical contact, causing the grid box to work harder and potentially overheat or fail. Use a track cleaning tool or track cleaning car, isopropyl alcohol on a lint-free cloth, and periodic use of a track-cleaning eraser for stubborn buildup. Maintain clean locomotive wheels and perform regular track cleaning routines to preserve reliable digital command control performance.
When should I replace the grid box instead of attempting repairs?
Replace the grid box if you find burned components, repeated failures after repair attempts, or if the component is obsolete and unreliable. For scale locomotive electronics, replacement is often more cost-effective than extensive repairs, especially if the grid box is integrated with the decoder or power pickup. Upgrading to a modern decoder with built-in suppression and better power handling can also improve reliability.
Can a track cleaning car or tool prevent future grid box problems?
Yes. Regular use of a track cleaning car and dedicated track cleaning tools helps maintain consistent rail conductivity and reduces arcing that stresses on-board components like the grid box. Routine cleaning combined with proper wiring and good locomotive wheel maintenance will significantly lower the incidence of electrical faults.
Are there preventative maintenance tips for model train owners to avoid grid box issues?
Preventative measures include regular track cleaning, cleaning locomotive wheels, ensuring proper wheel gauge and pickup springs, keeping decoders and grid boxes dust-free, and verifying solid DCC bus wiring and feeder spacing to avoid voltage drop. For operations in clubs or larger railroad layouts, coordinate maintenance schedules and use consistent track cleaning supplies to protect electronics.
How can I get help if my troubleshooting doesn’t fix the problem?
If basic troubleshooting fails, contact the locomotive or decoder manufacturer for support, consult experienced hobbyists at your Midwest model railroad club or online forums, or seek a skilled hobby electronics technician. Provide detailed symptoms, what you’ve tested (cleaning, swapping decoders, multimeter readings), and information about your layout (DCC system, scale locomotive, and any recent changes) to get faster, more accurate assistance.