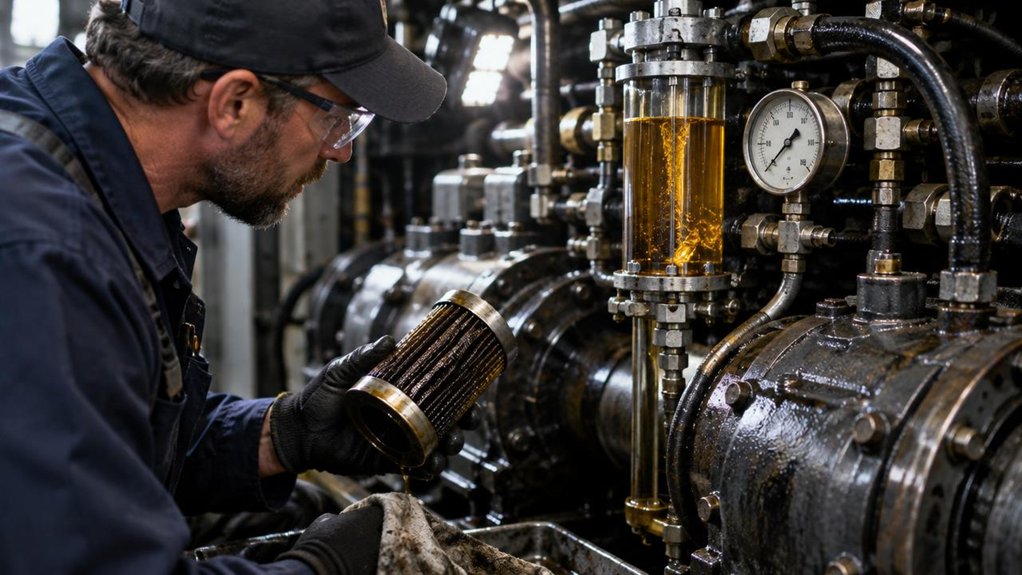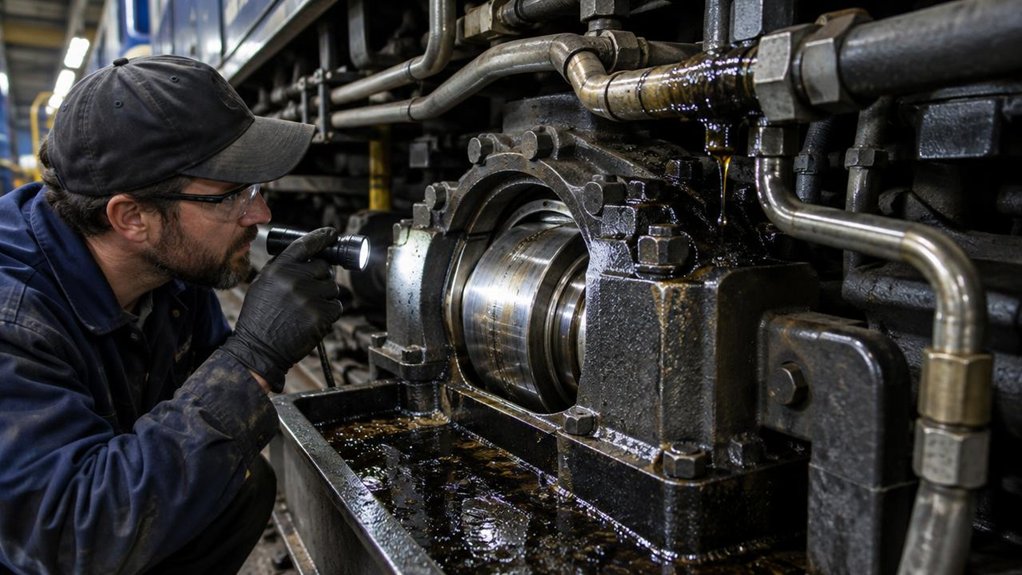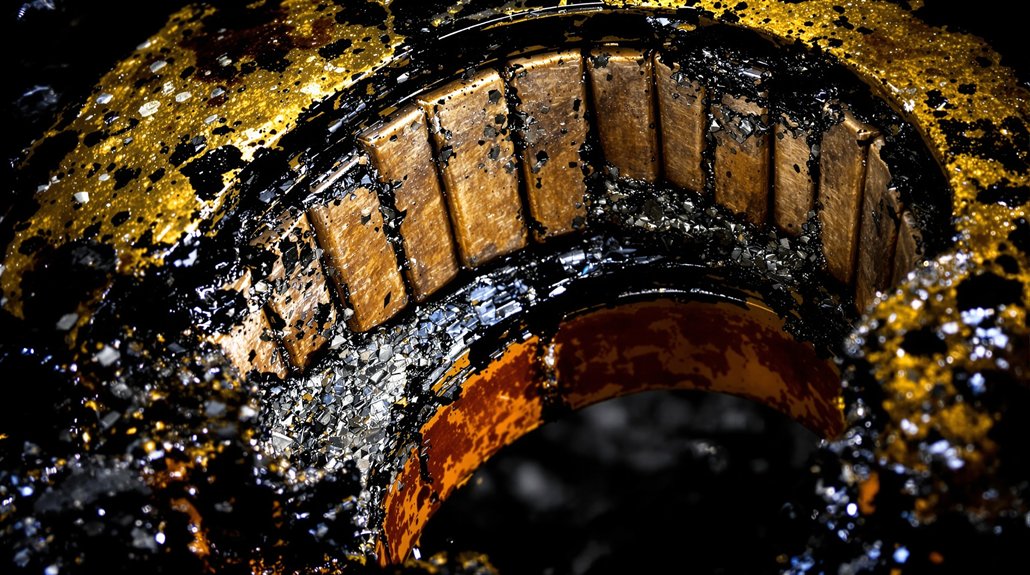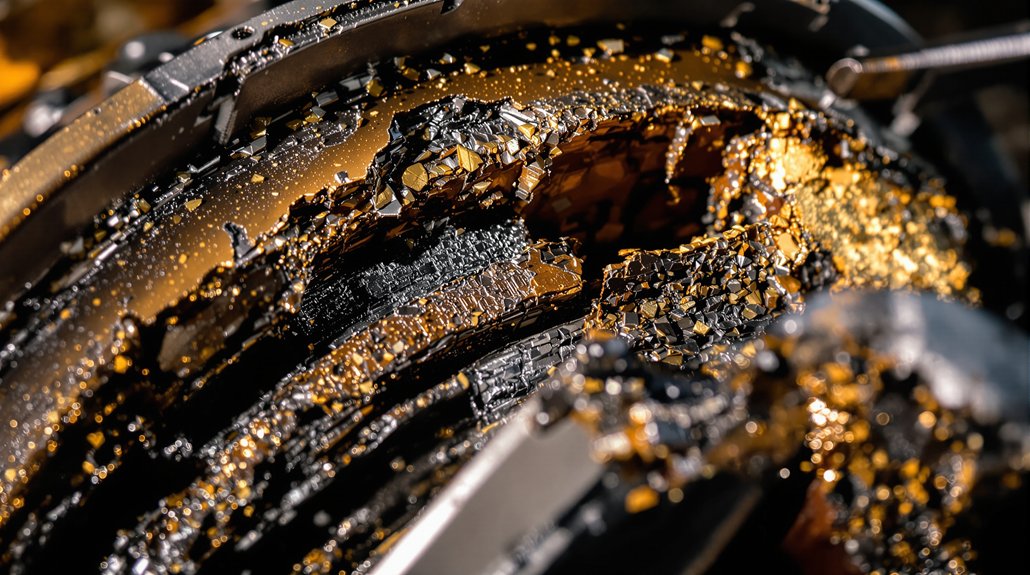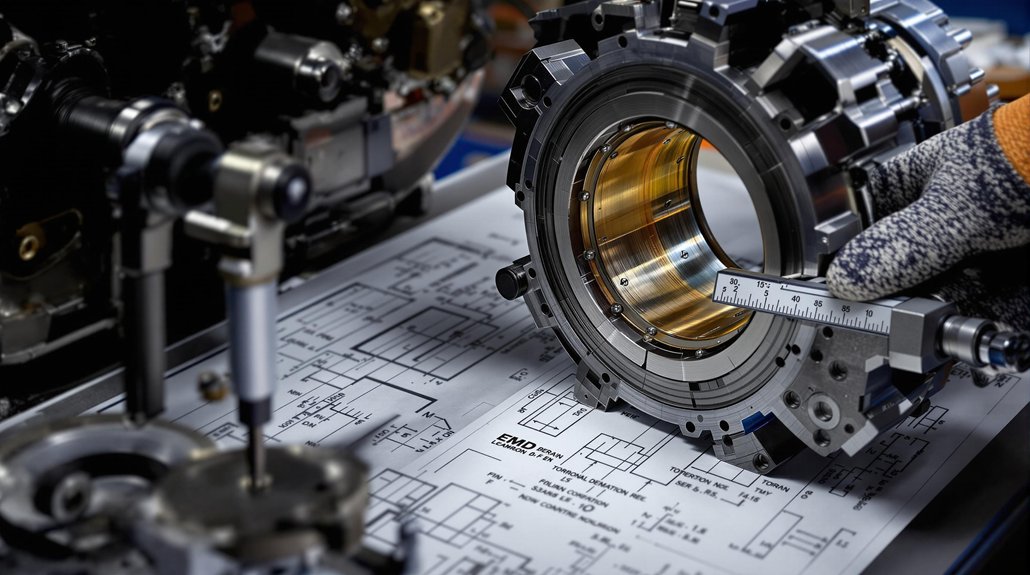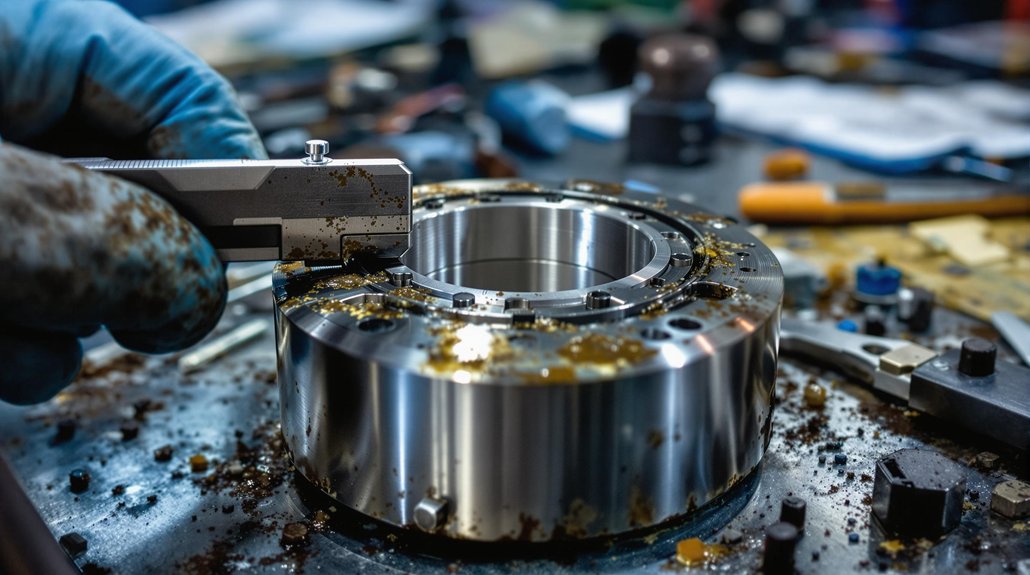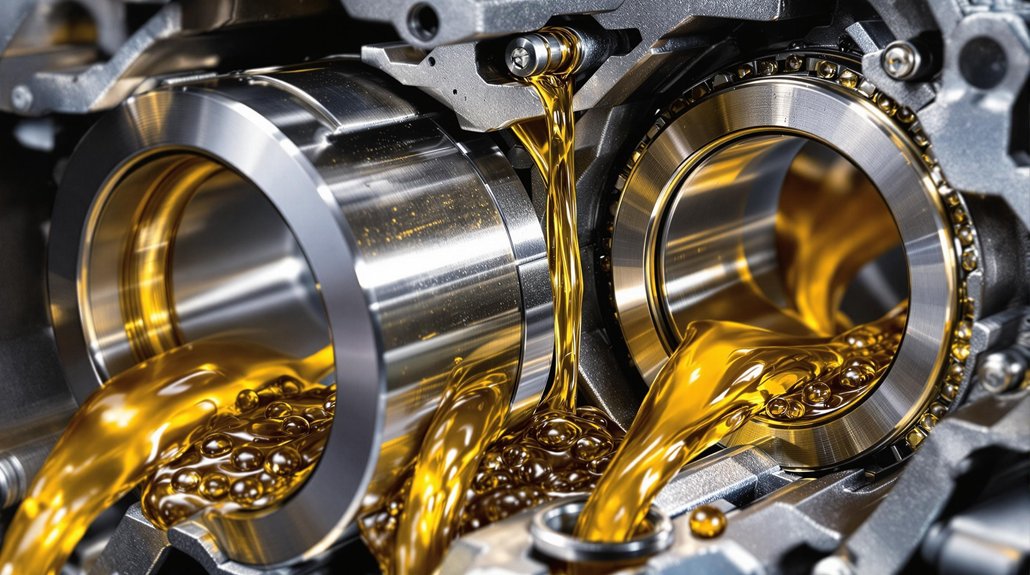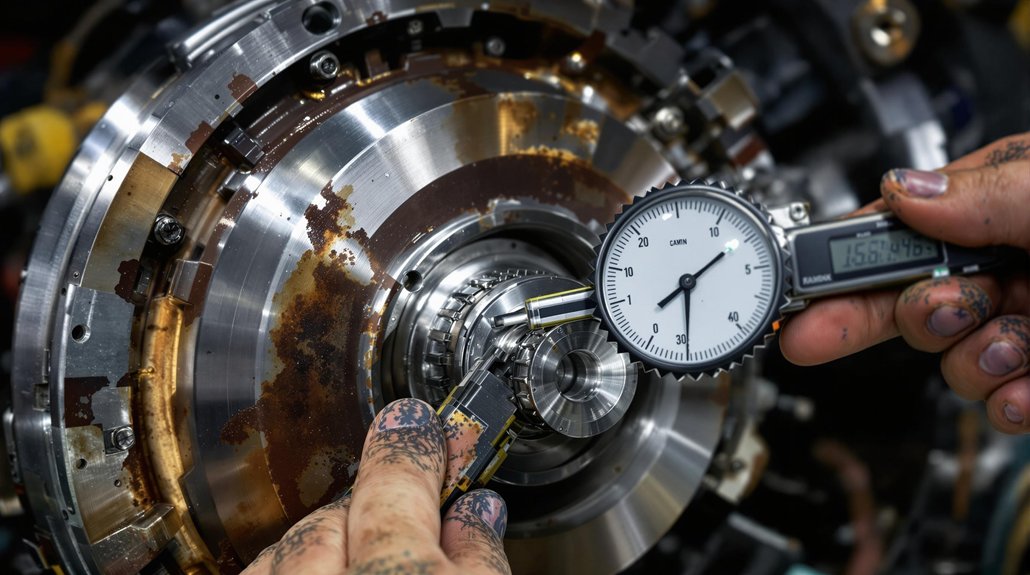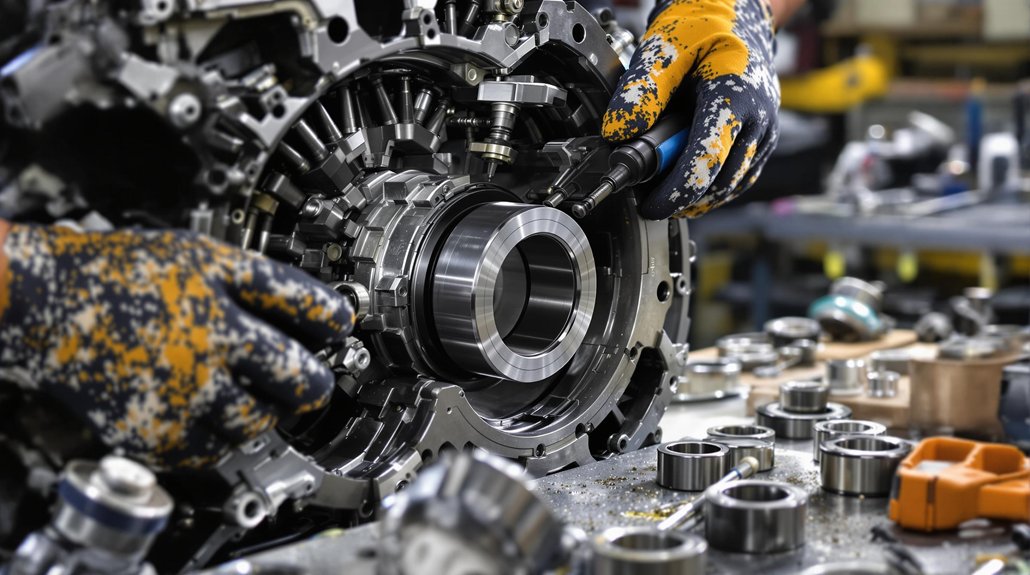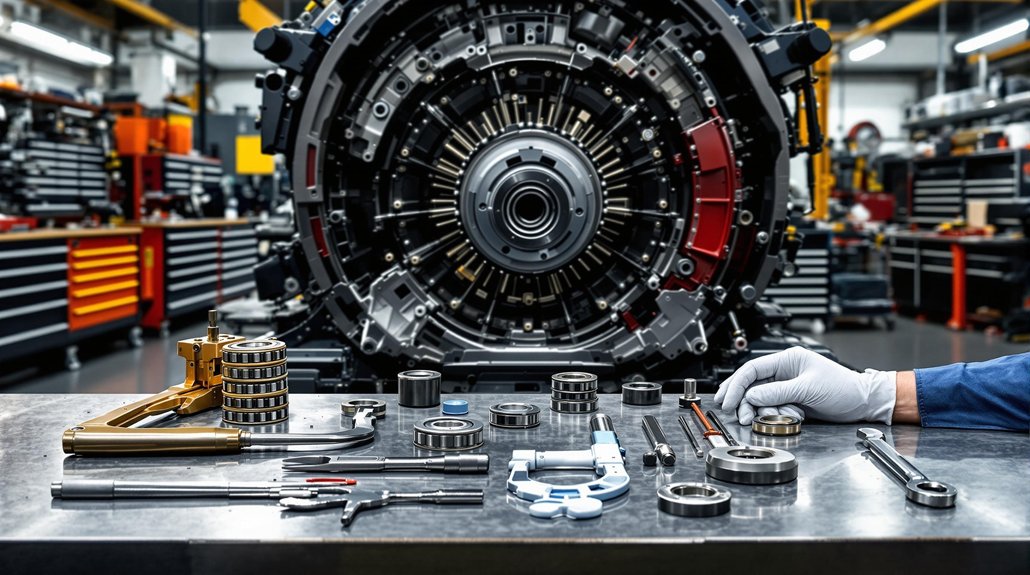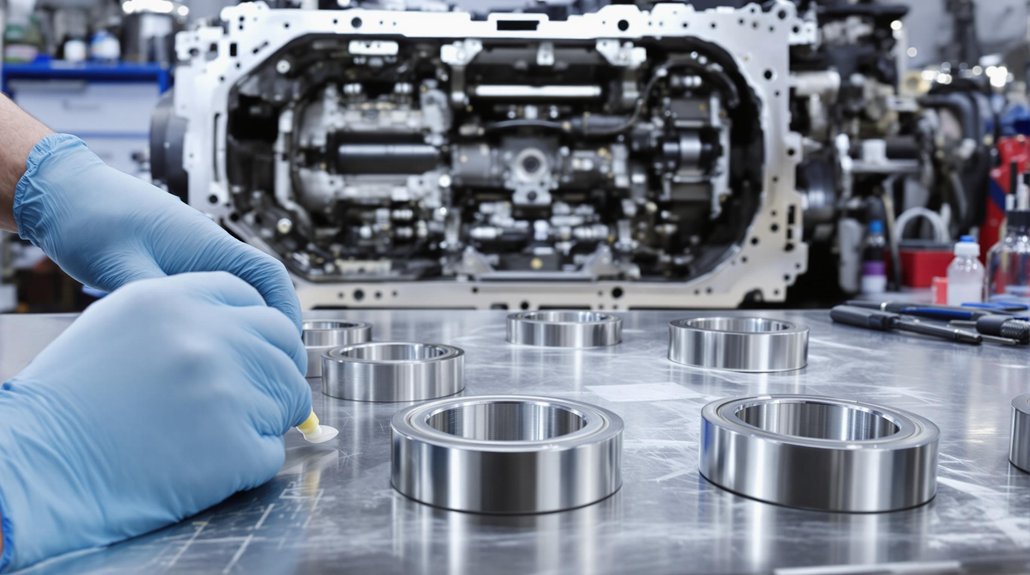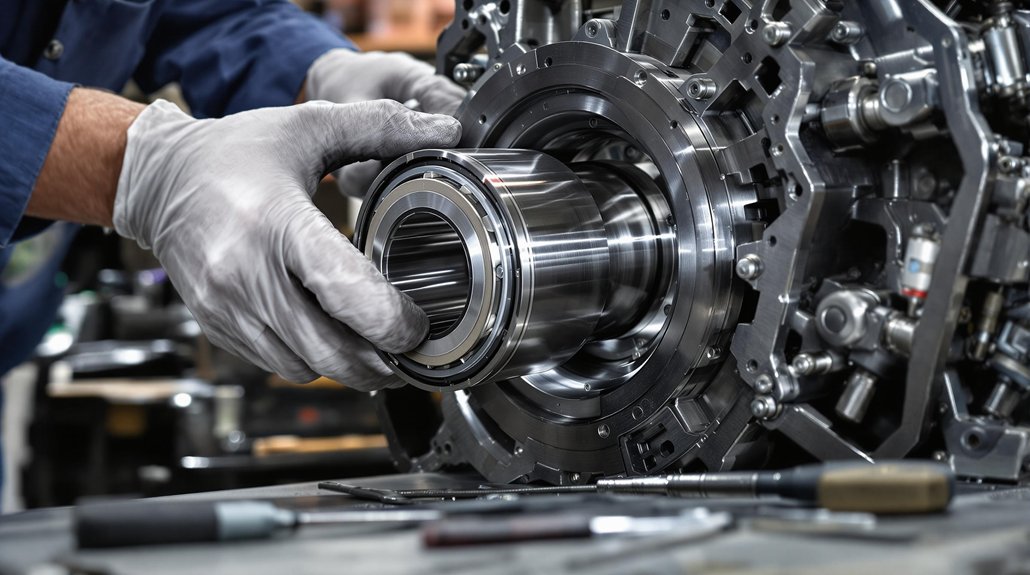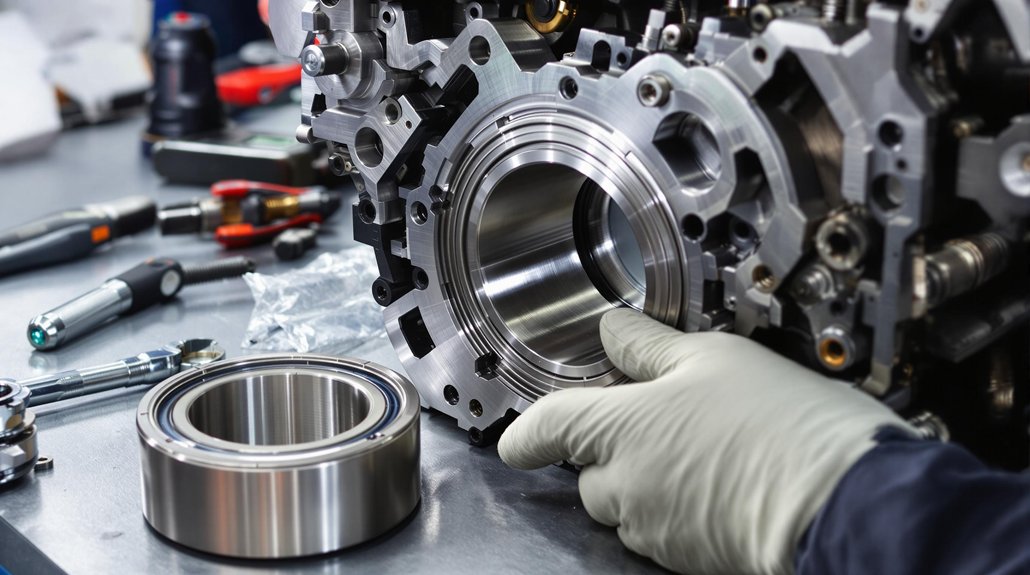
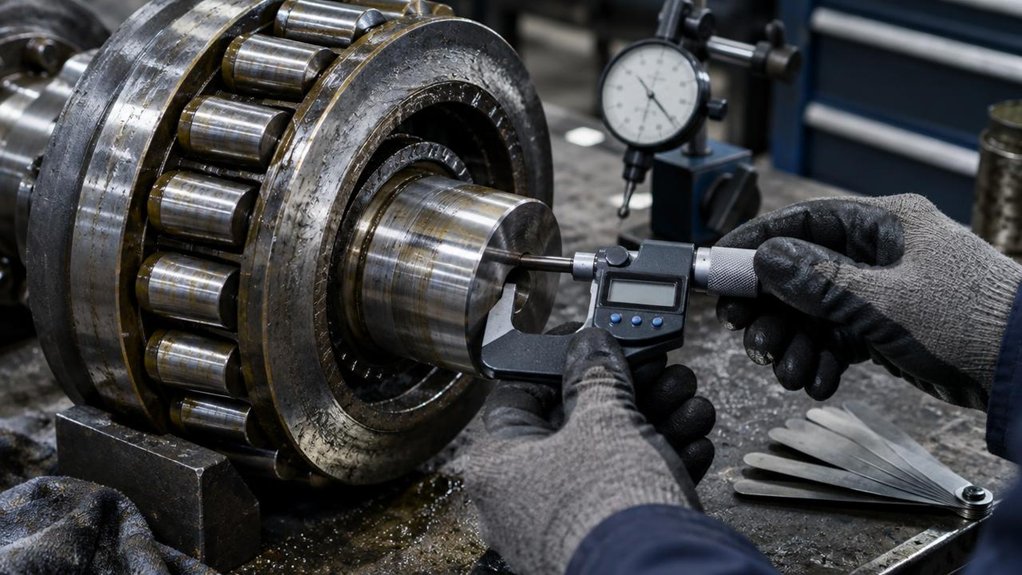
7 Tips for Railroad Engine Bearing Wear Measurement

7 Tips for Railroad Engine Bearing Wear Measurement

Locomotive maintenance teams often struggle to separate real bearing wear from measurement error.
Inaccurate readings lead to missed failures, unplanned downtime, and costly crankshaft damage.

Wrong clearance numbers also cause premature shell replacement.
Accurate, repeatable measurement prevents these problems before they reach the engine.

The tips below show how to measure consistently and reliably.

Common pain points:

  • Clearance readings change from one inspection to the next.
  • Heat from recent operation distorts measurements.
  • Dirty journals and anvils produce false wear readings.
  • Teams apply the wrong wear limit to a journal.
  • Crown and parting-line wear are often misread or ignored.
  • Inspection records are incomplete, so wear trends go unnoticed.
  • Shells are replaced too early or too late.
Inspection CheckpointWhat to VerifyWhy It Matters
Component temperatureCap, axle, and frame are at ambient temperatureHeat closes clearance and hides metal loss
Journal and anvil conditionSurfaces are clean and free of oil, carbon, and debrisContamination causes inaccurate gauge readings
Main bearing clearanceMeasured in place using the correct methodConfirms the actual running clearance
Crown wearUniform wear pattern across the shellIndicates load distribution or alignment issues
Parting-line wearEdge wear at the shell split linePoints to housing fit or installation problems
Model-specific limitMatched to the correct EMD published maximumPrevents using the wrong replacement criteria
Inspection recordReadings, dates, and tag numbers loggedEnables trend analysis and early warning

Tip 1: Let Components Cool to Ambient Temperature

Wait until the cap, axle, and frame reach ambient temperature.
Heat closes clearance.

Warm components hide real metal loss.
Measure only after everything has stabilized.

Tip 2: Clean Journals and Anvils Thoroughly

Wipe the journals and anvils clean before measuring.
Remove oil, carbon, and debris.

Contamination skews gauge readings.
Clean surfaces give repeatable results.

Tip 3: Gauge Main Clearance In Place

Measure main bearing clearance without removing the shell from the housing.
Use the approved method for the engine model.

Record readings at the specified positions each time.

Tip 4: Read Crown and Parting-Line Wear

Inspect the crown of the shell for uniform wear.
Check the parting line for edge wear.

Crown wear often signals load or alignment issues.
Parting-line wear often points to housing fit problems.

Tip 5: Match Each Journal to the Correct EMD Limit

Confirm the engine model, bearing size, and current service data before comparing readings.
Apply the published EMD maximum for that specific journal.

Do not rely on generic or outdated limits.

Tip 6: Log Every Inspection

Record every clearance reading, date, and tag number.
Include oil analysis results and housing observations.

Consistent logs reveal wear trends before failure occurs.

Tip 7: Replace the Shell at the Published Maximum

Replace the shell once clearance reaches the published maximum.
Inspect the housing for damage before reinstalling.

Stay consistent with inspections, so oil trends and housing checks remain reliable.

Mikura International supplies genuine locomotive engine parts, including EMD main bearing shells, for verified replacement needs.

Key Takeaways

  • Measure traction-motor and support bearings only after they cool fully to ambient temperature.
  • Wipe journals, cap faces, and gauge anvils clean before seating any measuring tool.
  • Gauge clearance in place using the builder’s Plastigage, lead-wire, or dial-indicator method.
  • Record crown wear and the thinner parting-line wall thickness; replace shells at the builder’s crown limit.
  • Compare each reading with the engine-specific EMD limit and confirm wear with oil-analysis trends.

Measure EMD Bearing Wear Only When Cold
Measure EMD Bearing Wear Only When Cold

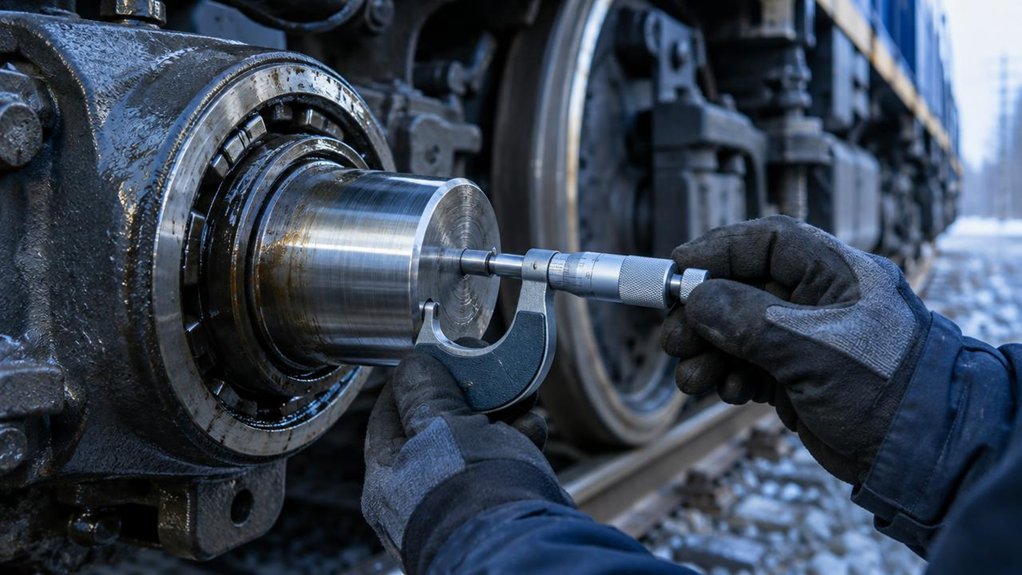
Because EMD traction-motor and support bearings expand as they heat, measure wear only after the locomotive cools to ambient temperature. Do not gauge a hot journal and treat the reading as final. Thermal growth closes clearances and shifts the housing. A warm reading understates wear. It can hide a bearing that is already out of limit.

Set cold measurement timing by the shop thermometer, not by how long the unit has sat. Wait until the bearing cap, the axle, and the motor frame match ambient air. If one component stays warmer, wait longer. Record the air temperature beside each reading. This lets the next inspector confirm the same condition.

Prevent measurement bias by comparing each reading with the last cold record. Do not compare against a hot check taken during the run. Do not torque, pry, or correct for unmeasured heat. If the locomotive ran recently, leave gauges boxed.

Clean Bearing Surfaces Before You Gauge

Before you seat the gauge, wipe the journal, the cap face, and both anvils until clean metal shows. Oil film, carbon, and lint change contact and shift your reading. Use a clean, lint-free rag and a light solvent approved for the locomotive bearing. Don’t leave any residue behind.

After you wipe, inspect the lubricant condition on the rag and in the oil groove. Dark grit, metal flakes, or a burnt smell means you stop and report the finding before you continue. Then verify bearing alignment by eye and by feel. The cap must sit square on the journal without a cocked edge or a lifted corner. A cocked cap loads one anvil and gives a false wear number.

Reclean any spot the rag missed. Seat the anvils only on dry, bright metal. If you don’t, grit under the contact pads stacks into the measurement. You end up chasing a number that isn’t real.

Gauge Main Bearing Clearance in Place
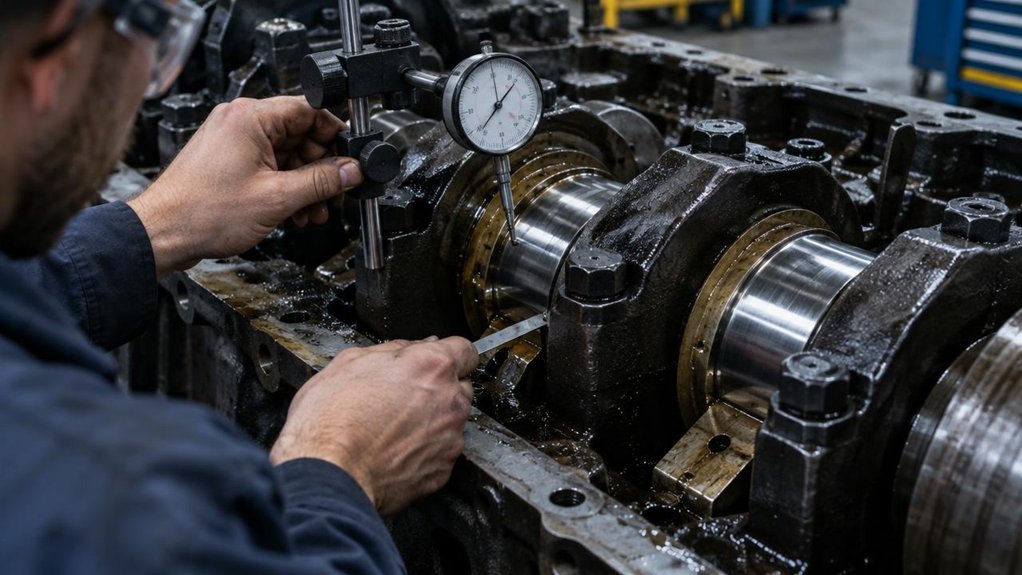
How do you gauge main bearing clearance in place on a locomotive engine? Start by confirming the locomotive builder’s inspection procedure. Avoid crankshaft removal unless the railroad’s maintenance procedure requires a full teardown. Select inspection tooling that matches the engine builder’s method. Choose Plastigage, calibrated lead wire, or a dial indicator on a rigid fixture. Clean the journal and bearing shell thoroughly before any measurement. Seat the gauge material or indicator tip only where the procedure allows.

Torque the main bearing cap to the specified sequence and value. Release the cap carefully, then read the crushed gauge width or indicator travel. Compare the reading against the specification chart for that bearing position. Match the comparison to the oil grade and temperature band listed in the procedure. Reject any reading outside the minimum or maximum clearance limits. Record the bearing position, tool ID, and torque value for each measurement. Consistent records allow the next inspection to repeat the same setup. Stop once installed clearance is confirmed, logged, and checked against the builder limit for that main bearing.

Mikura International offers locomotive engine bearing components and inspection tooling for railroad maintenance teams.

Read Bearing Wear at Crown and Parting Line

You read crown wear first because that point takes the highest load and shows the earliest loss of bearing material. Place the gauge at the crown, record the thickness, and compare it with the manufacturer’s limit before you accept the shell. Then check both parting lines for edge wear, fretting, and uneven crush so you don’t miss a shell that’s still thick at the crown but failing at the joints.

Crown Wear Reading

When you take a crown wear reading on a locomotive engine, measure the bearing shell at the crown and at the parting line. Compare the two thicknesses to quantify metal loss. Seat the shell on a flat reference plate first. Zero your digital dial gauge on an unworn area before you probe the crown. Hold the gauge perpendicular to the shell surface. Take three readings across the crown and record the lowest value. Subtract the crown thickness from the parting-line thickness to find wear. Do not average away a local thin spot. Log each result with engine hours so wear trends show whether loss is stable or accelerating. Replace the shell when crown wear reaches the locomotive builder’s limit. Recheck the readings if they disagree.

Parting Line Checks

Parting-line thickness sets the baseline for wear calculation. Check both locomotive bearing shell halves with the same gauge setup. Place each shell half on a certified flat plate. Measure wall thickness at both parting lines with one micrometer. Keep anvil force, temperature, and zero consistent for every point. Record the thinner parting-line value as the baseline. Subtract the lowest crown reading from that baseline to calculate wear. Do not average mismatched halves. When the two parting-line readings exceed the manufacturer’s spread, reject the shell. Order NDE inspection for the rejected shell. Open root cause analysis for crush loss, bore distortion, or embedded debris. Recheck the locomotive engine housing before reuse. This keeps your wear figure repeatable. Log the gauge serial number with every reading.

Compare Bearing Wear With EMD Limits
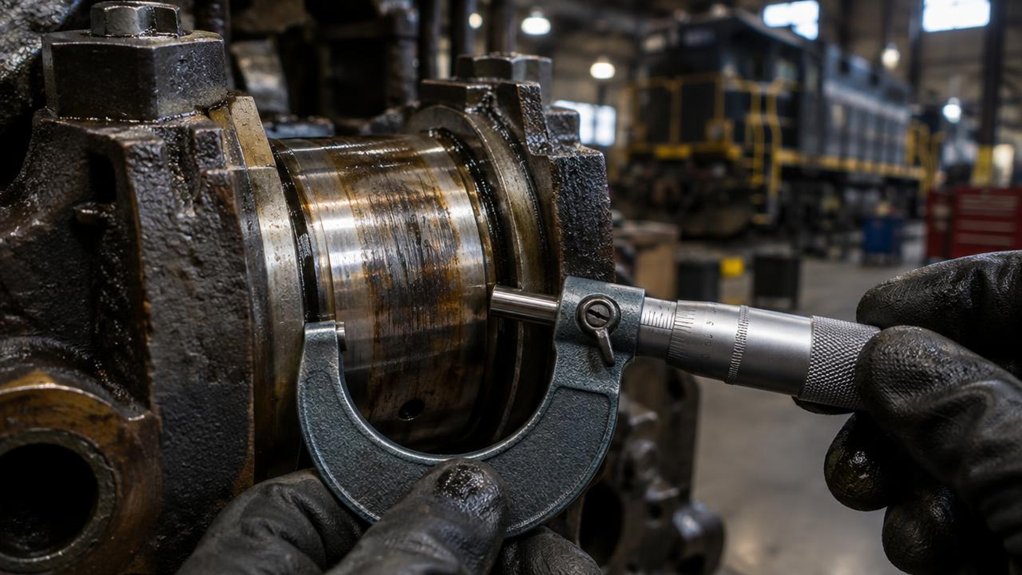
Compare Bearing Wear With EMD Limits

On locomotive engines, match each wear reading to the EMD limit for that position.

Use the bearing position, engine model, and service interval for every comparison.

Do not use one clearance for every journal.

Main, rod, and cam bearings follow separate charts.

A 645 limit does not apply to a 710 engine.

Select the table for the engine model and the service interval now in force.

Compare OEM and EMD tolerances before you scrap any shell.

OEM specifications often run tighter than EMD field limits.

A high OEM comparison can still pass the railroad limit.

Decide from the EMD figure.

Use the OEM gap only to judge how fast clearance is growing.

Interpret wear gauge trends on the same journal.

A sub-limit reading that climbs each time needs action sooner.

A steady reading near the cap can wait longer.

Replace any bearing that meets or exceeds the published EMD maximum.

Record Bearing Wear After Each Inspection

Log each bearing clearance right after you finish the inspection. Do not delay the entry until shift end. Delayed entries mix positions and reduce precision.

Record the clearance beside the bearing location, locomotive engine number, date, and your name. Use the same units every time. Consistent units keep comparisons valid.

Attach the reading to your visual inspection records before you leave the work area. Add brief notes on oil film, discoloration, and scoring. Keep these observations separate from the measured value.

You will rely on these figures for trend wear analysis after repeated inspections. Identify the gauge and its calibration date. Reviewers use this information to assess data quality.

If you repeat a questionable measurement, enter both results. Mark the accepted reading clearly. Retain measured precision without rounding.

Sign every line. Place the completed sheet where the next crew can retrieve it immediately. File the sheet before you leave today.

Schedule Replacement When Bearing Wear Exceeds Spec
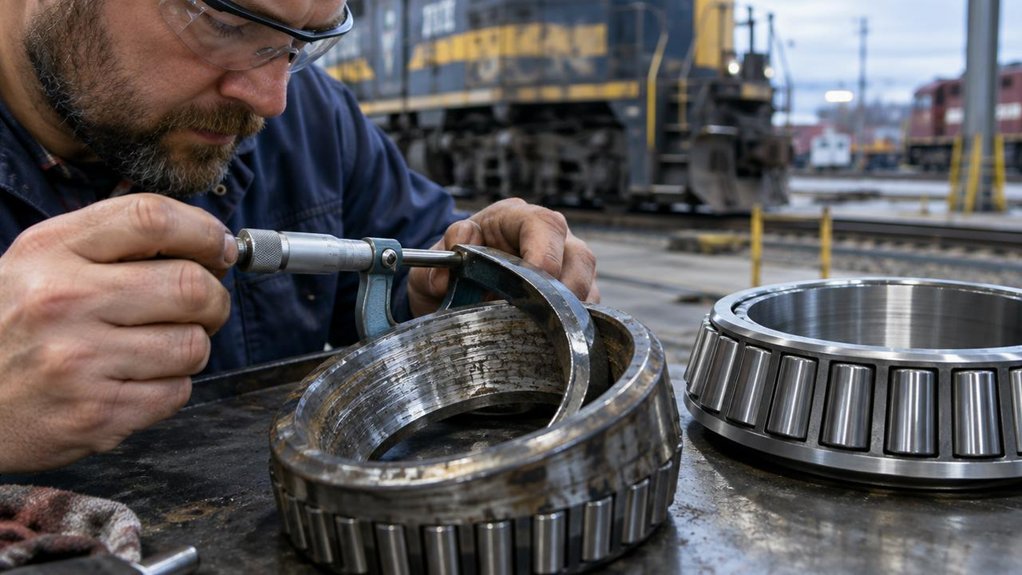
Schedule Replacement When Bearing Wear Exceeds Spec

You’ve recorded each clearance with its location and date. Compare the accepted reading with the published wear limit before the locomotive returns to service.

If clearance exceeds the published specification, do not return the locomotive to service. Schedule replacement before the next assignment. Tag the axle so dispatch will not release it.

Complete a bearing housing inspection before you order parts. Check the bore for ovality, fretting, and heat tint. Confirm cap-bolt torque. Do not reuse a housing that fails those checks. Replace it with a qualified new spare from Mikura International.

Use oil analysis trending to confirm the reading. Rising iron or copper, with falling viscosity, shows the wear is not an isolated measurement error. When metals rise across two samples as clearance grows, move the replacement earlier.

Log the limit, the decision, and the shop that will fit the new bearing. This keeps the out-of-spec journal off the main line.

Frequently Asked Questions

What Tools Are Needed to Measure EMD Bearing Wear?

Line the gauge up with the scar so both readings coincide. Never trust a single number.

Measure EMD bearing wear with an outside micrometer, a dial bore gauge, and a feeler set.

Add ultrasonic testing when wall loss hides beneath the surface.

Run a boroscope inspection when you cannot pull the cap.

Record clearance, ovality, and heat tint before you release the locomotive engine.

How Often Should Railroad Engine Bearings Be Inspected?

Railroad engine bearings require inspection on a schedule set by the engine builder. Your railroad’s preventive maintenance program also defines these intervals. Actual operating conditions determine how often you should check them. Typical intervals range from daily visual checks of oil, temperature, and vibration. Scheduled teardowns occur at defined mileage or hour limits. Do not wait for failure to act. Tighten inspection intervals when you see rising heat, metal in the oil, or abnormal noise. Document every check result so that trends become visible over time. Mikura International supports locomotive maintenance teams with quality bearing components and technical guidance.

What Symptoms Indicate Excessive Railroad Engine Bearing Wear?

The writing is on the wall when excessive bearing wear appears in a locomotive engine. Early detection protects the engine, the train, and the crew.

Watch for common failure indicators and unusual vibration symptoms right away. Small changes often signal larger problems ahead.

Heat rise is one of the first warning signs. A bearing running hotter than normal points to lubrication loss or excessive friction.

Metallic noise deserves immediate attention. Grinding, whining, or knocking sounds often indicate that bearing surfaces are breaking down.

Discolored oil is another key indicator. Dark, milky, or glittery oil may carry metal particles from worn bearing surfaces.

Excess end play also signals trouble. Measure the axial movement of the crankshaft and compare it against manufacturer limits.

Do not ignore rumble, knock, or a harsher running feel. These symptoms often appear before bearing failure becomes visible.

Maintenance teams should measure clearances and log trends over time. Trend data reveals gradual wear that a single inspection might miss.

Remove the engine from service if measured clearances exceed approved limits. Continued operation can damage the crankshaft and surrounding components.

Shut the engine down before the journal seizes. A seized journal or failed axle under load can cause derailment and serious injury.

Mikura International recommends regular inspection schedules for locomotive engines. Consistent monitoring helps operators avoid costly unplanned failures.

Who Is Qualified to Measure EMD Engine Bearing Wear?

You rely on qualified personnel to measure EMD locomotive engine bearing wear. Qualified personnel include EMD-trained diesel technicians, certified railroad machinists, and OEM-authorized inspectors. These professionals know the engine model and the correct gauging method. General laborers should not handle this work. A documentation review must come first before anyone sets a micrometer. The review covers the maintenance manual, wear-limit tables, calibration records, and the work order. This step matches the procedure to the bearing. It also ensures every result is traceable.

Can Hot Bearings Be Measured After Cooling Completely?

A hot locomotive bearing gives a valid wear reading only after it cools completely. Testing confirms this principle holds, but only within clear limits. Technicians measure the axle journal only when it reaches ambient temperature. Time alone is not a reliable indicator of readiness. Cooling intervals are enforced so contraction finishes evenly across the journal.

Before logging any diameter, technicians verify caliper accuracy against a certified standard. The measured figures are then compared with the bearing’s baseline record. Any reading affected by residual heat is rejected and never logged. Mikura International recommends following this sequence on every locomotive bearing inspection. Disciplined measurement protects bearing life and supports dependable locomotive operation.
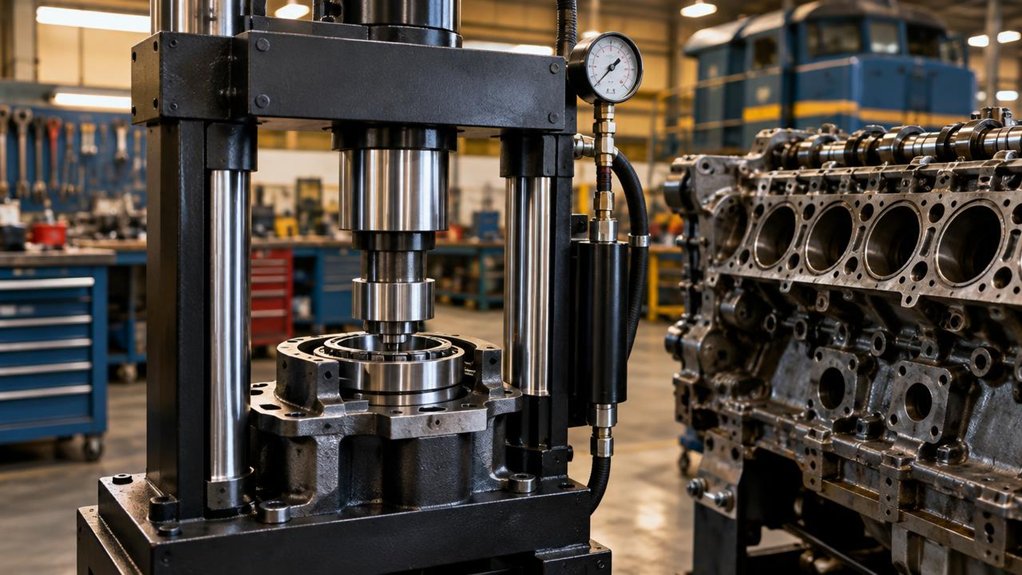
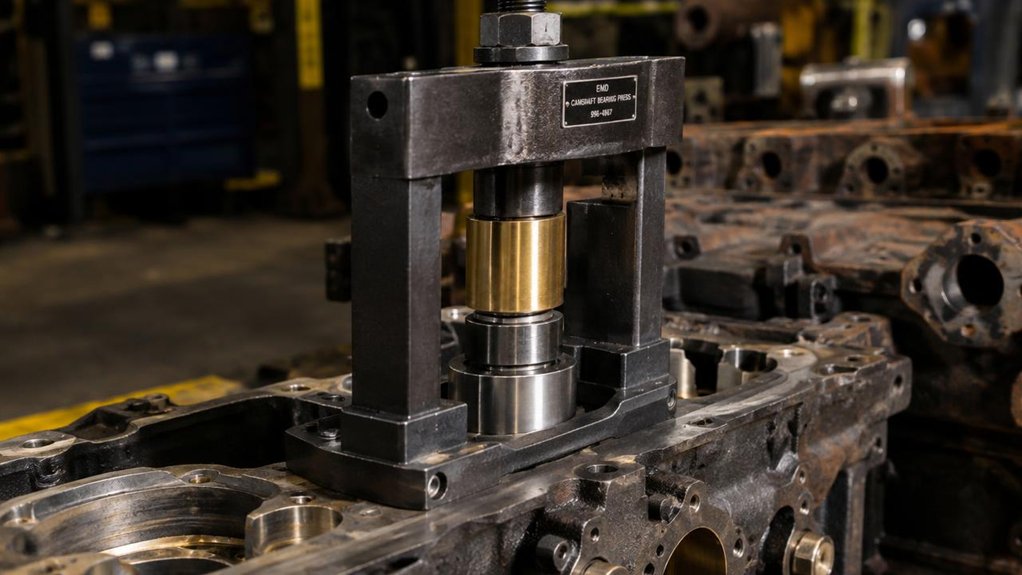
Why Choose Specialized Camshaft Bearing Press Tools for Locomotives?

Why Choose Specialized Camshaft Bearing Press Tools for Locomotives?

The Most Common Pain Point: Bearing Damage During Installation

Pressing a camshaft bearing into an EMD engine block leaves little room for error. A misaligned press can scratch the bore, block oil galleries, and force costly block repairs.

Generic fixtures rarely match the exact bore diameter, shoulder height, and oil-gallery geometry of EMD blocks. Mikura International supplies genuine EMD locomotive engine parts to help operators avoid these failures.

Common problems that cost locomotive operators time and money:

  • Bore scoring caused by off-axis pressing
  • Bearing walking or rotating inside the bore
  • Oil gallery blockage from misaligned seating
  • Pilot diameter mismatch with the bearing
  • Damaged shoulder or locating face
  • Overdriving the bearing past the specified seating load
  • Poor concentricity that leads to early camshaft wear
  • Repeated press attempts that weaken the bore
Pain PointRoot CauseCorrective Action
Bore scoringOff-axis pressing with a generic fixtureUse guided pilots matched to EMD bore specifications
Bearing walkingUnverified locating facesCheck locating faces against OEM drawings
Oil gallery blockageBearing seated out of alignmentConfirm gallery alignment before pressing
Pilot mismatchIncorrect pilot diameterMeasure pilot diameter against specification
Concentricity errorNo indicator checkConfirm concentricity with a dial indicator
Bearing distortionOverdriving the pressStop at the specified seating load

Why Specialized Tools Prevent These Failures

You choose specialized camshaft bearing press tools to match your EMD block’s exact bore diameter, shoulder, and oil-gallery geometry. Generic fixtures miss those dimensions.

They can push the bearing off axis, and that action scores the steel. You avoid this by verifying pilot diameter and locating faces against specification.

Guided pilots keep the bearing square during pressing. A dial indicator confirms concentricity before the job is final.

Do not overdrive the bearing past the specified seating load.

Selection Checklist

  • Confirm the tool matches the EMD block’s bore diameter
  • Verify the shoulder and locating face dimensions
  • Check that the oil-gallery geometry is supported
  • Require guided pilots that keep the bearing square
  • Confirm the seating load limit against the engine specification

Key Takeaways

  • Specialized tools match EMD block bore diameter, depth, and oil-gallery locations, preventing off-axis pressing.
  • Rated tools with verified tolerance ranges protect the bore from scoring and permanent steel damage.
  • Guided pilots and stepped shoulders keep bearings square throughout the press stroke.
  • Calibrated torque and load limits stop installation at the correct seating load, avoiding bore distortion.
  • Proper tooling supports controlled heating and lubrication, ensuring reliable bearing seating and locomotive uptime.

Why Generic Press Tools Fail on EMD Camshaft Bearings?

Why Generic Press Tools Fail on EMD Camshaft Bearings?

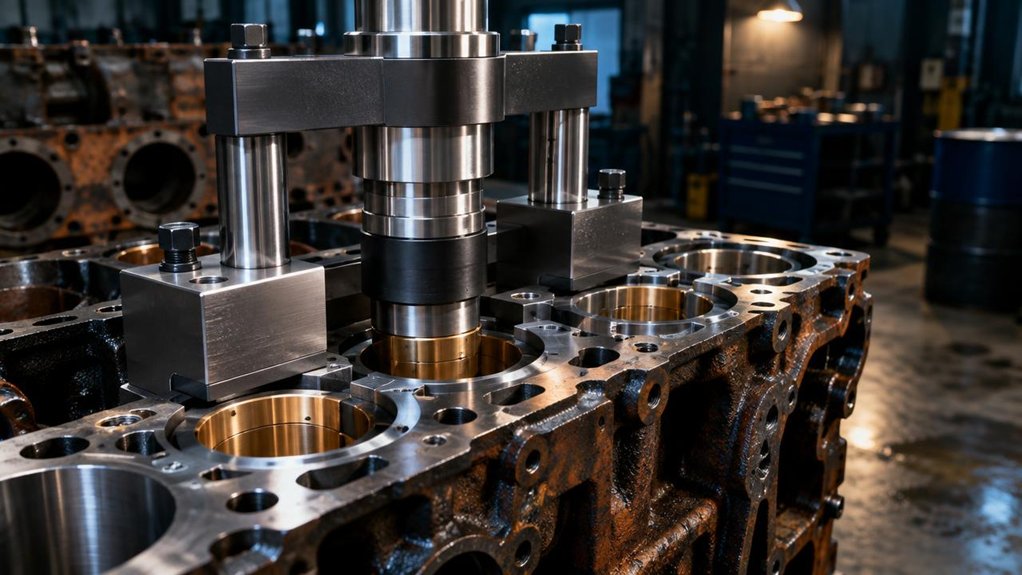
Generic press tools fail on EMD locomotive camshaft bearings because they ignore the block’s bore geometry. Standard fixtures rarely match the bore’s diameter, depth, or oil-gallery locations. Without that match, they push bearings off axis. That misalignment damages the bore and can permanently score the block’s steel.

Generic press tools miss the bore’s diameter, depth, and oil-gallery locations, pushing bearings off axis and scoring the block’s steel.

Start by verifying tooling compatibility before you touch the bearing. Confirm the pilot diameter, stepped shoulder, and locating faces match your locomotive engine’s specification. Do not improvise adapters. They introduce play you cannot measure.

Next, prioritize misalignment prevention. Use a guided pilot that holds the bearing square throughout the stroke. Apply torque control with a calibrated driver. Stop at the specified seating load rather than forcing the bearing home. Overdriving distorts the bore and compromises seating.

Finally, verify load distribution. Check that the bearing sits flush and rotates freely. Confirm that the lubrication holes align with the block’s oil passages. Bore protection matters on every locomotive overhaul.

What Makes a Camshaft Bearing Press Tool Effective?

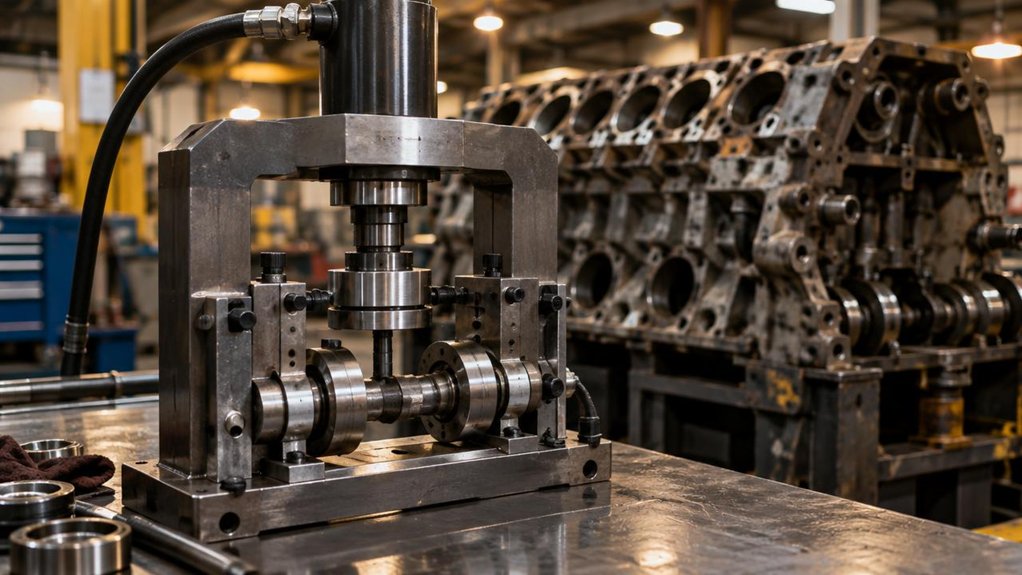
A press tool is only as effective as its control over alignment, load, and fit. It acts directly on the camshaft bore in a locomotive engine.

You’ll get the best results when you verify the setup before pressing. Start with precision alignment checks. Confirm that the bearing, the bore, and the press ram sit square. Recheck after every adjustment. Do not rely on visual judgment alone. Use dial indicators or laser gauges to confirm concentricity.

Next, you’ll need consistent force control throughout the stroke. Set your hydraulic pressure limits before the job begins. Watch the load curve for sudden spikes. A spike usually signals a misaligned bearing or a burr in the bore. Stop immediately when a spike appears. You’ll protect both the bearing and the camshaft housing by pressing slowly and steadily.

Log each press. Record force readings and alignment values so you can trace any future failure. Keep hands clear of the ram at all times.

Which Press Tool Fits Your EMD Block Specs?

Which Press Tool Fits Your EMD Block Specs?

Once you have confirmed alignment, load limits, and fit, match the press tool to the locomotive engine’s block specifications. Start by pulling the EMD block’s bore dimensions from the service manual. Then select a tool rated for that camshaft bearing diameter.

Confirm alignment, load limits, and fit first, then match the press tool to the EMD block’s bore dimensions from the service manual and select one rated for that camshaft bearing diameter.

Compare bore tolerances against the tool’s stated range. Reject any tool that falls outside those limits. Verify the press tool’s rating label before each use. Check clearance before every pull to avoid galling and misseating.

Don’t skip the final check. Mount the tool on the block, then verify press alignment with a dial indicator before applying force. If the ram drifts, stop immediately and recheck your setup.

Wear eye protection, keep hands clear of the pinch zone, and never exceed the rated hydraulic pressure. You are responsible for a clean, square installation that protects both the crew and the engine. Log all measured values in the maintenance record.

How Do You Press Bearings Without Bore Damage?

Press bearings slowly, square, and lubricated, and you’ll keep the bore intact. Rushing the stroke or letting the press ram at an angle scores the bore wall and spins the bearing. Start every press with a clean, deburred housing and a verified tool fit. Check the bore diameter and surface finish before you begin.

Use controlled heating when the interference fit is tight. Warm the marine engine housing evenly to the temperature specified for your engine model. Never use an open flame. Keep the temperature below the limit that alters the bore’s metallurgy. Don’t skip heat-resistant gloves and eye protection.

Position the bearing square to the bore before applying force. Avoid misalignment by seating the pilot first and confirming the bearing enters without binding. If resistance spikes, stop, back out, and recheck alignment rather than forcing it. Verify the press force against the tool’s rated limit before you finish seating.

Do Locomotive-Grade Press Tools Pay Off for EMD Engines?

Do Locomotive-Grade Press Tools Pay Off for EMD Engines?

Locomotive-grade press tools usually pay for themselves on EMD engines. They prevent bore rework and reduce downtime. If you’re pressing camshaft bearings in an EMD block, precision matters. Low-quality tooling rarely holds alignment across repeated installs. A single out-of-square bearing can cost you an entire block. Long-life tooling with hardened guide surfaces and precision-machined pilots keeps bores true for years. Mikura International supplies tooling built for these demands.

Consider the math. A bore repair or block replacement can cost far more than the tool itself. A stranded locomotive also burns crew hours and disrupts schedules. Trackside reliability depends on getting the job right the first time. That means choosing tooling rated for the loads these engines demand.

Safety matters on every job. Inspect the press frame, threads, and load-rated components before each use. Keep hands clear of the pressure path at all times. Never exceed the rated tonnage. Verify the bearing is seated square before releasing any pressure. Stop immediately if the bearing binds.

Frequently Asked Questions

What Warranty Coverage Do Specialized Camshaft Bearing Press Tools Typically Include?

Warranty Coverage for Locomotive Camshaft Bearing Press Tools

Most specialized camshaft bearing press tools for locomotive engines carry a twelve-month warranty. The warranty typically covers material and workmanship defects, hydraulic component failures, and frame integrity.

Before operating the press, confirm that torque certification accompanies the unit. Valid calibration records protect your claim if a dispute arises. Keep documentation current throughout the press’s service life. Log maintenance, operator training, and load testing. Misuse, unauthorized modifications, and worn parts typically void coverage.

Can These Press Tools Be Used on Non-EMD Locomotive Engines?

Not automatically. Do not assume compatibility before completing the required checks.

You can use these press tools on non-EMD locomotive engines only after verifying compatibility. Start by comparing the tool against your engine’s bore dimensions and bearing specifications.

Confirm that engine-specific fixtures seat correctly. Check that the press operates within its hydraulic limits. Verify that the tool carries model certification covering your exact locomotive engine model.

Skipping any step can cause bearing misalignment, housing damage, or personal injury. Always consult the equipment documentation first.

How Often Should Press Tools Be Calibrated and Inspected for Accuracy?

Press Tool Calibration and Inspection for Locomotive Maintenance

Follow strict calibration intervals for locomotive press tools. Recalibrate every six months or after 500 press cycles, whichever comes first. Verify accuracy before every shift using certified gauges. Confirm that load readings stay within tolerance. Increase inspection frequency when press tools operate under heavy use. Schedule an annual performance audit for every press tool. Inspect hydraulic seals, alignment fixtures, and guide surfaces after any overload event. Always lock out the locomotive and press equipment before inspection. Document every calibration and inspection result. Accurate records support smooth audits and help maintenance teams track tool performance over time.

What Training Do Technicians Need Before Operating Hydraulic Bearing Press Equipment?

You need documented operator certification before operating any hydraulic bearing press in a locomotive workshop. Your training should cover press controls, pressure limits, and emergency shutdown procedures. Before every job, you will perform a risk assessment. Identify pinch points where hands or fingers can become trapped. Check for hose failure hazards before pressurizing the system. Verify load alignment on axle and wheelset bearings to prevent sudden shifts. You must demonstrate competence under supervision before working independently. Retrain whenever the equipment, pressure settings, or procedures change. Do not skip lockout/tagout training. Stored hydraulic energy can cause serious injury even after power is removed.

Which Safety Standards Govern Press Tool Use in Railroad Maintenance Facilities?

Safety Standards for Press Tool Use in Railroad Maintenance Facilities

Railroad maintenance facilities must satisfy OSHA requirements before operating any press tool on locomotive components. Start with 29 CFR 1910.147 lockout/tagout procedures. Isolate hydraulic power and bleed all residual pressure before servicing the press. Apply 29 CFR 1910.212 machine guarding requirements at every press station. Wear the personal protective equipment specified under 1910.132. Your facility’s railroad safety program should follow FRA oversight. Follow the manufacturer’s load ratings for every fixture and die. Inspect hoses, gauges, and fixtures before every shift. Never exceed rated capacity, even momentarily, during any pressing operation. Mikura International recommends documenting every inspection and training record to stay audit-ready.

How to Maintain Locomotive Engine Bearing Lubrication Systems

How to Maintain Locomotive Engine Bearing Lubrication Systems

Locomotive bearing lubrication problems can cause overheating, accelerated wear, and unplanned downtime.

Finding the cause early helps protect engine components and supports reliable operation.

Follow the locomotive’s model-specific EMD service manual and current maintenance guidance.

Use only approved procedures and parts suited to the engine and operating conditions.

CheckWhat to look forAction
Oil supplyLow level or interrupted flowVerify the supply using the approved procedure
Oil pressureReadings outside specified limitsStop and investigate before operation
Oil conditionContamination or unexpected changesDo not operate until the cause is identified
FiltersDamage, blockage, or incorrect installationInspect and replace as specified
BearingsAbnormal heat, noise, or visible damageKeep the locomotive out of service pending assessment
LeaksOil around lines, fittings, or bearing areasLocate and correct the source before restarting

Key maintenance precautions:

  • Select oil approved for the engine, climate, and operating conditions.
  • Do not choose oil by viscosity grade alone.
  • Do not mix oil brands unless compatibility is confirmed.
  • Secure the locomotive before inspection or cleaning.
  • Apply lockout/tagout and allow components to cool.
  • Check oil flow, pressure, filters, bearings, and leaks as directed.
  • Do not start the engine if damage or contamination is found.
  • Use genuine locomotive engine parts supplied by Mikura International when replacements are required.

Key Takeaways

  • Select oil approved for the locomotive’s EMD model and operating conditions; verify viscosity, formulation, and additive compatibility in current guidance.
  • Secure the locomotive and follow lockout/tagout procedures before inspecting accessible bearings, caps, fasteners, and oil passages.
  • Measure bearing oil flow and pressure at designated test points with calibrated gauges; check filters and leaks without bypassing alarms.
  • Clean bearings only at the specified maintenance interval, using approved methods and materials while preventing contamination of oil passages.
  • Inspect for wear, damage, leaks, and contaminated oil; report out-of-limit findings and do not start the engine if damage is found.

Choose Oil to Match EMD Specifications

Choose Oil to Match EMD Specifications

Select engine oil that meets EMD specifications for your locomotive model and operating conditions. Do not rely on viscosity grade alone. Check the engine manual and current EMD service guidance before ordering or filling. The approved formulation helps meet lubrication requirements and protect bearings under your locomotive’s temperatures, loads, and duty cycles.

Check that the oil’s viscosity falls within the approved range for your climate and operating profile. Do not use a heavier or lighter oil without written manufacturer approval. Viscosity affects oil flow during startup and film strength at operating temperature. Also verify additive compatibility when changing brands or topping up. Do not mix oils unless EMD guidance confirms they are compatible.

Keep product labels and delivery records available. Inspect containers for contamination, damage, or incorrect identification. Use clean, dedicated transfer equipment and follow site handling procedures. Before adding oil to the locomotive’s lubrication system, confirm that it meets the required specification.

Check EMD Camshaft Bearings Before Startup

After confirming the oil meets EMD specifications, inspect the locomotive’s camshaft bearings before startup. Secure the locomotive against movement, apply lockout/tagout procedures, and follow the engine service manual. Do not open bearing housings or remove components unless authorized by the procedure.

Inspect accessible bearing surfaces, caps, fasteners, and oil passages for scoring, cracks, looseness, sludge, or metal debris. Check for overheating discoloration and unusual wear. If you find damage or contamination, do not start the engine. Report the condition and arrange qualified repairs.

Review maintenance records and oil-analysis results for trends in wear metals or contaminants. Confirm the specified lubricant is present, and verify bearing lubrication using the approved pre-start procedure. Record observations, corrective actions, and unresolved concerns. Obtain required authorization before releasing the locomotive for startup, and keep personnel clear of moving parts.

Inspect Bearing Oil Flow, Pressure, and Filters

Inspect Bearing Oil Flow, Pressure, and Filters

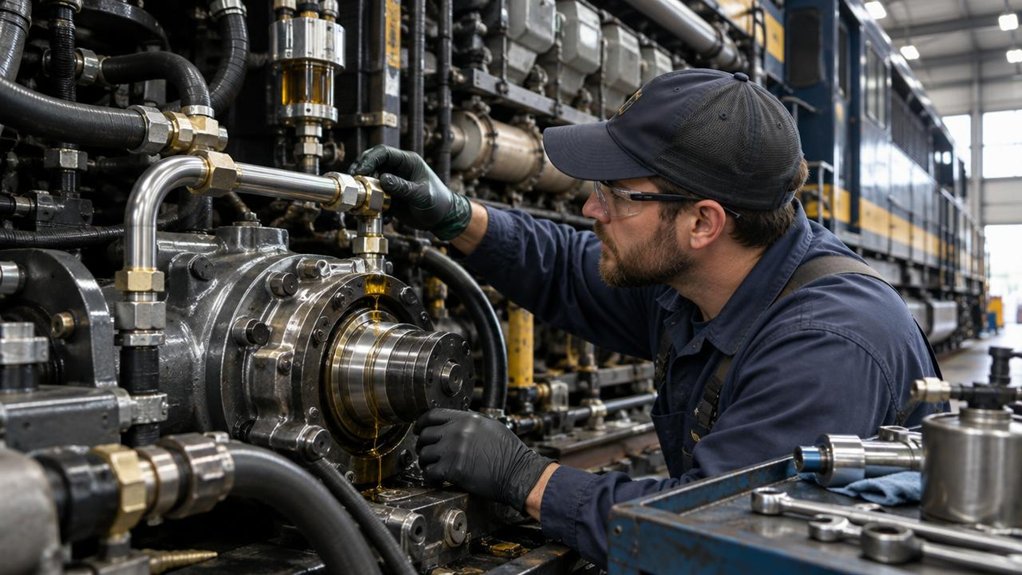
Before startup, check locomotive bearing oil flow and pressure using the approved procedure and specified limits. Secure the locomotive against movement, wear required protective equipment, and use calibrated gauges at designated test points. Isolate the system before connecting instruments. Never loosen pressurized fittings.

CheckAction
Flow and pressureCompare readings with specified limits. Investigate abnormal values.
FiltersCheck indicators and inspect housings for leaks or damage.

During operation, monitor readings as directed. Respond promptly to sudden pressure drops, restricted flow, or rising bearing temperatures. Follow the maintenance procedure, including shutdown requirements.

Inspect filter housings, lines, and connections for seepage, looseness, or contamination. Replace filters only as specified. Confirm correct installation and sealing. Take oil samples using approved methods at designated ports. Label samples and send them for analysis.

Record readings, filter condition, and sample details. Report out-of-range results to qualified maintenance personnel before returning the locomotive to service. Never bypass a filter or defeat an alarm to keep the locomotive running.

Follow the EMD Bearing Cleaning Schedule

Follow the EMD maintenance manual’s bearing-cleaning schedule for the specific locomotive model and operating conditions. Use the specified interval, cleaning method, and approved materials. Do not substitute solvents or extend intervals without authorization.

Before servicing, secure the locomotive against movement and isolate the relevant equipment. Follow site lockout procedures, allow components to cool, and wear the required protective equipment.

Keep dirt, lint, and cleaning fluid out of oil passages and the lubrication system. Use clean, lint-free materials and dedicated tools. Collect waste fluid for proper disposal. Do not direct compressed air into bearing openings, as it can push contaminants deeper or create hazards.

Protect exposed surfaces during cleaning. Restore covers and connections according to the manual. Inspect filters at the specified service point, following the approved procedure and using replacement parts that meet the manual’s requirements.

Record the service date, operating hours, materials used, and any deviations in the maintenance log. If instructions conflict or conditions exceed manual limits, stop work and consult qualified maintenance personnel before returning the locomotive to service.

Check for Bearing Wear, Dirty Oil, and Leaks

Check for Bearing Wear, Dirty Oil, and Leaks

After cleaning, inspect accessible locomotive bearing surfaces and lubrication components for abnormal wear, discoloration, scoring, or oil leaks. Follow isolation and lockout procedures before opening guards or touching components. Hot oil and rotating machinery can cause serious injury.

Check bearing surfaces for pitting, cracks, uneven contact, and metal particles. Compare findings with maintenance limits. Do not return damaged bearings to service if they exceed those limits.

Inspect seals for hardening, cuts, looseness, or seepage. Check joints, hoses, fittings, and drain points for fresh oil. Trace leaks to their source instead of tightening connections blindly.

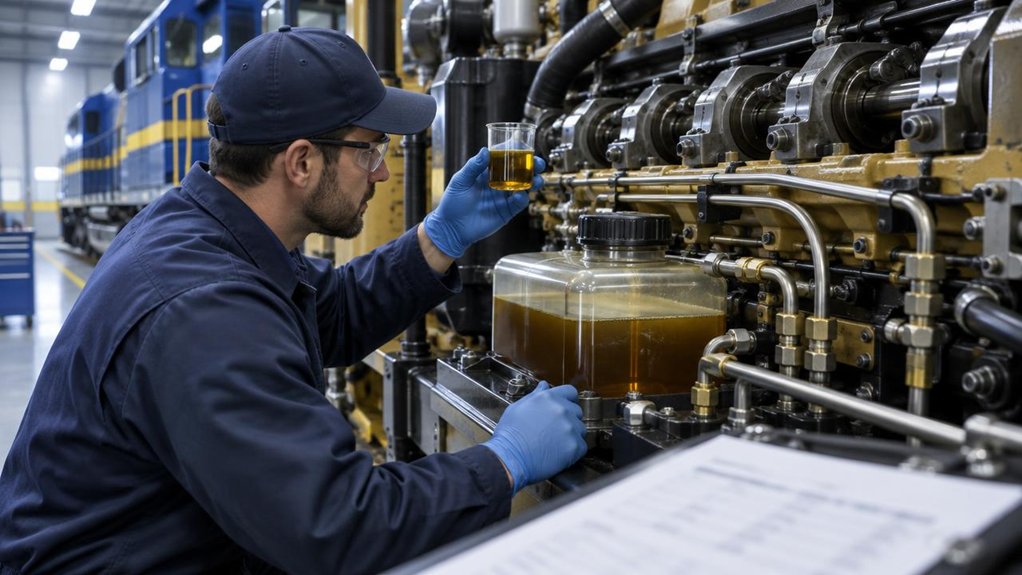
Collect an oil sample using the approved method. Check for water, sludge, fuel dilution, and metallic debris. Compare results with baseline readings and specified limits. Replace or filter oil only as directed by maintenance procedures.

Document bearing wear, sample results, and leaks. Report out-of-limit conditions promptly. Keep the area clean, contain spills, and verify repairs before restarting the locomotive.

Frequently Asked Questions

How Often Should Locomotive Engine Bearing Lubrication Systems Undergo a Complete Overhaul?

Overhaul a locomotive engine bearing lubrication system according to the manufacturer’s recommendations and the fleet maintenance program. There is no universal overhaul interval. Schedule inspections based on operating hours, condition-monitoring results, and service history. Arrange an earlier overhaul if you find contamination, pressure loss, abnormal bearing wear, or recurring faults. Record all inspections, repairs, and overhauls in the locomotive’s maintenance records.

What Safety Precautions Should Technicians Follow When Servicing a Lubrication System?

Before servicing a locomotive lubrication system, shut down the locomotive and isolate all energy sources using approved lockout procedures. Verify zero energy with suitable instruments. Allow hot components to cool, wear appropriate protective equipment, and keep clear of moving parts. Relieve system pressure according to the manufacturer’s instructions, then confirm gauges read zero before opening lines or filters. Use compatible tools, contain oil spills, and dispose of used oil properly. Before restarting, reinstall all guards and check for leaks.

Which Tools Are Needed to Diagnose Lubrication System Faults?

To diagnose lubrication faults in a locomotive, use calibrated pressure gauges, temperature probes, flow meters, and oil sampling kits. A multimeter can check electrical instrumentation, while a diagnostic scanner helps interpret fault codes. Keep suitable fittings, clean sample containers, and locomotive service data nearby. Verify instrument calibration, isolate equipment as required, and follow site lockout procedures before testing.

How Can Operators Monitor Bearing Lubrication Remotely?

Operators can monitor locomotive bearing lubrication remotely by tracking oil pressure, temperature, flow, and vibration with installed sensors. Transmit readings to a secure dashboard for continuous review. Compare live data with operating limits and historical trends. Set alerts to notify operators and maintenance staff when readings become abnormal. Regularly verify sensor calibration, communication links, and alert delivery. Treat remote readings as diagnostic aids, and follow approved procedures before inspecting equipment or changing operating conditions.

What Should Be Done if a Lubrication System Alarm Activates While the Locomotive Is Running?

If a lubrication system alarm activates while a locomotive is running, follow the applicable emergency and alarm procedures immediately. Notify the engineer, reduce the load, and stop at a safe location as procedures require. Record the alarm indication before resetting it. Inspect for oil leaks, low pressure, abnormal temperatures, or unusual noise. Use approved fault-isolation procedures to identify the cause. Do not resume operation until qualified personnel confirm the lubrication system is safe and authorize movement.

Oil Specifications and Maintenance Guide for Locomotive Engine Bearing

Oil Specifications and Maintenance Guide for Locomotive Engine Bearing

This guide provides a comprehensive overview of oil specifications and maintenance practices critical for ensuring the longevity and optimal performance of locomotive engine bearings. Selecting the right oil and adhering to a strict maintenance schedule are crucial steps in preventing premature wear and costly repairs.

Understanding Locomotive Engine Bearings

Understanding Locomotive Engine Bearings

Locomotive engine bearings are essential components that minimize friction between moving parts, allowing for smooth and efficient operation. Understanding the types, functions, and common issues associated with these bearings is crucial for effective maintenance and ensuring the longevity of locomotive and marine engine performance. Selecting the appropriate lubricant is paramount for optimal operation.

Types of Engine Bearings

Various types of engine bearings are utilized in locomotives and marine vessels, each designed to withstand specific loads and operating conditions. These include plain bearings, roller bearings, and ball bearings. Each type of bearing has unique characteristics. Understanding these differences is important for selecting the appropriate lubricant to ensure premium performance and long life in demanding locomotive and marine engine applications.

Function and Importance of Bearings

The primary function of bearings is to reduce friction between moving surfaces within the locomotive engine, enabling smooth and efficient power transfer. Bearings support the crankshaft, connecting rods, and other critical components, allowing them to rotate freely. Superior bearing function ensures optimal engine performance, minimizes wear and tear, and contributes to the overall reliability of the locomotive and marine engine.

Common Issues with Locomotive Bearings

Locomotive bearings are susceptible to various issues that can compromise their performance and lifespan. These include wear, corrosion, fatigue, and contamination. Wear can occur due to inadequate lubrication or excessive loads, while corrosion can result from moisture or chemical exposure. Regular inspections and adherence to strict oil standards help prevent these issues and ensure the reliable operation of locomotive engine bearings. Mikura International understands these challenges and can provide the necessary spare parts.

Oil Specifications for Locomotive Engines

Selecting the correct locomotive oil is critical for maintaining optimal performance and extending the life of engine bearings in both locomotive and marine vessels. The right oil not only lubricates but also cools, cleans, and protects engine components from corrosion and wear. Using substandard oil can lead to premature bearing failure, reduced engine efficiency, and costly repairs. Therefore, understanding oil specifications and choosing a premium product is essential.

Types of Oils Used in Locomotive Engines

Different types of oils are used in locomotive engines. These oils can be categorized as follows:

  • Mineral oils, which are derived from crude oil and are suitable for many applications.
  • Synthetic oils, engineered to provide superior performance under extreme conditions.
  • Semi-synthetic blends, offering a balance between cost and performance.

The selection depends on the engine type, operating conditions, and manufacturer recommendations to ensure optimum locomotive operation.
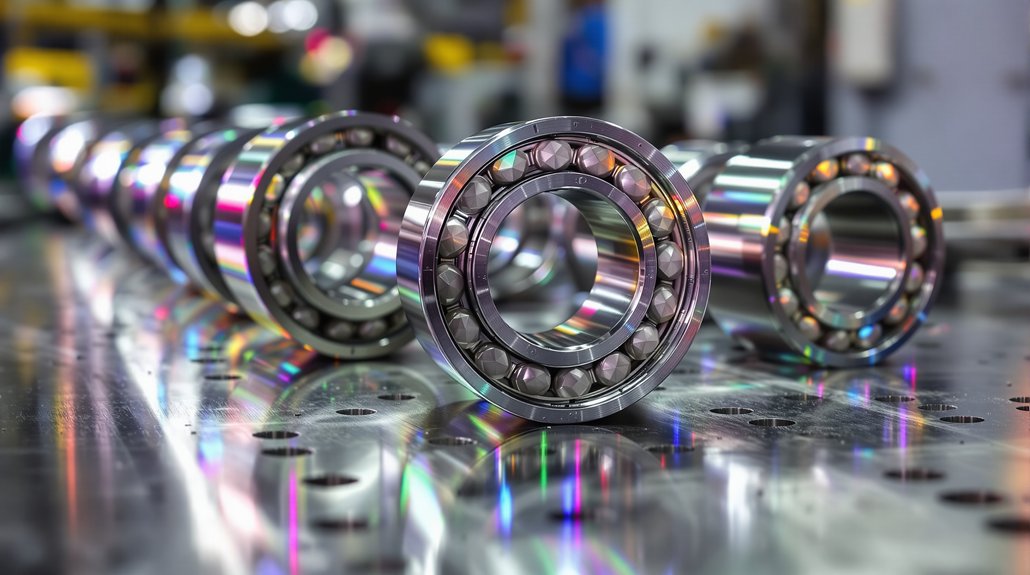
Viscosity Ratings and Their Importance

Viscosity is a measure of an oil’s resistance to flow, and it is crucial for maintaining proper lubrication in locomotive engines. The viscosity rating indicates how well the oil will perform at different temperatures. Multi-grade oils, such as SAE 15W-40, are commonly used because they provide adequate lubrication across a wide temperature range. Choosing the correct viscosity grade ensures that the oil maintains a sufficient film thickness between moving parts, preventing wear and tear on critical engine components.

API and SAE Standards for Locomotive Oil

The American Petroleum Institute (API) and the Society of Automotive Engineers (SAE) set standards for oil performance. These standards cover different aspects of oil quality and suitability, including:

  • API standards, which classify oils based on their suitability for different engine types and operating conditions.
  • SAE standards, which define viscosity grades.

Locomotive oils must meet specific API and SAE standards to ensure they provide adequate protection and performance. Compliance with these standards guarantees that the oil has undergone rigorous testing and meets the necessary requirements for marine vessels and locomotive applications.

Maintenance Practices for Engine Bearings

Effective maintenance practices are vital for prolonging the life of engine bearings and maintaining the performance of locomotive engines. Regular inspection, proper lubrication, and timely oil changes are essential steps in preventing premature bearing failure. By adhering to a strict maintenance schedule and utilizing advanced oil analysis techniques, operators can ensure the reliable operation of their locomotive fleets. Mikura International is committed to helping you ensure optimal locomotive performance.

Regular Inspection and Monitoring

Regular inspection and monitoring of engine bearings are essential for identifying potential issues before they lead to catastrophic failures. Visual inspections can reveal signs of wear, corrosion, or contamination. Monitoring oil pressure and temperature can also indicate the health of the bearings. Implementing a proactive inspection program allows for early detection of problems, enabling timely intervention and preventing costly downtime.

Oil Change Intervals and Best Practices

Adhering to recommended oil change intervals is critical for maintaining the performance of engine bearings. Over time, oil degrades and becomes contaminated with dirt, debris, and combustion byproducts, reducing its ability to lubricate and protect engine components. Following the manufacturer’s recommendations for oil change intervals and using high-quality filters can ensure that the oil remains clean and effective, extending the life of the bearings and the engine. These best practices help provide superior maintenance.

Utilizing Advanced Oil Analysis Techniques

Advanced oil analysis techniques can provide valuable insights into the condition of the oil and the engine bearings. Spectrometric analysis can identify the presence of wear metals, contaminants, and additives in the oil. Viscosity measurements can indicate whether the oil has thinned or thickened, while acid number testing can assess its level of degradation. By regularly analyzing oil samples, operators can detect potential problems early and take corrective action, preventing costly repairs and downtime. Doing so helps to ensure future reliability and long life.

Best Oils for Locomotive Engine Bearings

Best Oils for Locomotive Engine Bearings

Recommended Oil Brands for Locomotive Bearings

Selecting the right oil brand is crucial for the optimal performance of locomotive engine bearings. While various brands claim to provide superior lubrication, it’s important to focus on those that meet or exceed industry standards. Look for brands known for their rigorous testing, quality control, and specialized formulations designed specifically for heavy-duty applications. Consider brands that have a proven track record, as these are more likely to ensure the longevity and reliability of your bearings.

Choosing Oil Based on Operating Conditions

The selection of locomotive oil should also be influenced by the specific operating conditions of the engine. Factors such as ambient temperature, load, and duty cycle can all affect oil performance. In high-temperature environments, synthetic oils may be preferable due to their superior thermal stability. For engines operating under heavy loads, consider oils with enhanced anti-wear additives to provide additional protection. Matching the oil to the operating conditions will ensure optimal lubrication and prolong the life of engine bearings and associated components.

Impact of Quality Oil on Bearing Longevity

The quality of oil used in locomotive engines has a direct impact on the longevity of bearings. High-quality oils contain additives that reduce friction, prevent corrosion, and dissipate heat, all of which contribute to extending bearing life. Conversely, using low-quality or unsuitable oil can lead to premature wear, increased friction, and potential bearing failure. Investing in a premium oil that meets or exceeds the manufacturer’s specifications is a cost-effective way to ensure the reliable performance and longevity of your locomotive engine bearings.

Expert Insights on Locomotive Engine Maintenance

Common Mistakes to Avoid

Several common mistakes can compromise the effectiveness of locomotive engine maintenance, including neglecting regular inspections, using the wrong type of oil, and failing to adhere to recommended oil change intervals. Overlooking these seemingly minor details can lead to significant performance issues and costly repairs. Another frequent error is ignoring early warning signs of bearing distress, such as unusual noises or elevated temperatures. Avoiding these mistakes is essential for ensure optimal locomotive engine performance and extending the life of critical components.

Tips from Industry Experts

Industry experts emphasize the importance of proactive maintenance strategies to ensure the longevity and reliability of locomotive engines. One key tip is to conduct regular oil analysis to monitor its condition and identify potential problems early on. Experts also recommend using high-quality filters to remove contaminants and prevent wear on bearings and other critical components. Furthermore, they advise closely following the manufacturer’s recommendations for lubrication and maintenance schedules to provide the best possible performance and protection.

Future Trends in Locomotive Engine Oil Technology

The future of locomotive engine oil technology is focused on developing more sustainable and high-performance lubricants. Researchers are exploring the use of bio-based oils and advanced additives to reduce environmental impact and improve engine efficiency. Nanotechnology is also being applied to create oils with superior friction-reducing and wear-resistant properties. These advancements promise to provide enhanced protection for locomotive bearings, extending their lifespan and reducing maintenance costs. Mikura International stays abreast of these developments to ensure we provide the best possible parts and advice.

FAQ

Q: What are the key oil specifications for locomotive engine bearings?

A: The key oil specifications for locomotive engine bearings typically include viscosity grade, detergent and dispersant levels, and anti-wear additives. It is essential to follow the manufacturer’s guidelines to ensure optimal performance and longevity of the bearings.

Q: How does oil viscosity affect locomotive engine performance?

A: Oil viscosity plays a crucial role in the lubrication of locomotive engine bearings. The right viscosity ensures that the oil can effectively reduce friction while maintaining a proper film thickness under varying temperature and load conditions, similar to requirements in a marine engine.

Q: What maintenance practices are recommended for locomotive engine bearings?

A: Recommended maintenance practices include regular oil changes, monitoring oil levels, checking for contamination, and inspecting bearing surfaces for wear. Following these practices helps ensure the efficient operation of the bearings, akin to maintenance protocols in marine engines.

Q: How often should oil be changed in locomotive engine bearings?

A: The frequency of oil changes depends on operating conditions and the type of oil used. Generally, it is recommended to change the oil every 500 to 1,000 hours of operation, but this may vary based on specific locomotive and environmental factors.

Q: What are the signs of oil degradation in locomotive engine bearings?

A: Signs of oil degradation include increased engine temperature, unusual noises from the bearings, visible discoloration of the oil, and the presence of metal particles in the oil. Regular oil analysis can help detect these issues early.

Q: Can marine engine oil be used in locomotive engine bearings?

A: While some marine engine oils may meet the viscosity and performance requirements for locomotive engine bearings, it is essential to consult the manufacturer’s specifications before using marine oil to ensure compatibility and efficacy.

Q: What additives are important in oil for locomotive engine bearings?

A: Important additives for oil used in locomotive engine bearings include anti-wear agents, detergents, dispersants, and antioxidants. These additives help maintain oil performance and protect against wear and corrosion, similar to the needs in marine engine applications.

Q: How does temperature affect oil performance in locomotive engines?

A: Temperature significantly impacts oil performance in locomotive engines. High temperatures can lead to oil thinning and reduced lubrication effectiveness, while low temperatures can cause the oil to become too viscous. Maintaining optimal operating temperatures is critical for bearing longevity.

Q: What role does oil filtration play in locomotive engine bearing maintenance?

A: Oil filtration is crucial in maintaining clean oil in locomotive engine bearings. Effective filtration helps remove contaminants that can cause wear and damage to the bearings, thus prolonging their life and enhancing engine performance.

10 Locomotive Camshaft Bearing Alloy Specifications You Need

10 Locomotive Camshaft Bearing Alloy Specifications You Need

You’ll need aluminum alloys with 200-300 MPa fatigue resistance, copper-based alloys offering 152-227 W/m·K thermal conductivity, and steel-backed tri-metal constructions for EMD applications. Critical specifications include 0.001-0.004″ clearances, babbitt compositions with 88-90% tin content, and thermal expansion coefficients matching camshaft materials. Bi-metal configurations provide enhanced durability over tri-metal overlays, while copper-HCP delivers 98% IACS electrical conductivity correlating with superior thermal transfer. These foundational specifications form the framework for thorough locomotive bearing selection criteria.

Key Takeaways

  • Aluminum alloys require 130-227 W/m·K thermal conductivity with 6061-T6 grade offering 152-154 W/m·K for optimal heat dissipation.
  • Copper-based alloys must maintain 98% IACS electrical conductivity with phosphorous content between 0.002-0.007% for enhanced thermal transfer.
  • Tri-metal construction needs steel backing, copper intermediate layer, and 0.0005-0.0008″ lead-based overlay for high-load applications.
  • Fatigue resistance specifications require 200-300 MPa endurance limits under 10^4 to 10^7 cycle testing protocols.
  • Operating clearances must be 0.0015-0.002 times bearing diameter with EMD minimum recommendation of 0.0025 inches.

Aluminum Alloy Fatigue Strength Requirements for EMD Locomotive Applications

aluminum bearing fatigue requirements

When designing camshaft bearing systems for EMD locomotive applications, you must establish aluminum alloy fatigue strength parameters that withstand the demanding operational cycles inherent in heavy-haul and freight service environments. Your fatigue testing protocols should encompass stress amplitude ranges from 10⁴ to 10⁷ cycles, matching typical locomotive duty cycles. You’ll need to specify minimum endurance limits of 200-300 MPa for aluminum bearing alloys under rotating bending conditions.

Your lifecycle modeling must account for variable loading conditions, including startup torque spikes, thermal cycling, and vibration harmonics from diesel engine operation. Consider implementing accelerated fatigue testing using standardized protocols that replicate field stress patterns. You should evaluate crack propagation rates and establish inspection intervals based on fatigue life predictions.

Material selection requires aluminum alloys with enhanced fatigue resistance, typically achieved through controlled microstructure and heat treatment optimization. Your specifications must define acceptance criteria for fatigue strength verification testing before component approval. Material compatibility considerations are essential to prevent premature failure of bearing assemblies in locomotive service environments.

Copper-Based Alloy Load-Bearing Capacity in High-Performance Locomotive Engines

copper alloy bearing load capacity

Copper-based alloys deliver exceptional load-bearing performance in high-performance locomotive engines through their superior material properties and structural characteristics. You’ll find these alloys maintain stable load capacity under extreme operating conditions due to their inherent fatigue resistance and thermal conductivity properties. The fine microstructure optimization enables enhanced strength under cyclic loading while preventing material failure during repeated stress cycles.

In tri-metal bearing constructions, you’ll benefit from copper intermediate layers that support loads exceeding aluminum alloy alternatives’ fatigue strength limitations. These materials demonstrate superior wear resistance and embeddability properties, accommodating contamination without performance degradation. Their excellent thermal management capabilities dissipate heat generated during high-load cycles, preventing thermal degradation between bearing surfaces and camshaft components.

You’ll also appreciate the superior lubricant compatibility that prevents chemical reactions reducing load capacity. The seizure resistance proves particularly effective with cast iron crankshaft materials, ensuring extended service life in demanding locomotive applications. The precise dimensional stability achieved through copper-based alloys ensures accurate fit tolerances even with temperature fluctuations during operation.
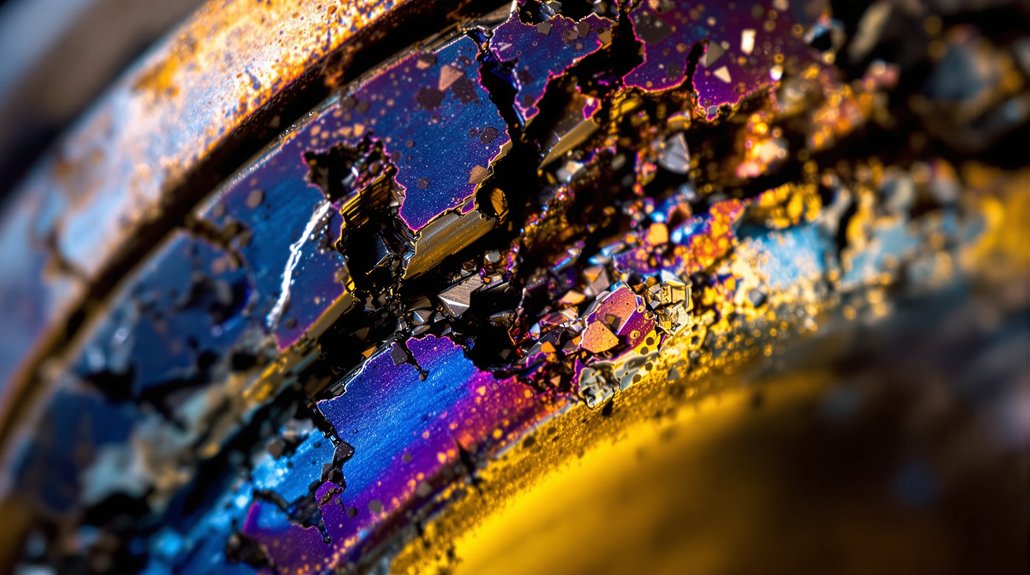
Steel-Backed Composite Material Construction for Extreme Operating Conditions

steel backed tri metal camshaft bearings

Steel-backed composite materials form the structural foundation for locomotive camshaft bearings operating under extreme conditions where single-material solutions can’t maintain performance standards. You’ll find tri-metal configurations incorporating steel backing, copper intermediate layers, and soft overlay materials delivering superior fatigue resilience under cyclic loading conditions. The steel substrate provides dimensional stability during high-speed operation while maintaining load-bearing capacity that exceeds aluminum-based alternatives.

Your composite bearing construction requires precise bonding technologies to prevent delamination. Pure aluminum bonding layers create metallurgical bonds between steel backing and bearing lining, while nickel barrier layers provide corrosion protection by preventing diffusion between copper and overlay materials. You’ll achieve peak performance with overlay thickness ranging from 0.0005″ to 0.0008″ in tri-metal applications.

These composite structures deliver extended service life under contaminated lubrication conditions while maintaining thermal expansion coefficient compatibility. You’ll need specialized installation tooling to preserve oil gallery alignment and bearing orientation during assembly operations. Proper clearance specifications maintain optimal oil film thickness, with typical oil clearance calculated at 0.0015 to 0.002 times the bearing diameter for reliable hydrodynamic operation.
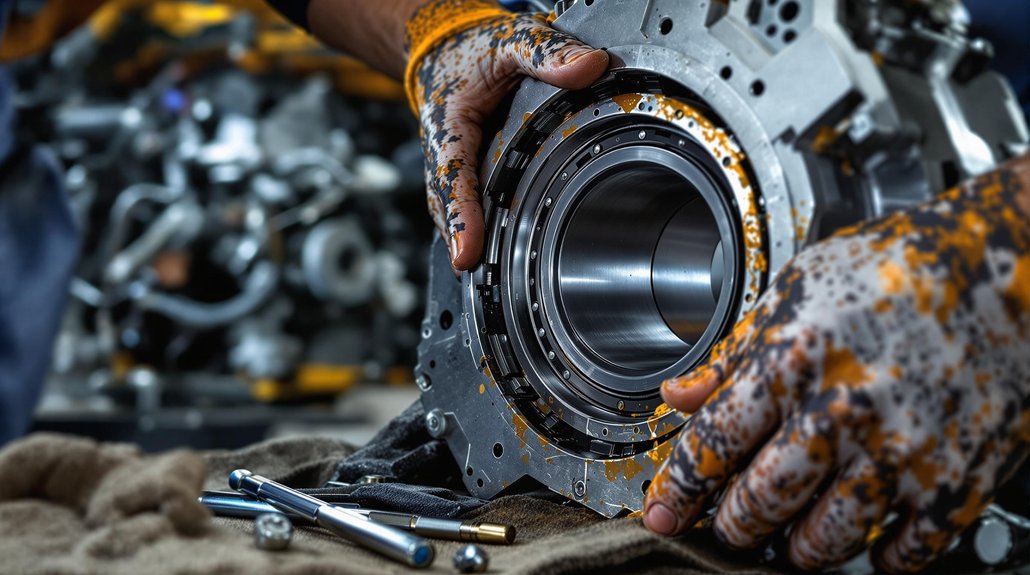
Traditional Babbitt Metal Composition and Contamination Resistance Properties

tin antimony copper babbitt bearings

Although steel-backed composites excel in extreme applications, traditional babbitt metal formulations remain the gold standard for locomotive camshaft bearings requiring superior contamination resistance and embeddability characteristics. You’ll find optimal tin-based compositions contain 88-90% tin, 7-8% antimony, and 3-4% copper for maximum performance reliability.

Antimony increases hardness and fatigue life while forming a strong matrix that resists deformation under load. Copper additions enhance mechanical strength, improve wear resistance, and ensure uniform heat distribution during temperature fluctuations. You’ll benefit from tin’s excellent corrosion resistance against moisture, chemicals, and temperature extremes in harsh locomotive environments.

The embeddability mechanisms allow small particle absorption, protecting rotating camshafts from contaminant-induced scoring. Soft surface characteristics enable conformability to shaft imperfections and misalignment compensation. This contamination resistance prevents damage accumulation while maintaining smooth anti-friction properties throughout extended operating cycles, making babbitt ideal for demanding locomotive applications. Proper temperature control during casting ensures uniform metal structure and prevents the formation of hard and soft spots that compromise bearing performance.

Thermal Conductivity Specifications for Heat Dissipation During Locomotive Operation

thermally optimized bearing alloy

You’ll need to evaluate thermal conductivity specifications when selecting bearing alloys for camshaft applications, as heat dissipation directly impacts bearing longevity and locomotive performance. Aluminum-based alloys provide excellent heat transfer characteristics that complement their lightweight properties, while copper-based compositions deliver superior thermal conductivity under high-load operating conditions. These thermal management capabilities become critical factors in maintaining ideal bearing temperatures during extended locomotive operations where heat build-up can compromise component integrity. Proper oil film thickness ensures effective heat transfer away from bearing surfaces while maintaining the lubrication barrier essential for preventing metal-to-metal contact during high-temperature operating cycles.

Aluminum Heat Transfer Properties

When selecting aluminum alloys for locomotive camshaft bearing applications, you’ll find thermal conductivity values ranging from 130 W/m·K to 227 W/m·K depending on the specific grade and temper condition. These properties directly impact heat dissipation performance during high-speed operation.
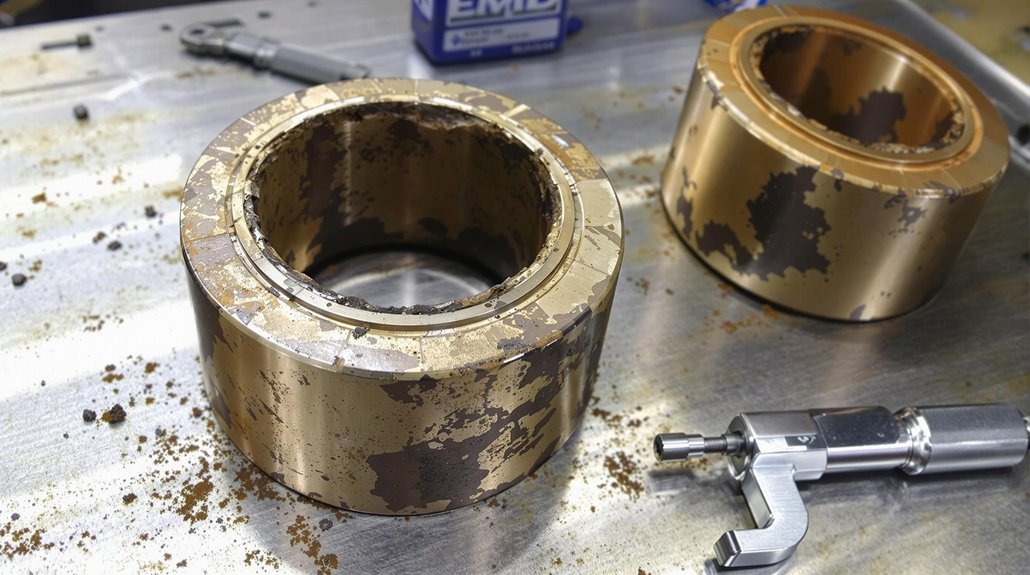
Alloy GradeThermal Conductivity (W/m·K)
1050227
1100222
6061-T6152-154

You’ll need to take into account thermal expansion compatibility with steel backing substrates, as aluminum bearings maintain interference fit through heating cycles. Surface emissivity characteristics enhance radiative heat transfer under loads up to 69 MPa. The heat capacity of aluminum at 0.90 J/g·°C enables rapid temperature equilibration during locomotive operational cycles. Aluminum’s weight advantage—three times lighter than copper alternatives—combined with superior thermal management capabilities makes it ideal for locomotive camshaft bearing specifications requiring sustained performance at surface speeds reaching 84 m/s.

Copper Thermal Conductivity Performance

Copper alloys deliver thermal conductivity values that markedly exceed aluminum’s performance range, with high purity copper (Cu-HCP) achieving 223 Btu/sq ft/ft hr/°F at 20°C. You’ll find beryllium copper provides 3-5 times greater thermal conductivity than tool steel, combining exceptional heat transfer with tensile strengths from 60-220 ksi for demanding camshaft applications.

Thermal diffusion remains consistent across 20°C to 300°C operating ranges, while microstructural effects from residual phosphorous content (0.002-0.007%) optimize conductivity without compromising dissipation performance. Cu-HCP‘s 98% electrical conductivity (IACS) correlates with superior thermal transfer potential. The coefficient of thermal expansion ranges 9.4-9.8 x 10^-6 per °C, ensuring dimensional stability during locomotive operation while maintaining efficient heat management capabilities. These copper alloys demonstrate low friction coefficients that reduce energy consumption while supporting extended service life requirements in high-performance locomotive applications.

Wear Resistance and Chemical Compatibility Standards for EMD Camshaft Bearings

wear resistant chemically compatible bearings

EMD camshaft bearings must meet stringent wear resistance standards that guarantee reliable operation under the extreme conditions found in locomotive diesel engines. You’ll need bearings that demonstrate exceptional durability against metal-to-metal contact during startup sequences and high-load operations. These specifications assure your bearings maintain dimensional stability throughout extended service intervals.

Chemical resistance becomes critical when you’re selecting bearing alloys for EMD applications. Your bearings must withstand exposure to diesel fuel contaminants, combustion byproducts, and acidic compounds that can migrate through the lubrication system. Lubrication compatibility standards confirm proper interaction between bearing materials and specified engine oils.

Key performance requirements include:

  • Minimum wear rate specifications under boundary lubrication conditions
  • Chemical compatibility with synthetic and mineral-based locomotive engine oils
  • Resistance to corrosion from sulfur compounds and acidic combustion residues

You’ll find these standards essential for preventing premature bearing failure and maintaining peak camshaft timing accuracy throughout the bearing’s operational lifecycle. The cam follower assemblies incorporate roller bearing systems that work in conjunction with camshaft bearings to ensure precise valve timing control.

Clearance Tolerances and Installation Requirements for Locomotive Engine Applications

precision bearing clearance specifications

Proper bearing alloy selection pairs directly with precision clearance specifications to achieve peak camshaft performance in locomotive applications. You’ll need to maintain EMD factory clearance specifications ranging from 0.001 to 0.004 inches for standard applications, with a minimum 0.0025 inches recommended for enhanced reliability.

Apply the general bearing clearance rule of 0.00075 to 0.0010 inches per inch of shaft diameter as your baseline calculation. For high-performance applications, you’ll add an additional 0.0005 inches to maximum calculated clearance values. Your vertical measurement must be taken at 90 degrees to the split line for accurate specifications.

Use dial bore gauges when bearings are installed at specified torque without the shaft present. Your installation checklist should include measurements at front, center, and rear positions of each bearing location. Account for housing bore variations of plus or minus 0.0005 inches and crankshaft journal tolerances of plus or minus 0.0003 inches during final clearance calculations. Compensate for tolerance variations by mixing half shells of bearings in incremental thicknesses from bearing manufacturers to achieve your target clearance specifications.

Tri-Metal Vs Bi-Metal Construction Performance Characteristics

While both tri-metal and bi-metal bearing constructions serve locomotive camshaft applications effectively, their fundamental structural differences create distinct performance profiles that’ll directly impact your engine’s reliability and maintenance intervals.

Tri-metal bearings feature steel backing, copper-lead intermediate layer, and lead-based overlay measuring 0.0005-0.0008″ thick. However, overlay vulnerability represents their primary weakness—once this thin surface layer wears through, anti-friction properties deteriorate dramatically. You’ll find tri-metal construction rarely specified for camshaft applications due to this critical limitation.

Bi-metal bearings eliminate overlay vulnerability through aluminum alloy lining approximately 0.010″ thick bonded to steel backing. This construction provides superior misalignment tolerance and accommodates geometric defects that would compromise tri-metal performance. The aluminum alloy lining delivers improved conformability characteristics that enhance bearing performance under varying operating conditions.

  • Bi-metal bearings offer virtually identical load capacity with enhanced durability
  • Aluminum construction tolerates far greater wear than tri-metal overlay systems
  • Mixed lubrication conditions favor bi-metal designs over vulnerable tri-metal overlays

Surface Finish and Journal Specifications for Optimal Bearing Performance

polished camshaft journals precise clearances

Since bearing performance depends critically on surface interactions between journal and bearing materials, achieving ideal camshaft journal surface finish becomes paramount for locomotive applications. You’ll need polishing to 10 micro-inches Ra or better for peak performance, with superfinished surfaces reaching Ra 0.01 for maximum hardness and minimum friction in high-performance applications.

Your polishing direction must match the camshaft’s operational rotation in the engine for proper surface preparation. You should avoid honing bearing inner diameters since this process will embed grit particles that cause shaft wear. Instead, you’ll achieve better results grinding journal diameters to reach proper clearances.

For locomotive applications, you’ll require clearances spanning .003″ to .004″ for best results. Your surface finish directly impacts bearing fatigue strength under high loading conditions. You can utilize three-stage superfinishing processes with ceramic chippings and progressively finer grinding pastes for competition-level applications requiring maximum performance characteristics.

Material Stability Requirements Under High-Temperature Locomotive Operating Conditions

thermally stable bearing alloys

When locomotive engines operate at elevated temperatures exceeding 200°F, you’ll find that bearing alloy stability becomes the determining factor between reliable performance and catastrophic failure. Your material selection must prioritize microstructural stability to prevent grain boundary degradation and dimensional changes during thermal cycling.

Copper-based alloys deliver exceptional thermal conductivity while maintaining structural integrity under extreme heat conditions. Steel-backed copper-plated configurations combine high-strength frameworks with superior wear characteristics, ensuring oxidation resistance throughout extended operation cycles. You’ll need materials that demonstrate consistent thermal expansion coefficients to maintain critical bearing clearances.

Key stability requirements include:

  • Thermal expansion compatibility – Materials must match camshaft expansion rates to prevent clearance deviations
  • Chemical inertness – Alloys require resistance to lubricant degradation and corrosive byproducts at elevated temperatures
  • Microstructural integrity – Grain structure stability prevents material property changes during temperature fluctuations

Lead-based babbitt overlays with tin content provide self-compensating properties essential for locomotive temperature variations.

Frequently Asked Questions

What Are the Typical Replacement Intervals for Locomotive Camshaft Bearings?

You’ll replace locomotive camshaft bearings at 80% of their calculated service life, typically coinciding with major engine overhauls every 3,000 hours. This preventive approach proves effective against catastrophic failures. Your routine inspections during 750-hour oil changes detect early wear indicators, while continuous load cycling from varying operational demands accelerates degradation patterns. Temperature monitoring and vibration analysis provide critical data for optimizing replacement timing based on actual bearing condition rather than fixed schedules.

How Do You Properly Measure Bearing Clearances During Installation?

You’ll measure bearing clearances using a dial bore gauge at vertical positions 90 degrees from the split line. Position the crankshaft at bottom dead center, then insert telescopic gauges between crank webs and bearing keeps. Take readings at front, center, and rear positions, accounting for thermal expansion effects. Standard clearance ranges from 0.00075 to 0.0010 inches per shaft diameter inch, with high-performance applications requiring additional 0.0005-inch tolerance.

Which Bearing Alloy Offers the Best Cost-To-Performance Ratio for EMD Engines?

Like striking gold in engineering economics, babbitt alloy delivers your ideal cost-to-performance ratio for EMD engines. You’ll find it outperforms expensive nickel chrome alternatives while maintaining superior self-compensation characteristics. Unlike costly titanium aluminide options, babbitt’s tolerance management capabilities reduce installation precision requirements, lowering labor costs. You’re getting enhanced load capacity, wear resistance, and manufacturing variance accommodation at fraction of premium alloy pricing.

What Causes Premature Bearing Failure in Locomotive Camshaft Applications?

You’ll encounter premature bearing failure primarily from oil contamination carrying abrasive particles that score bearing surfaces and inadequate lubrication creating metal-to-metal contact. Thermal expansion from excessive operating temperatures accelerates bearing material deterioration, while poor installation practices misalign components. Contaminated oil systems, blocked oil passages, and insufficient oil film thickness destroy bearing integrity. High-performance diesel loading exceeds material fatigue limits, causing catastrophic failure.

Are Aftermarket Bearing Brands Compatible With OEM Locomotive Engine Specifications?

Yes, aftermarket bearing brands demonstrate full compatibility with OEM locomotive engine specifications through direct cross-reference part numbers and engineered tolerances. You’ll find aftermarket compatibility maintained via precise dimensional matching and metallurgical standards that meet or exceed original specifications. However, warranty implications may vary between manufacturers, so you should verify coverage terms before installation to make certain your locomotive’s powertrain protection remains intact.

Why Do Locomotive Camshaft Bearings Fail Prematurely?

Why Do Locomotive Camshaft Bearings Fail Prematurely?

Your locomotive camshaft bearings fail prematurely due to oil starvation (causing over 60% of failures), installation errors creating misaligned oil holes, and excessive thermal stress from high-performance operations. Contamination introduces abrasive particles that destroy bearing surfaces within minutes, while mechanical misalignment accounts for 12.6% of failures through bore distortion and improper clearances. Heavy-duty overloading compounds these issues, preventing adequate cooling and accelerating material fatigue that systematically compromises bearing integrity before reaching designed service intervals.

Key Takeaways

  • Oil starvation from pump failures, blocked passages, or misaligned oil holes causes over 60% of premature bearing failures.
  • Installation errors like flipped bearing halves and misaligned oil holes block lubrication and create stress concentrations.
  • Mechanical misalignment and bore distortion prevent proper oil film formation and create uneven load distribution.
  • Contaminated oil loses protective properties, leading to metal-on-metal contact that destroys bearings within minutes.
  • Debris particles as small as 10 microns from contaminated assembly procedures cause catastrophic surface damage immediately.

Lubrication System Breakdowns That Destroy Camshaft Bearings

oil starvation destroys camshafts

Beyond mechanical stress and manufacturing defects, lubrication system breakdowns represent the primary destroyer of locomotive camshaft bearings, with oil starvation alone accounting for over 60% of premature bearing failures in diesel engine applications.

You’ll encounter several critical failure modes that systematically destroy bearing integrity. Oil pump malfunctions and pressure relief valve failures prevent adequate circulation, while pump cavitation reduces effective oil delivery to bearing surfaces. Dry starts without pre-lubrication systems expose bearings to immediate metal-to-metal contact damage.

Your engine’s oil delivery system becomes compromised when suction screens block or filters clog, restricting flow rates under operating loads. Blocked oil passages from misassembled components prevent proper lubrication flow to critical surfaces. Oversized bearing bores create excess clearance that allows harmful camshaft movement and reduces effective lubrication support. When oil film breaks down between bearing and journal, you’ll see distress starting at the bearing center and progressing outward, ultimately causing wiping action and hot short failure.

Installation Errors That Lead to Bearing Failure

You’ll encounter bearing failures when installation procedures compromise critical alignment specifications and contamination control protocols. Misaligned oil holes block lubrication passages by up to 50%, while improper bearing orientation creates stress concentrations that exceed material limits within 200 operating hours. Contaminated assembly procedures introduce abrasive particles that accelerate wear rates and prevent proper oil film formation between camshaft journals and bearing surfaces. Incorrect bearing size results in poor fit and excessive camshaft movement that compromises the structural integrity of the entire bearing system.

Misaligned Oil Holes

Installation errors can wipe out even the highest-quality locomotive bearings when oil holes don’t align properly between the bearing and engine block. You’ll see catastrophic lubrication failure when oil hole orientation prevents adequate flow to camshaft journals during operation. Misaligned passages create localized overheating that extends from bearing journals onto the camshaft itself, while bearing overlay mismatch compounds the problem by disrupting oil distribution patterns.
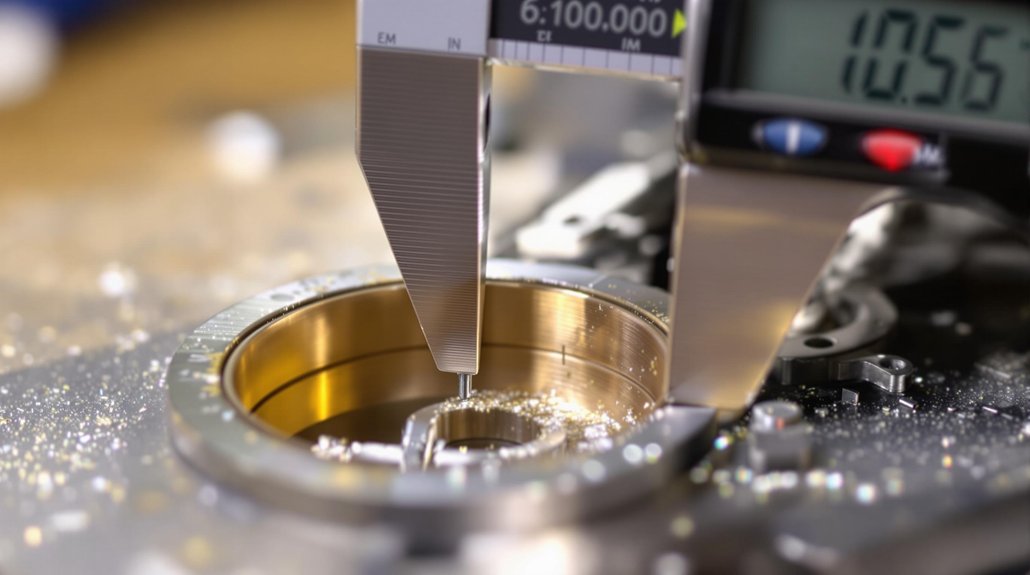
Partial blockage reduces oil volume reaching critical bearing surfaces, and complete blockage eliminates lubrication entirely. You’ll notice bearing journal discoloration indicating insufficient lubrication from blocked passages. The increased friction accelerates bearing wear exponentially, creating uneven wear patterns that signal distortion. Excessive clearance space allows camshaft movement, reducing lubrication and support while contributing to bearing journal damage. Precise alignment during installation avoids these failures and guarantees proper camshaft lubrication throughout operation.
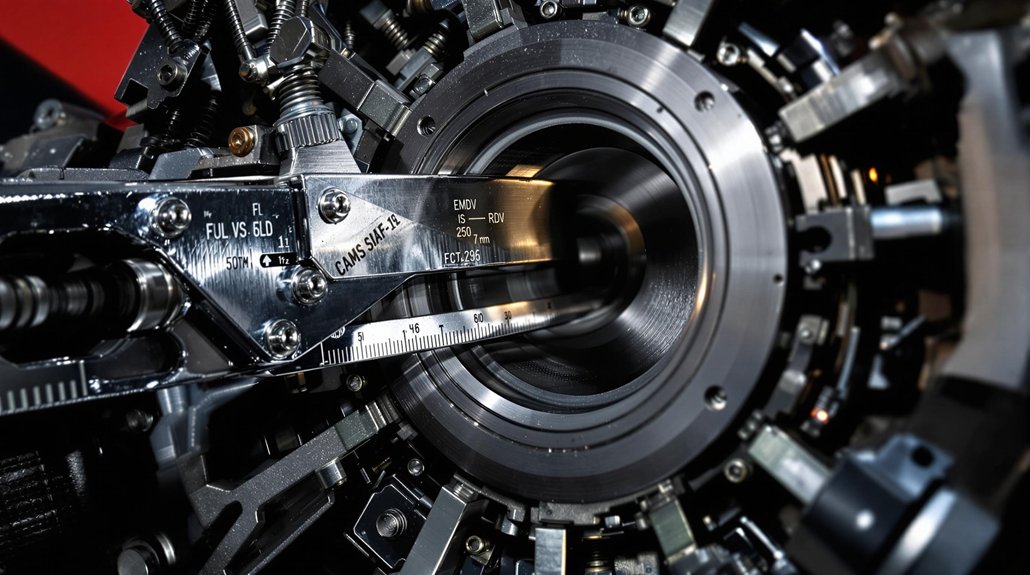
Improper Bearing Orientation

When locomotive camshaft bearings aren’t oriented correctly during installation, you’re setting up a cascade of failures that’ll destroy even premium bearing materials within hours of operation. Incorrect orientation disrupts the critical oil film formation between bearing and journal surfaces, creating metal-to-metal contact that generates excessive heat and wear particles.
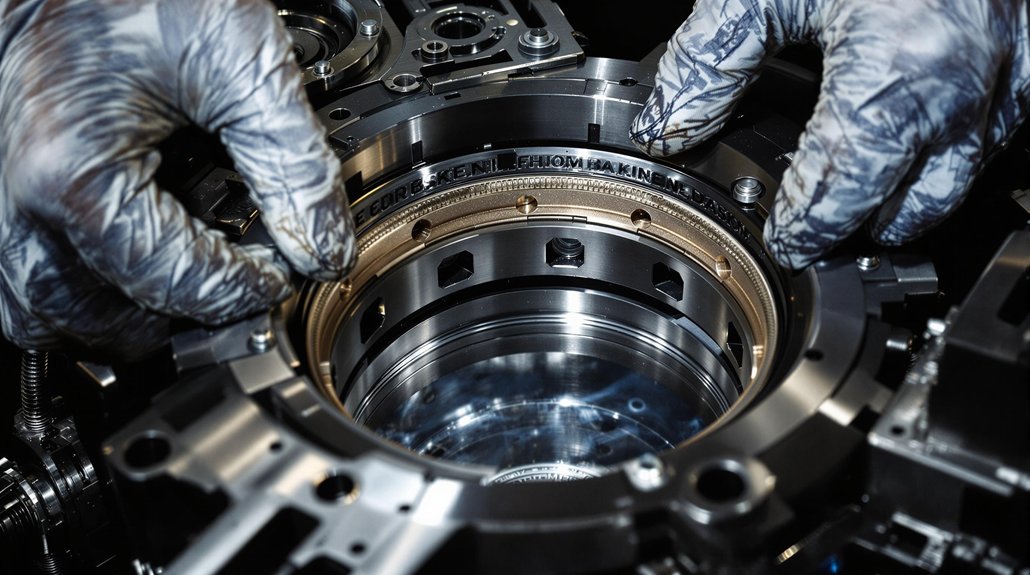
Flipped halves represent the most catastrophic orientation error you’ll encounter. When bearing shells are reversed, oil holes misalign with housing passages, starving lubrication systems and preventing proper oil distribution. This misalignment also affects bearing crush specifications, reducing the interference fit that maintains bearing stability under dynamic loads. You’ll observe accelerated journal scoring, bearing material transfer, and complete lubrication breakdown when orientation errors compromise the hydrodynamic lubrication envelope essential for camshaft bearing longevity. These installation errors often result from over-tightened bearing caps, which compound the orientation problems by creating uneven stress distribution across bearing surfaces.
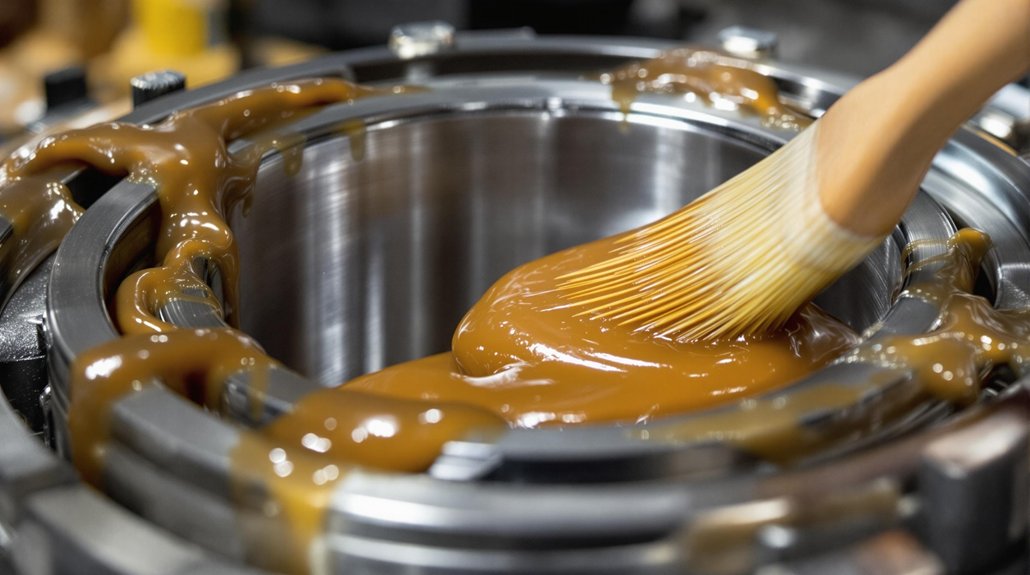
Contaminated Assembly Procedures

Contaminated assembly procedures destroy locomotive camshaft bearings faster than any other installation error, with debris particles as small as 10 microns creating catastrophic surface damage within the first operating cycle. You’ll compromise bearing integrity when compressed air blowing pushes contaminants deeper into surfaces instead of removing them. Assembly airflow systems must maintain positive pressure while filtering particles to prevent contamination introduction.
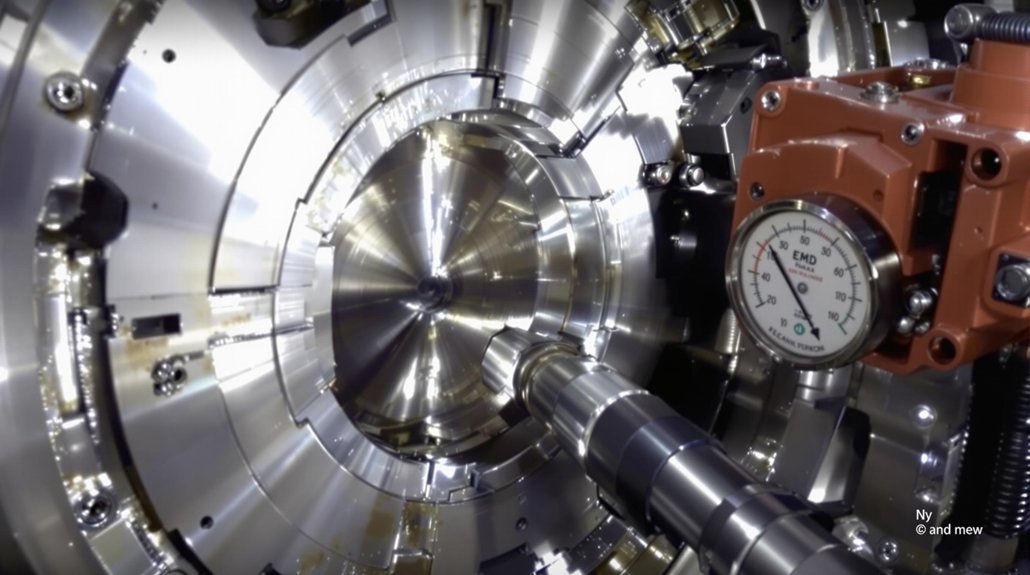
Tooling contamination transfers metal particles directly onto bearing journals during installation. You’re creating abrasive conditions when dirt embeds in bearing material, causing immediate surface scoring. Blocked oil passages result from misaligned holes during improper installation, preventing lubrication flow. Impact guns distort bearing housings, affecting oil film thickness. You’ll guarantee bearing longevity by implementing thorough cleaning protocols, proper torque specifications, and contamination-free assembly environments.
Contaminated oil immediately loses its ability to provide adequate lubrication protection, leading to metal-on-metal contact that destroys bearing surfaces within minutes of operation.
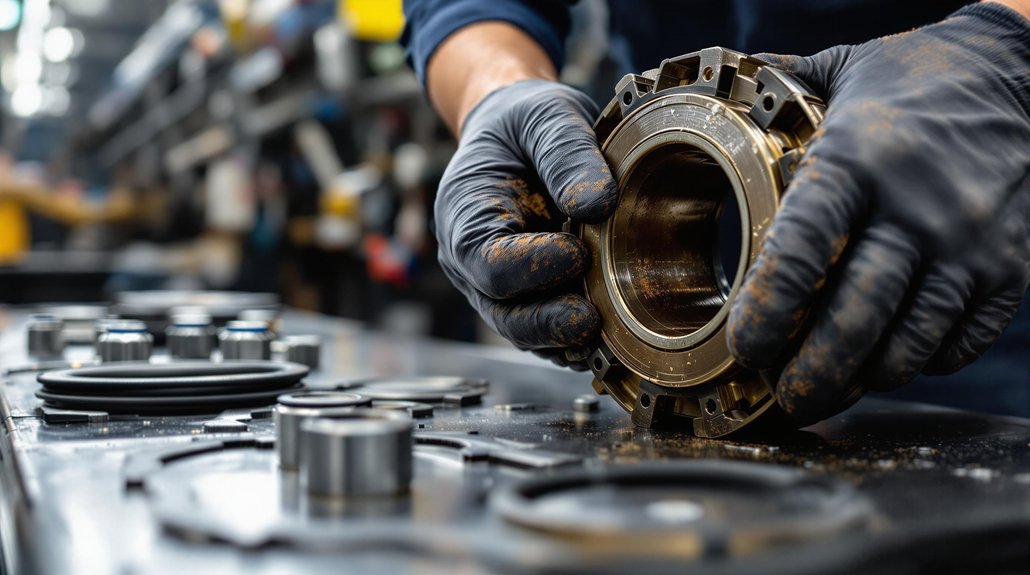
Mechanical Misalignment and Structural Support Defects

camshaft bearing structural failure

When you’re diagnosing camshaft bearing failures, you’ll find that mechanical misalignment creates direct friction damage that accounts for 12.6% of premature failures across engine applications. Your bearing bore distortion prevents adequate oil film formation between surfaces, while camshaft support misalignment blocks critical lubrication passages and generates excessive heat buildup. These structural defects compromise load distribution across bearing surfaces, creating the foundation for accelerated wear patterns that’ll ultimately destroy your locomotive’s camshaft system. The babbitt overlay construction used in many cam bearings lacks the tri-metal design found in rod and main bearings, making them more susceptible to delamination under mechanical stress.
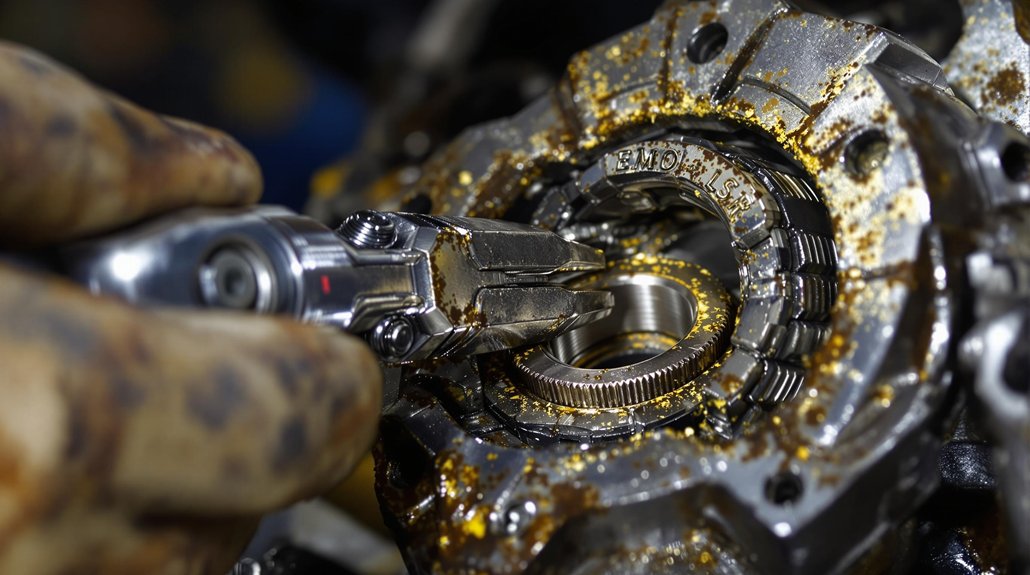
Bearing Bore Distortion

Beyond surface contamination issues, bearing bore distortion represents one of the most complex failure mechanisms affecting locomotive camshaft systems. You’ll encounter progressive block deformation that allows camshafts to gradually adapt before complete failure occurs. When bearing housing bores become undersize, oversize, or out-of-round, they create immediate operational problems requiring bore annealing and thermal relaxation procedures.

Engine blocks sometimes utilize oversize OD bearings as salvage operations, though replacement parts become difficult to obtain. Excessive clearance space allows damaging camshaft movement within bores, while steel backing yields during installation in undersize holes. You can identify distortion through uneven wear patterns and “X”-shaped contact marks. Polymer liners and composite sleeves offer solutions for correcting bore irregularities and restoring proper bearing support geometry. Finished-In-Place bearings require precision machining during rebuilding, introducing variables not present in original assembly configurations.

Camshaft Support Misalignment

Structural support defects compound the challenges you face with bearing bore irregularities by introducing systematic misalignment throughout the camshaft assembly. When bearing supports lack proper positioning, you’ll observe shaft wobble that creates concentrated stress points on journal surfaces. This misalignment disrupts load distribution patterns and generates excessive heat buildup.

Misalignment EffectResulting Damage
Concentrated stress pointsJournal scoring
Disrupted oil flow patternsBearing blackening
Excessive clearancesAccelerated wear

Installation errors worsen these conditions by blocking oil holes and creating inconsistent support structures. You’ll notice journal scoring develops rapidly when misaligned bearings concentrate loads on specific contact areas. Temperature-related expansion differences between components further amplify existing alignment problems, creating cascading failure effects that compromise valve timing precision. The resulting timing disruption significantly impacts locomotive power output and operational efficiency across the entire assembly.

Excessive Operating Loads and Harsh Service Conditions

excessive loads degrade bearings

Although locomotive camshaft bearings are engineered to withstand substantial operational forces, excessive loading conditions and harsh service environments consistently push these critical components beyond their design thresholds. When you operate locomotives under heavy-duty conditions, overloading accounts for 8.1% of premature bearing failures, while insufficient lubrication contributes another 11.4%. These concentrated mechanical stresses create uneven load distribution across bearing surfaces, accelerating material breakdown beyond designed service life.

You’ll encounter elevated operating temperatures that break down lubrication systems, causing catastrophic failures when lead content melts and damages shaft surfaces. Thermal expansion creates improper clearances, while hot short conditions result in surface wiping. Continuous high-load operations prevent adequate cooling periods, and severe duty cycles exceed normal design parameters. The disrupted timing mechanisms cause engine misfires that further compromise locomotive performance and accelerate component deterioration. Marine and heavy-duty applications subject your bearings to extreme environmental stress, where contaminants combined with excessive loads markedly reduce service life expectancy. Effective overload mitigation and strategic duty cycling become essential for maintaining bearing integrity.

Contamination Sources and Engine Cleanliness Issues

contamination driven camshaft bearing failures

Within locomotive engine systems, contamination represents the primary threat to camshaft bearing longevity, accounting for the majority of premature failures through multiple pathways that compromise bearing surface integrity. You’ll encounter hard particles creating sharp-edged dents with concentrated stress points, while polymer particles extrude under 200,000 psi contact pressures, forming shallow surface damage. Metallic debris acts like grinding wheels against journal surfaces when protruding from embedded positions.

Your engine block cleaning protocols directly determine bearing survival rates. Inadequate cleaning practices allow debris accumulation, while compressed air redistribution worsens particle embedding during assembly. You must maintain extremely clean conditions throughout installation procedures.

Oil system contamination introduces wear fragments from other components, particularly when you neglect filter replacement or extend change intervals. Environmental contaminants enter through compromised air filtration systems, embedding road dirt and sand particles into bearing linings, creating metal-to-metal contact and accelerated wear patterns. Iron particles released from cast engine blocks can accelerate oil oxidation and create secondary lubrication problems that further compromise bearing performance.

Design Specifications and Clearance Problems

precise clearances prevent failures

Beyond contamination factors, your bearing failures often stem from fundamental design specification mismatches and clearance control deficiencies that create destructive operating conditions. Locomotive applications demand precise bearing clearances between .003″ to .004″ for peak performance, yet tolerance stack-up from block machining, shaft diameter variations, and bearing manufacturing creates compounded errors that push clearances beyond acceptable limits.

Your material selection directly impacts failure rates. Aluminum alloy bearings lack the self-compensation properties of softer materials, requiring stricter clearance control. Copper-based alloys provide superior fatigue resistance under locomotive’s extreme loads, while steel-backed copper-plated materials handle the most demanding applications.

Specification ParameterCritical Requirement
Minimum Clearance.003″ locomotive applications
Surface Finish10 micro-inches Ra maximum
Material SelectionCopper alloys for high loads
Measurement ProtocolVerify at installation
Temperature StabilityAccount for thermal expansion

You must measure clearances at installation since manufacturing tolerances compound unpredictably, creating bearing distortion that mirrors block bore irregularities.

Oil Quality Degradation and Viscosity Breakdown

viscosity breakdown causing bearing failure

Degraded oil destroys your camshaft bearings through viscosity breakdown that eliminates the protective hydrodynamic film essential for preventing metal-to-metal contact. When you operate locomotives under high-load conditions, oil temperature spikes accelerate molecular breakdown, reducing viscosity below critical thresholds required for bearing protection.

Oxidation products form when oil molecules react with oxygen at elevated temperatures, creating acidic compounds that corrode bearing surfaces and thicken remaining oil. You’ll notice sludge formation as these oxidation products accumulate, restricting oil flow through critical bearing passages.

Additive depletion occurs simultaneously as anti-wear agents, viscosity improvers, and antioxidants become exhausted through normal operation. Without these protective additives, your oil can’t maintain stable viscosity under thermal stress. The resulting thin oil film collapses under bearing loads, causing direct metal contact that generates heat, accelerates wear, and ultimately leads to catastrophic bearing failure in your locomotive’s camshaft system.

thermal degradation of camshaft bearings

Temperature spikes from viscosity breakdown create a cascade of thermal damage that systematically destroys your locomotive’s camshaft bearings through multiple failure mechanisms. High-performance engines generate excessive cylinder pressures that compound thermal stress effects, while thermal gradients across bearing surfaces create stress concentration points that accelerate material fatigue.

Thermal SourceTemperature ImpactFailure Mechanism
Engine OperationElevated bearing tempsMaterial fatigue acceleration
Manufacturing GrindingResidual thermal stressReduced operational lifespan
Adjacent Motor Components66.9% stress increaseNon-uniform heat distribution
Cyclic LoadingTemperature fluctuationsDimensional tolerance changes

Your bearing overlay materials lose critical strength properties at elevated temperatures, while thermal expansion differentials between components create internal mechanical stresses. Manufacturing processes introduce additional thermal damage through grinding operations and heat treatment cycles. When traction motor heating combines with operational loads, you’ll experience maximum stress concentrations that systematically compromise bearing integrity before visible symptoms appear.

Frequently Asked Questions

How Often Should Locomotive Camshaft Bearings Be Inspected for Early Wear Signs?

You should inspect locomotive camshaft bearings every 750 hours for oil changes and conduct thorough assessments at 3,000-hour intervals. Implement monthly inspections focusing on visual examination of raceways, manual rotation testing, and systematic mounting alignment checks. Integrate vibration monitoring systems with daily component inspections to detect early wear indicators like cracking, flaking, or smearing. Document all findings for regulatory compliance and performance tracking.

What Specific Tools Are Needed to Properly Measure Camshaft Bearing Clearances?

You’ll need micrometers for precise journal measurements, dial bore gauges with dial indicator attachments for actual clearance calculations, and plastigage measurement strips for quick visual verification. Calibrate all precision instruments before use, ensuring you follow EMD-specific torque specifications during assessment. Clean all surfaces thoroughly before applying plastic gauges across the entire journal surface. These tools provide thorough data for accurate bearing clearance analysis and preventive maintenance decisions.

Can Rebuilt Camshaft Bearings Perform as Well as New OEM Bearings?

You’ll find rebuilt camshaft bearings can achieve performance parity with OEM units when properly reconditioned using precision machining and OEM specifications. However, you’re facing warranty concerns since rebuilt bearings typically offer shorter coverage periods and may lack thorough failure protection. You’ll need to verify the rebuilder’s quality control processes, material specifications, and dimensional tolerances match OEM standards. Performance depends on the rebuilding facility’s technical capabilities and adherence to manufacturer specifications.

Which Bearing Materials Work Best for High-Mileage Locomotive Engine Applications?

Like a marathon runner needs endurance gear, you’ll find aluminum-based bi-metal bearings excel in high-mileage locomotive applications. Their 0.010″ thickness tolerates extensive wear while superior conformability accommodates misalignments that develop over time. Bronze alloys deliver exceptional fatigue resistance for heavy loads, though polymer composites show promise in specific applications. You’ll achieve peak performance by selecting aluminum bi-metal construction over tri-metal alternatives for extended service intervals.

How Much Does Premature Camshaft Bearing Failure Typically Cost in Repairs?

You’ll face repair costs ranging from $15,000 to $45,000 per locomotive when camshaft bearings fail prematurely. Engine teardown, bearing replacement, and associated component damage drive these expenses higher. You’re looking at 3-7 days downtime, compounding operational losses. Insurance claims typically cover catastrophic failures but exclude wear-related issues. Factor in secondary damage to camshafts, cylinder heads, and timing systems when calculating total repair costs for your fleet maintenance budget.

10 Essential Camshaft Bearing Installation Tips for EMD Locomotives

10 Essential Camshaft Bearing Installation Tips for EMD Locomotives

You’ll guarantee reliable EMD locomotive performance by inspecting bearings thoroughly during removal, measuring clearances with Plastigage to maintain proper specifications, and aligning camshafts using factory tool 8212763. Position oil holes at 4:00 o’clock for ideal lubrication, apply EP grease to contact surfaces, and clean all galleries entirely. Replace seals with precise 3/32″ protrusion, torque drive plugs to 100-120 ft-lbs per EMD specifications, verify tolerances don’t exceed 0.015″, and document everything meticulously. These procedures form the foundation for extensive bearing maintenance protocols.

Key Takeaways

  • Apply 650 ft-lbs torque on EMD 567C main bearings and use Plastigage for accurate oil clearance measurements.
  • Position oil holes downward at 4:00 clock position to ensure optimal lubrication flow during operation.
  • Use factory-specified alignment tools like tool 8212763 with dial indicators maintaining ±0.001″ accuracy for precise positioning.
  • Apply premium-grade EP grease to bearing surfaces before installation to prevent metal-to-metal contact during startup.
  • Document six measurements per bore and maintain ≤0.004″ alignment deviation for proper oil distribution compliance.

Inspect Bearings Thoroughly During Removal to Assess Replacement Requirements

thorough camshaft bearing inspection

Before you begin camshaft bearing removal, establish a systematic inspection protocol that’ll preserve critical diagnostic information and prevent costly oversights. Use OEM-approved tools like ball micrometers and dial indicators for precise bearing inspection measurements. Compare all findings against EMD-established tolerances to determine replacement criteria.

During visual examination, identify heat discoloration, scoring, pitting, or fretting on bearing surfaces. Check camshaft journal concentricity relative to bearing bores using serration gauges to detect misalignment. Inspect oil feed holes with magnifying glass or borescope, ensuring passages remain clear of carbon buildup.

Mark bearing orientation using center punch before removal to prevent side reversal during reassembly. Match wear patterns with original cap positions using existing fret marks. Reject bearings immediately if they exhibit metal transfer or fretting depth exceeding manufacturer limits. Document all defects systematically in maintenance logs for trend analysis and compliance with EMD protocols. Verify that EP additive lubricant has been properly applied to all bearing surfaces before conducting the final inspection checks.

Measure Bearing Clearance Precisely to Prevent Camshaft Flex Issues

precise bearing clearance measurement

After completing your bearing inspection and documentation, measuring bearing clearance becomes your next critical step in preventing costly camshaft failures. Use plastic gauges (Plastigage) for accurate oil clearance checks, ensuring zero camshaft rotation during measurement. Apply 650 ft-lbs torque on EMD 567C main bearings before taking measurements to assess out-of-round tolerances.

Your bearing measurement techniques must include dial indicators and micrometers to verify journal diameters. Document six measurements per bore—three per end—to calculate accurate averages for compliance with camshaft clearance standards.

Shell CombinationExpected ClearanceApplication
Half-standard + Standard2.5 thouIdeal fit
Half-standard + Standard X>3 thouLooser tolerance
Full Standard X>3 thouMaximum clearance
Standard + StandardVariableStandard operation
Shimmed ConfigurationAdjustableCustom applications

Calibrate all measurement tools before use and avoid contamination during Plastigage tests to prevent skewed readings that compromise bearing performance. Remember that wider gauge measurements indicate reduced oil clearance, requiring immediate attention to prevent bearing damage.

Align Camshaft With Engine Guides Using Factory-Specified Tools

precise camshaft alignment tools

You must use factory-specified tools like tool 8212763 when installing aligning components into engine guides to guarantee precise camshaft positioning. Proper tool assembly requires compressing inserts on puller plates and aligning them with spindle shoulders before driving into position. Following these precision alignment procedures prevents costly misalignment issues that can cause premature bearing failure and excessive vibration. Use dial indicators to measure any radial or angular misalignment during the camshaft installation process to ensure optimal bearing performance.

Factory Tool Requirements

When aligning camshaft components in EMD locomotives, you’ll need factory-specified tools that guarantee precise bearing installation without damaging critical engine components. Tool compatibility becomes critical when selecting equipment like Cloyes Timing Camshaft Gear Installation Tools with spline-drive configurations for 13/16″ hex sizes. JEGS Cam Bearing Tool Set (Part #555-80597) provides specialized adaptors essential for proper installation techniques in EMD applications.

Essential factory tool requirements include:

  • Extended alignment bars (24″ & 55″ lengths) for leveraging camshaft guides without bearing damage
  • Monaco Tool Cam Bearing Adaptor Kits with engine-specific configurations for locomotive applications
  • Precision micrometers and dial indicators maintaining ±0.001″ accuracy for clearance verification
  • Woodruff keys ensuring exact shaft-to-drive-gear alignment per EMD timing specifications

Professional installation demands tools manufactured from high-quality materials to ensure consistent performance throughout the bearing installation process. These specifications align with industry standards for locomotive maintenance operations requiring maximum durability and precision tolerances.

Precision Alignment Procedures

Mount dial indicators on surface gauges to measure vertical bore alignment relative to case line data. Zero your indicators at the No.1 main bearing bore’s accessory end as your reference point. Record readings at main foundation mounting points, ensuring discrepancies remain under 0.25 mm.

Cross-check camshaft positioning against manufacturer guides for cylindrical surfaces and keyways. Your installation tools must integrate with EMD-specific equipment like 8212763/8212764 for precise bore alignment. Calculate case line data mathematically, combining vertical measurements with reference specifications to verify proper camshaft materials positioning before final assembly.

Use precision tools like dial bore gauges and micrometers to verify bearing clearances according to EMD specifications throughout the alignment process.

Position Oil Holes Downward for Optimal Lubrication Flow Distribution

optimal camshaft oil positioning

Although proper camshaft bearing installation requires multiple crucial steps, positioning oil holes downward stands as the most important factor for maintaining consistent lubrication flow in EMD locomotives. When you’re installing camshaft bearings, you’ll need to position oil holes at the 4:00 clock position to counter journal downward pressure effectively. This oil hole positioning creates ideal lubrication optimization by working with gravity rather than against it.

Never position holes at 6:00, as this risks complete oil shut-off under load conditions. You must maintain ≤0.004″ deviation during alignment to guarantee proper oil distribution throughout the bearing surface.

Key positioning requirements include:

  • Orient holes based on clockwise rotation direction for proper flow dynamics
  • Avoid loaded areas where high pressure excludes oil from critical surfaces
  • Align with engine feed passages in non-grooved lubrication systems
  • Account for centrifugal forces that affect oil distribution at operating speeds

Proper hole positioning prevents premature bearing failure and maintains consistent lubrication under all operating conditions. The 4:00 o’clock position allows oil to be pulled around by cam rotation, ensuring continuous lubrication flow during operation.

Apply EP Grease to Bearing Contact Surfaces Before Installation

apply ep grease properly

You’ll need to apply premium-grade extreme-pressure (EP) grease to all bearing contact surfaces before installing camshaft bearings in your EMD locomotive. This specialized lubricant provides critical protection during initial startup when oil pressure hasn’t yet established full hydrodynamic lubrication. Proper application technique guarantees uniform coverage across bearing journals and prevents metal-to-metal contact that could damage expensive components. Remember that main bearings should be replaced one at a time to maintain proper oil clearance throughout the engine assembly.

EP Grease Benefits

Three critical performance characteristics make EP (Extreme Pressure) grease essential for EMD locomotive camshaft bearing installations. The sulfur-phosphorus additives in EP grease formulation prevent metal-to-metal contact during startup cycles when oil film hasn’t fully developed. You’ll achieve superior protection against wear under high mechanical stress conditions typical in locomotive duty cycles.

EP grease delivers exceptional heat resistance up to 200°C+, maintaining stable viscosity through repeated thermal cycling. The lithium-based thickener guarantees compatibility with bearing metals while extending lubrication intervals beyond 30,000-mile equivalents. Anti-corrosion additives protect ferrous components in humid environments, while tackiness agents maintain adhesion during high-speed rotation. Proper application prevents engine seizing during the critical initial startup phase when oil pressure systems are still building.

  • Base oil stability prevents degradation under extreme temperature fluctuations
  • NLGI Class 2 consistency balances pumpability with placement accuracy
  • Antioxidants neutralize acidic byproducts from thermal oxidation
  • Microscopic fillers provide additional anti-wear protection during boundary lubrication

Proper Application Technique

Before installing camshaft bearings in EMD locomotives, you must apply EP grease with meticulous precision to guarantee peak performance and prevent premature failure. Clean each bearing surface thoroughly with solvent to eliminate contaminants that compromise adhesion. Apply grease exclusively to bearing inner surfaces using calibrated applicator gauges, working in a radial pattern from center to edge. This prevents air pockets while ensuring even distribution across load paths.

Never coat outer diameters or engine block surfaces, as this creates improper fits. Remove excess grease with lint-free cloth to maintain controlled thickness. Work sequentially across surfaces at consistent room temperature to preserve grease viscosity. Verify that oil feed holes are properly aligned and unobstructed by grease to ensure adequate lubrication flow during operation. Post-grease application, inspect all surfaces to confirm proper coating without excessive buildup that could migrate during operation.

Use Specialized Insert Compressors for Dimensionally Accurate Fitting

precise camshaft bearing installation

Two critical factors determine successful camshaft bearing installation in EMD locomotives: precise diameter reduction and controlled insertion force. You’ll need specialized insert compressor types like tool 8212763 to achieve the dimensional accuracy required for fitting bearings through restricted bore openings. These installation techniques guarantee proper alignment while preventing radial stress damage to camshaft bore surfaces.

Your compressor tool selection directly impacts bearing longevity and engine performance. Component-specific assembly sequences maintain critical alignment tolerances during insertion operations. Prior to bearing installation, main caps should be torqued to manufacturer specifications to ensure proper block stability.

  • Use striker-driven force application for controlled thrust, minimizing stress on bore surfaces
  • Verify marked positional alignment between tool strike surfaces and bearing boundaries
  • Apply multistage spindle preparation with compressing tools (8212764) secured by threaded fasteners
  • Confirm insert orientation aligns with cylinder bore geometry for proper shoulder thread engagement

Always perform dimensional clearance verification using precision micrometers after insertion to validate manufacturer specifications before proceeding with reassembly procedures.

Clean All Oil Galleries and Passages to Eliminate Debris Blockages

debris detection and removal

You’ll need systematic debris detection methods to identify contaminants that could compromise camshaft bearing lubrication in your EMD locomotive. Start by conducting thorough oil hole inspections and bore gauging to locate blockages, followed by water contamination checks and dirt impregnation detection on all bearing surfaces. Implement proper gallery flushing techniques using high-pressure washing and pressure testing to guarantee complete debris removal before bearing installation.

Debris Detection Methods

Why do experienced technicians prioritize thorough debris detection before installing camshaft bearings? Contaminated oil galleries create catastrophic bearing failures, making extensive debris detection crucial for successful EMD locomotive maintenance. You’ll need to identify debris sources ranging from metal particles to coolant contamination that compromise bearing longevity. Advanced detection techniques guarantee your installation meets strict cleanliness standards.

Critical debris detection methods include:

  • Ferrography analysis – Use bichromatic microscopes to differentiate metallic particles from nonmetallic contaminants in oil samples
  • Particle size distribution testing – Monitor debris above 10 microns that indicates worn components or inadequate filtration
  • SEM/EDS analysis – Determine particle composition and origin for precise contamination source identification
  • Silicon level tracking – Detect airborne contaminants penetrating through compromised seals or vents

Exception testing protocols trigger immediate corrective action when contamination exceeds safety thresholds.

After identifying contamination through thorough debris detection, you must execute systematic gallery flushing to eliminate every trace of debris from EMD camshaft bearing oil passages. Deliver high-speed fluid flows through galleries to maximize flushing efficiency while attaching dedicated tools to penetrate narrow passages and blind spots.

Flushing ParameterSpecificationSafety Requirement
Flow DirectionAlternating sequencesMonitor pressure gauges
Engine PositionVertical/horizontalSecure on reinforced fixtures
Gallery IsolationTemporary blockingPrevent debris migration
Temperature ControlConsistent levelsAvoid thermal expansion

Sequence operations through interconnected galleries ensuring full coverage. Position engine blocks based on design accessibility and alternate flushing directions for complex geometries. Gallery isolation prevents debris migration during operations. Calibrate pressure gauges within manufacturer-recommended ranges and integrate overflow safety valves.

Replace Seals and Drain Plugs to Prevent Oil Leakage

seal replacement and maintenance

Three critical seal replacement procedures form the foundation of preventing oil leakage during camshaft bearing installation in EMD locomotives. Your seal material selection directly impacts long-term performance, particularly when using phosphate-treated cast iron inserts for lower liner bores under high rotational stresses. Master these installation techniques to guarantee proper sealing between oil pan, crankcase, and end housing components.

Cut seal cord ends precisely to achieve 3/32″ ± 1/64″ protrusion from end plate faces. Apply sealing compound (P/N 8222724) to insert split lines, preventing air infiltration between lower liner bore inserts and liners. Verify groove cleanliness in lower cylinder liner pilots before inserting new seals.

Essential drain plug maintenance procedures include:

  • Inspect drain plugs for cracks, corrosion, or thread damage before reinstallation
  • Clean sealing surfaces with lint-free rags after oil drainage
  • Replace scavenging pump strainer housing seals and verify drainage valve closure
  • Pressure test all drain valve seals and gasket bounding surfaces post-assembly

Torque Drive Plugs to Manufacturer Specifications for Secure Installation

torque plugs to specifications

Torquing drive plugs to precise manufacturer specifications prevents catastrophic bearing failures and maintains structural integrity throughout your EMD locomotive’s operational cycle. Use torque wrench 8157121 with extension 8210136 for accurate application, ensuring your 3/8″ drive torque wrench produces an audible click confirmation. Drive plug connections typically require 100–120 ft-lbs torque, following EMD Spec 8091 compliance standards.

Perform torque calibration before each installation sequence to eliminate over-or under-torquing risks that compromise bearing assemblies. Apply torque in graduated increments rather than single applications, checking for proper thread engagement throughout the process. Non-calibrated tools create dangerous installation variables that’ll lead to premature component failure.

Complete installation verification by rechecking torque values after initial setup to confirm stability. Record all torque specifications for future maintenance reference, ensuring FRA-mandated safety tolerances are met. Dynamic testing post-installation verifies secure drive plug positioning and validates proper camshaft bearing operational parameters.

Verify Installation Tolerances and Document for Future Reference

verify camshaft installation tolerances

Once you’ve completed the drive plug torque sequence, verify installation tolerances using precision measurement tools to confirm your camshaft bearing assembly meets EMD’s critical specifications. Proper tolerance verification guarantees peak bearing performance and prevents premature failure in locomotive service conditions.

Document all measurements systematically to establish an all-encompassing maintenance baseline. Record bearing clearances, alignment positions, and any dimensional variations that fall within acceptable parameters. Your documentation practices should include serial number tracking, installation dates, and technician identification for complete traceability.

  • Bearing clearance measurement: Use precision gauges to verify diametral clearances don’t exceed 0.015″ specifications
  • Alignment verification: Confirm camshaft position relative to numbered cylinder banks in V8 configuration
  • Seal integrity documentation: Record 3/32″ ± 1/64″ seal height compliance at critical junction points
  • Maintenance record integration: Update service history with ISO-standard reporting formats for audit compliance

Store all alignment datasheets with your locomotive’s service documentation for future reference and trend analysis.

Frequently Asked Questions

What Are the Common Signs of Bearing Wear That Indicate Immediate Replacement?

You’ll hear distinct bearing noise like knocking or grinding sounds that signal immediate replacement needs. Watch for oil pressure drops and metal shavings indicating friction damage. Check for engine misfires caused by timing disruptions. Examine bearing surfaces for scoring, pitting, or shiny areas from metal contact. Oil contamination with dark discoloration shows overheating damage. Don’t delay replacement when these critical warning signs appear.

How Often Should Camshaft Bearings Be Replaced in EMD Locomotives?

Coincidentally, bearing wear signs you’ve identified align perfectly with EMD’s established replacement intervals. You’ll replace camshaft bearings every 3 years, 1,367,905 km, or 23,000 MWh during major overhauls on GT46MAC models. Follow maintenance guidelines strictly—don’t rely solely on condition-based decisions. You must adhere to these fixed intervals regardless of apparent bearing condition, as EMD’s procedural requirements guarantee reliability and prevent catastrophic failures through proactive replacement scheduling.

Can Aftermarket Bearings Be Used Instead of OEM Parts for EMD Engines?

You can use aftermarket bearings if they meet strict aftermarket compatibility requirements. Ascertain exact OEM dimensional matching – bore size must be 2.333″ ±0.0005″ for HC-1/HC-2 types. Performance comparison shows aftermarket options like Hamilton Cams’ bearings cost $18.99 versus OEM pricing, but material quality must equal or exceed EMD standards. Verify thermal expansion coefficients, tensile strength, and thickness specifications match exactly to prevent catastrophic engine failure and warranty voidance.

What Causes Premature Camshaft Bearing Failure in Diesel Locomotive Applications?

Like a marathon runner hitting the wall at mile twenty, your camshaft bearings face inevitable breakdown under relentless mechanical stress. You’ll encounter premature failure primarily through camshaft lubrication issues—blocked oil galleries starve bearings of essential film protection. Poor installation creates misalignment, while contaminated oil introduces abrasive particles. Bearing material fatigue accelerates under thermal expansion and excessive loads, causing surface deterioration that compromises your locomotive’s valve timing precision.

Are There Different Bearing Specifications for Various EMD Locomotive Models?

Yes, you’ll encounter distinct bearing specifications across EMD models. Different bearing types include segment bearings in 567C engines versus bracket-integrated bearings in 645 series. You must verify model compatibility since 567C uses segment bearings with flanged caps, while 645 camshafts incorporate bearing brackets within drive gear assemblies. Early models like SW1001 specify Timken tapered roller bearings, whereas later GP40-2 designs require Hyatt roller bearings with crowned rollers for extended service life.

You may also like to read – EMD Owners Group Procedure EMD9314.

Diesel Locomotive Camshaft Bearing Maintenance Intervals

Diesel Locomotive Camshaft Bearing Maintenance Intervals

You’ll maintain diesel locomotive camshaft bearings by changing oil every 750 hours and conducting thorough bearing inspections at 3,000-hour intervals. Monitor oil pressure continuously—execute immediate shutdown when pressure drops below 8 psi to prevent catastrophic damage. Replace turbocharger oil filters at 1,400 hours and perform visual inspections for scoring, pitting, or discoloration. Measure camshaft runout with dial indicators, replacing units exceeding 0.002″ specifications. These protocols form the foundation of advanced bearing protection strategies.

Key Takeaways

  • Standard camshaft bearing maintenance follows 750-hour oil change intervals to ensure proper lubrication and prevent bearing damage.
  • Initial break-in requires oil change after 500 miles to remove metal particles that could damage camshaft bearings.
  • Deep sump systems allow extended 1,000-hour maintenance intervals while standard sumps require 500-hour servicing schedules.
  • Camshaft runout measurements exceeding 0.002″ indicate immediate bearing replacement to prevent catastrophic engine damage.
  • Emergency shutdown protocols activate when oil pressure drops below 7.1-14 psi to protect camshaft bearings from seizure.

Oil System Pressure Requirements for Camshaft Bearing Lubrication

camshaft bearing oil pressure

Three critical pressure thresholds determine whether your diesel locomotive’s camshaft bearings receive adequate lubrication throughout the operating range. You’ll need to maintain 8-12 psi minimum during idle operation to prevent bearing damage. At full speed, target 25-29 psi for ideal lubrication efficiency. CI engines require higher pressures of 28.5-64 psi at rated speed.

Monitor your oil pressure continuously through switches installed directly at camshaft bearings. Low-pressure alerts activate between 7.1-14 psi, depending on your engine type. If pressure drops below 10 psi at idle, you’re facing potential cam bearing failure risks that require immediate attention.

Your warning system will trigger automatic shutdowns when oil pressure falls below critical thresholds, protecting expensive components. Relief valves prevent system overload by restricting maximum pressure. Remember that spun cam bearings reduce system pressure, signaling urgent inspection needs before catastrophic failure occurs. Proper oil entrance position at the 1 o’clock location from bearing loading ensures optimal lubrication flow to prevent premature bearing wear.

Visual Inspection Techniques for Bearing Wear Detection

bearing wear visual inspection

While maintaining proper oil pressure protects your camshaft bearings during operation, regular visual inspection reveals developing problems before they trigger pressure drops or system failures.

During visual inspection for bearing detection, examine bearing surfaces for scoring, pitting, or discoloration indicating insufficient lubrication or contamination. You’ll identify uneven wear patterns showing irregular loading conditions that require immediate bearing replacement. Check for fatigue cracks, scratches, or embedded debris that accelerate bearing degradation.

Visual inspection reveals critical bearing damage through scoring, pitting, and discoloration before catastrophic failure occurs.

Inspect bearing-to-cap seating by loosening caps enough for examination without full removal, preserving critical alignment marks. Document surface finish quality, rejecting bearings with roughened or contaminated surfaces that’ll cause premature failure.

Distinguish between bearing materials during inspection—softer babbitt bearings show wear differently than hardened copper-lead alloys. Look for flat spots or polished surfaces indicating excessive contact pressure. Any visible marking or surface irregularity warrants replacement, as bearing detection through visual inspection prevents costly camshaft damage and maintains locomotive reliability. Measure bearing wear with micrometer accuracy to determine if replacement thresholds have been exceeded.

Camshaft Runout Measurement and Alignment Verification

camshaft runout measurement techniques

Accurate camshaft runout measurement requires precise setup of dial indicators and V-blocks to detect shaft eccentricity before it causes bearing failure or valve timing irregularities. You’ll mount probes perpendicular to journals, ensuring contact points remain clean and properly aligned throughout testing.

For thorough runout analysis, rotate the camshaft through complete 360° cycles while recording measurements at consistent intervals. Set your probe travel range to half the plunger’s capacity, enabling accurate positive and negative deviation recording. This alignment technique captures both axial and radial runout effectively.

Measurement TypeTolerance LimitAction Required
Well-ground cams≤0.001″Continue operation
Acceptable wear0.001″-0.002″Monitor closely
Poor machining>0.002″Replace immediately
Base circle runoutMinimal movementVerify concentricity
Coupling hub deviationDocument valuesTrend analysis

Calculate total runout by subtracting minimum from maximum readings. Replace camshafts exceeding 0.002″ runout immediately to prevent catastrophic bearing damage. Regular run-out checks during scheduled maintenance intervals help identify developing problems before they cause complete mechanical failure.

Bearing Replacement Torque Specifications and Installation Procedures

bearing installation torque specifications

Once you’ve verified camshaft alignment meets specifications, proper bearing installation becomes your next priority to prevent premature failure. You’ll need specific torque values for each engine series: 15-20 ft-lbs for 4.2 engines, 35-40 ft-lbs for 71-series, and 300-325 lb-ft for 92-series engines. Bearing caps require maximum 15 ft-lbs to avoid stripping threads.

Replace all cam bearing bolts and unsettable fasteners during bearing installation. Use serrated lock washers instead of split washers for better retention. Apply thread-locking compound on 92-series engine fasteners to prevent loosening. Work with a calibrated torque wrench for precise application.

During torque verification, confirm gear teeth are fully seated before tightening. Use thrust plates to hold the camshaft position throughout the process. After initial torquing, manually rotate the crankshaft twice and recheck all torque values. This double-verification prevents fastener loosening and confirms proper bearing contact throughout the camshaft’s operational range. Consider subscribing to manufacturer updates for exclusive online offers on replacement parts and technical bulletins.

750-Hour Oil Change Schedule for Bearing Protection

oil change interval guidelines

Three critical factors determine your diesel locomotive’s oil change intervals: sump capacity, operating hours, and bearing protection requirements. Your initial break-in requires an oil change after 500 miles to remove metal particles that compromise bearing maintenance. Follow this with a second change at 50% of standard intervals—typically 7,000 miles if normal operation calls for 15,000.

Your sump capacity dictates ongoing schedules: deep sumps allow 1,000-hour intervals, standard sumps require 500 hours, and shallow sumps need changes every 250 hours. For specialized bearing protection, you’ll replace turbocharger oil filters at 1,400 hours to protect high-speed bearings from contamination.

Oil longevity correlates directly with fuel consumption—schedule changes every 106,000 liters of fuel burned. After two initial oil changes, you can resume standard manufacturer intervals while maintaining dedicated filter schedules for critical bearing systems. Avoid idling the locomotive whenever possible to minimize unnecessary wear during the critical first months following break-in.

3,000-Hour Major Service Bearing Inspection Protocol

bearing inspection service protocol

When your diesel locomotive reaches major service intervals, you’ll conduct thorough bearing inspections that protect critical engine components from catastrophic failure. These extensive inspection intervals require precise procedures to assess bearing wear and determine component serviceability.

Begin by reviewing service manual specifications for camshaft bearing tolerances and gathering precision tools including dial bore gauges and micrometers. Remove oil pans and obstructions, then lift camshafts using proper equipment to prevent bearing displacement. Keep bearing caps minimally engaged during inspection while documenting positions and wear patterns.

Proper preparation with precision instruments and careful camshaft handling prevents bearing damage during critical locomotive engine inspections.

Measure bearing inner diameters and calculate clearances by subtracting cam journal outer diameters. Evaluate out-of-round conditions and compare readings against factory limits. Replace camshafts showing excessive lobe wear, scoring, or dimensional loss. Address journals with out-of-round readings beyond specifications through resurfacing or replacement.

Check for metal shavings in the oil during inspection as these indicate camshaft bearing wear or potential failure conditions requiring immediate attention.

Document findings photographically and maintain alignment marks during reassembly to guarantee proper component positioning and continued operational reliability.

Oil Analysis Testing for Contamination Monitoring

systematic oil contamination monitoring

Since contaminated oil causes 75% of diesel engine failures, you’ll implement systematic oil analysis testing to detect wear metals, chemical degradation, and foreign contaminants before they trigger catastrophic component damage.

Your oil quality monitoring program must target specific contamination sources including water ingress, fuel dilution, and abrasive particles. You’ll establish critical thresholds: iron content exceeding 100 ppm indicates severe bearing wear, while lead levels above 20 ppm signal imminent bearing failure requiring immediate intervention.

Implement these testing protocols for thorough contamination monitoring:

  • Spectral analysis using GOST20759 standards to quantify wear metals (Fe, Pb, Cu, Sn, Al) and detect abnormal degradation patterns
  • FTIR screening to identify water content above 0.5% and oxidation byproducts affecting additive performance
  • Base Number (BN) testing to assess acid-neutralizing capacity and determine oil change intervals
  • Acid Number (AN) analysis to detect fuel sulfur contamination and thermal breakdown products

Schedule analysis every 500 operating hours or when abnormal engine conditions occur. Note that ICP spectroscopy has a particle size detection limit of five to eight microns, which may mask issues from larger wear particles that could indicate significant bearing damage.

Emergency Bearing Failure Response and Mitigation Strategies

emergency bearing failure response

When bearing failure occurs during locomotive operation, you’ll need to execute immediate shutdown procedures to prevent catastrophic engine damage and costly secondary failures. Your detection protocols must focus on critical warning signs including sudden oil pressure drops, unusual vibration patterns, and thermal discoloration on bearing surfaces that indicate imminent failure. You must implement emergency response measures within minutes of detection, as continued operation with compromised bearings can destroy journals, warp cam caps, and require complete engine rebuilds. The metal-on-metal contact from failed bearings will rapidly escalate damage throughout interconnected engine components if operation continues.

Immediate Failure Detection

Although diesel locomotives operate within normal parameters most of the time, bearing failures can develop rapidly and without warning, making immediate detection systems your first line of defense against catastrophic engine damage. Your monitoring equipment must provide real-time alerts when thermal spikes or vibration anomalies exceed predetermined thresholds. Proper sensor calibration guarantees accurate failure prediction before complete bearing seizure occurs.

Establish baseline readings during initial sampling to create reference points for detecting deviations that signal potential bearing deterioration before catastrophic failure occurs.

  • Temperature monitoring – Install thermocouples directly in bearing cups to detect thermal spikes exceeding 180°F above baseline temperatures
  • Vibration analysis – Deploy accelerometers on engine casings to capture amplitude variations and frequency spikes at crankshaft RPM harmonics
  • Oil contamination detection – Monitor lubrication systems for metal debris particles indicating bearing wear progression
  • Pressure tracking – Implement hydraulic flow sensors to alarm at abnormal bearing pressure rates

Critical Response Protocols

Detection systems provide the foundation for response, but your emergency protocols determine whether bearing failure results in minor downtime or catastrophic engine destruction. When failure indicators like vibration spikes or metallic noises occur, execute immediate shutdown procedures to prevent cascading damage. Activate cooling systems to stabilize temperatures while isolating lubrication circuits to prevent debris contamination. Remove metal shavings through thorough oil system cleaning before any reassembly attempts.

Implement damage mitigation by verifying alignment with precision tools and retorquing bearing caps using new bolts in side-to-side patterns. Check oil hole alignment and confirm proper chamfer positioning. Maintain regular oil changes to prevent friction-related bearing deterioration during extended operational periods. Your maintenance frequency adjustments should incorporate contamination analysis results to address filtration weaknesses and prevent recurrence of bearing failures.

Frequently Asked Questions

What Are the Cost Differences Between OEM and Aftermarket Camshaft Bearings?

You’ll find aftermarket camshaft bearings cost 50% less than OEM equivalents, with individual units ranging $18.99-$26.95 versus higher OEM pricing. However, OEM benefits include guaranteed compatibility and brand reliability. Aftermarket risks involve potential quality variations despite ISO 9001 certifications. You’re getting 2-year unlimited mileage warranties from quality aftermarket suppliers, matching OEM coverage. Bulk bearing kits provide better value than individual purchases, reducing your overall maintenance costs considerably.

How Do Temperature Variations Affect Camshaft Bearing Maintenance Interval Scheduling?

You’ll adjust maintenance scheduling based on temperature monitoring data showing thermal stress patterns. Higher temperatures accelerate lubricant breakdown, requiring shortened intervals. You’ll use thermal imaging systems to detect localized overheating early, triggering immediate inspections. When temperatures exceed design thresholds, you’ll implement emergency replacement protocols. Your scheduling algorithms must correlate real-time temperature data with predicted wear patterns, ensuring you’re replacing bearings before catastrophic failure occurs during operations.

Can Camshaft Bearing Maintenance Be Performed Without Removing the Entire Engine?

You’ll face a critical decision when bearings start failing—complete engine disassembly or strategic access points? You can perform camshaft inspection through removable cover plates and access panels without full engine removal. However, you’re limited to visual checks and basic measurements. For thorough bearing replacement, you’ll need partial engine disassembly, removing cylinder heads and camshaft assemblies while keeping the block mounted in the locomotive frame.

Which Specialized Tools Are Required for Proper Camshaft Bearing Installation Procedures?

You’ll need universal camshaft bearing tools with expander sleeves for standard installations, plus engine-specific adaptor kits for CAT C10/C12 or Cummins Big Cam series. Essential specialized equipment includes hydraulic rams for controlled insertion, precision alignment components like nylon centering cones, and drive shaft extensions for deep-reach applications. Don’t forget split driving plates with protective rubber sleeves and proper drive bars—24″/55″ lengths guarantee adequate leverage for secure bearing installation procedures.

How Do Different Oil Viscosity Grades Impact Bearing Longevity and Performance?

You must use manufacturer-specified oil viscosity to guarantee ideal bearing performance. Higher viscosity oils create excessive friction and reduce flow through camshaft passages, causing bearing starvation. Lower viscosity oils can’t maintain proper film thickness, leading to metal-to-metal contact. You’ll experience premature bearing failure if you deviate from recommended grades. Proper viscosity maintains hydraulic pressure, guarantees adequate lubrication, and maximizes bearing longevity under operating temperatures.

How to Replace Locomotive Camshaft Bearings Properly

How to Replace Locomotive Camshaft Bearings Properly

To properly replace locomotive camshaft bearings, start by selecting engine-specific tools and inspecting oil channels and seals. Lubricate new bearings with EP additive, then use precision drivers to insert bearings, aligning oil holes carefully. Apply steady, controlled force—never hammer at an angle—and check for ≤0.004” misalignment. After installation, measure clearances and alignment, verifying everything meets manufacturer specs. If you’re aiming for maximum reliability and bearing longevity, the next steps will guide you through each essential detail.

Key Takeaways

  • Select high-quality, engine-specific tools and bearings, ensuring material and dimensional compatibility with the locomotive engine block.
  • Thoroughly inspect and clean oil channels, replace seals, and apply EP lubricant to all bearing contact surfaces before installation.
  • Carefully align camshaft bearings with oil holes and galleries, using precision tools to achieve ≤0.004” misalignment and ≤0.001” runout.
  • Insert bearings with controlled force using dedicated drivers, avoiding hammering or generic tools that may cause misalignment or damage.
  • After installation, measure clearances and alignment with calibrated instruments, then verify oil flow and proper lubrication during dynamic testing.

Tool Preparation and Selection

tool selection and preparation

Before you start replacing camshaft bearings, select and prepare your tools with precision, as the right equipment guarantees both safety and accuracy. Evaluate tool compatibility by matching your tool kit’s bearing diameter range to the engine specifications—choose mandrels and adapters that accommodate sizes like 1.25″–2.69″ or 0.875″–1.00″. Assess material selection: use aluminum adapters for corrosion resistance or steel mandrels for high-torque jobs.

Expandability matters, so select adjustable mandrels or split driving plugs for flexibility across engine types. Ascertain your set includes core components: driving shafts, expander units, guide cones, and reaction mandrels for controlled, precise bearing installation. Inspect for kit completeness and storage cases to maintain organization. A blow molded case is often included with professional camshaft bearing tools, making storage and transport easier while keeping components protected and organized. Prioritize American-made, durable tools, and source from reputable brands to guarantee safe, accurate camshaft bearing replacement.

Lubrication and Pre-Assembly Steps

camshaft lubrication and inspection

Although it may seem straightforward, proper lubrication and pre-assembly steps are critical to guaranteeing reliable camshaft bearing performance and preventing premature wear. Begin by conducting thorough pre-assembly checks: inspect oil channels in stub shafts, confirm all camshaft galleries are clear, and verify seal integrity at both camshaft ends. Replace all seals and confirm lube oil filters are new to prevent particulate ingress. Use appropriate lubrication techniques—apply an extreme-pressure (EP) additive lubricant to all bearing surfaces and pack bearings to establish a hydrodynamic film at startup.

Verify oil pressure specifications (8–12 psi at idle, 25–29 psi at full load), check scavenging pump operation, and validate relief valve settings for system safety. The main lubricating oil system supplies oil under pressure for cooling and lubrication, which is essential for preventing friction damage during initial engine operation. Align bearings with stub shafts, confirm camshaft concentricity, and check axial clearance per manufacturer tolerances. Finally, secure stub shaft fasteners with threadlocker. These steps, when executed precisely, create ideal conditions for bearing installation and long-term reliability.

Bearing Insertion Techniques

precise bearing installation techniques

Now, you’ll select the correct cam bearing installation tool, making sure it matches your engine’s bore size and configuration. Carefully align each bearing with the oil hole and gallery passage, using visual guides to keep orientation exact. Proper positioning of bearings is crucial to avoid damage and ensure long-term reliability. Apply steady, controlled force with your tool to avoid distorting the bearing surface or damaging the block.

Selecting Proper Insertion Tools

Tool selection plays a critical role in successful camshaft bearing installation, ensuring proper fit, alignment, and minimizing the risk of engine damage. Begin by matching your insertion tool to the bearing diameter—expandable mandrels and universal kits like Lisle’s offer broad tool compatibility for 1.25″ to 2.69″ bearings. For large-bore or GEVO engines, hydraulic ram systems and anchor mandrels are essential for safe, controlled installation.

Use engine-specific adaptors for brands like Cummins and CAT to boost installation efficiency and avoid damage from improper sizing. Adjustable tools with split plugs or collapsing mandrels allow you to adapt to slight bore irregularities, while fixed mandrels provide rigidity for perfect bores. Always check that ancillary components—drive extensions, bar guides, and replacement parts—are in prime condition for safe operation. Expandable mandrels are especially valuable because they instantly adjust to undersize cam bearings, as seen in modern cam bearing tool designs.

Ensuring Precise Bearing Alignment

While precise camshaft bearing alignment is critical to engine reliability, you can achieve it by combining careful preparation with the right insertion techniques. Begin by thoroughly cleaning and inspecting housing bores—any dent or sharp edge can tilt the bearing and throw off alignment tolerances. Use alignment techniques like optical or laser tools to confirm centerline accuracy, and guarantee your insertion driver is perfectly centered.

As you insert each bearing, apply steady, incremental pressure, monitoring for abnormal resistance. Always verify alignment with feeler gauges; your target is ≤0.004” misalignment and ≤0.001” runout. For added accuracy, proper oil hole orientation is essential during cam bearing installation, as misaligned oil holes can lead to low oil pressure and premature bearing wear.

Common PitfallConsequence
Rushed alignmentEngine failure risk
Ignored tolerancesCostly bearing replacement
Misaligned installationDangerous system stress

Never compromise safety—verify every measurement before finalizing assembly.

Preventing Bearing Surface Damage

Achieving precise camshaft bearing alignment lays the groundwork, but you must also protect the bearing surfaces throughout installation to avoid premature wear or catastrophic failure. Always use purpose-designed cam bearing drivers to guarantee straight insertion—never force bearings at an angle, as this can score sensitive bearing materials. Prepare your installation environment by thoroughly cleaning oil gallery holes and applying anti-corrosive lubricant to bearing O-rings.

Proper alignment during installation is essential, as camshaft bearings must be driven into position perfectly straight with oil galley holes aligned to ensure optimal function. Avoid abrasive honing, which risks embedding debris in the bearing surface; precision reaming is safer for tight fits. During insertion, employ controlled hammer blows with a nylon drift, advancing incrementally. Confirm oil feed holes align properly. Test-fit bearings and verify bore diameters before final assembly. These methods protect bearing surfaces, guaranteeing reliable operation and extending service life.

Alignment and Position Verification

camshaft bearing alignment verification

Before seating the camshaft bearings, verify their alignment and position to assure reliable oil delivery and proper engine function. Use alignment strategies that account for block orientation: align the bearing oil feed holes at the 2 o’clock position when the block is upright, or at 8 o’clock if inverted. This guarantees feed holes correspond with oil galleries and 360° oil grooves for ideal hydrodynamic support.

Rely on visible position checks, using alignment marks on both the bearing and block, and confirm proper fit before final installation. Always keep a consistent reference axis—front or rear of the block—to avoid rotational misalignment. Safety demands all oil galleries and bearing surfaces remain clear of debris during these procedures. Distortion during installation can affect the bearing shape and size, so take care to press bearings evenly and avoid introducing stress that could compromise camshaft rotation.

  1. Visually confirm oil feed hole alignment with galleries using reference marks.
  2. Verify block orientation and translate clock positions accordingly for correct installation.
  3. Inspect and clear oil grooves and channels before proceeding to the next installation step.

Hydraulic Press Application Methods

steady pressure for alignment

When you use a hydraulic press to install camshaft bearings, apply steady, controlled pressure in small increments to prevent distortion or misalignment. Always verify that each bearing seats fully and evenly by checking for uniform contact around the circumference. Pause periodically to inspect alignment and adjust force as needed, prioritizing safety and consistent fit throughout the pressing process. Proper hydraulic press application helps maintain the oil clearance critical to camshaft bearing longevity and engine performance.

Controlled Pressure Application Steps

While the hydraulic press provides the necessary force for camshaft bearing installation, precise control and correct tool selection are critical for safe and effective results. Always utilize controlled pressure to prevent bearing distortion and guarantee stability throughout the process. Begin by selecting the correct tool combination from the provided chart for your specific bearing size. Carefully align Tooling B’s chamfer with the bore face, and confirm the bearing oil hole matches the camshaft bore’s oil access. Use Tooling C for bearings three through six to maintain bearing stability and distributed pressure. Monitor the hydraulic pump output for uniform force application and avoid sudden spikes.

For best results, ensure proper alignment during installation, as misalignment of less than .001 can usually be compensated for with adequate clearance but larger misalignments may cause premature bearing wear or engine failure.

  1. Select tool combination per Table 2 for bearing size.
  2. Align oil hole and apply controlled pressure until seating.
  3. Use Tooling C for multi-bearing stability and even load.

Bearing Seating Verification

Although the hydraulic press streamlines camshaft bearing installation, you must verify seating accuracy to affirm reliable engine performance and prevent premature wear. Start by visually inspecting each bearing seat for metal shavings or debris. Use an LS-specific driver and guarantee even force distribution so the bearing aligns concentrically within the housing.

Maintain perpendicularity with the cam bore axis during pressing to avoid eccentric seating, which compromises bearing stability. After pressing, check for proper oil hole alignment and inspect for trapped contaminants. Measure cam journal runout with a dial indicator to confirm concentricity, and use a micrometer to verify bearing ID matches specifications. Documenting all measurements is important to track wear trends over time and ensure ongoing reliability. Test the camshaft for free rotation—any binding may indicate compromised seating accuracy. Always document your measurements for future reference.

Incremental Force Techniques

To achieve precise camshaft bearing removal and installation, incremental force application with a hydraulic press guarantees controlled, consistent load distribution and minimizes the risk of housing or bearing distortion. Begin by setting the hydraulic press to the correct demounting force—up to 63.5 metric tons for railway-specific applications. Use the semi-automatic or fully automatic operation modes to manage the press cycle (2 minutes per cycle), ensuring the ram stroke and extension speed match the bearing size. Always rely on the carriage’s automatic positioning and rack-and-pinion alignment to center the axle journal. This prevents uneven force application and potential damage.

  1. Set adjustable jaws for the specific wheel diameter.
  2. Engage the hydraulic ram gradually, monitoring force application.
  3. Use automated cycle management to maintain incremental force and maximize safety.

Post-Installation Inspection and Testing

post installation inspection protocol

Once you’ve installed new camshaft bearings, it’s critical to conduct a thorough post-installation inspection and testing sequence to guarantee proper function and longevity. Begin your post installation analysis by measuring camshaft journal and bearing bore diameters with calibrated micrometers and bore gauges. Compare recorded clearances to manufacturer specs—any discrepancy over 0.0005″ means immediate attention. Confirm bearing alignment using straightedges, and perform clearance analysis with plastigage or feeler gauges to detect tapering or end-play issues.

Next, inspect cam journals for out-of-round or lobe wear, using micrometers and dial indicators for precision. Mount the camshaft in V-blocks for runout testing; TIR should not exceed 0.002″. Dynamic testing under operational rotation is essential—monitor for abnormal noise, oil film distribution, and proper valve train motion. Always record your findings for traceability and safety.

StepTool UsedSpec/Action
Measure ClearanceMicrometer/Bore G.≤0.0005″ discrepancy
Check AlignmentStraightedgeVisual/Measured conformity
Test RunoutDial Indicator≤0.002″ TIR
Dynamic TestingAccelerometerNoise/vibration monitoring

Maintenance of Tools and Equipment

tool maintenance ensures safety

Proper maintenance of tools and equipment is essential for achieving accurate results and guaranteeing safety during camshaft bearing replacement. Adhering to rigorous tool maintenance and equipment storage protocols minimizes the risk of measurement errors and accidents. Begin each workday by visually inspecting hand tools and machinery for wear, rust, or damage. Calibrate precision instruments such as torque wrenches and force gauges per OEM timetables, documenting all calibration activities for regulatory compliance. Always store tools in climate-controlled, secure environments to prevent corrosion and unauthorized use.

Consistent tool maintenance and careful storage are critical for accuracy and safety when replacing camshaft bearings.

Follow these best practices for effective tool maintenance and equipment storage:

  1. Daily Inspections: Check tools for physical defects, replace worn parts, and guarantee all mechanisms function smoothly.
  2. Scheduled Calibration: Maintain up-to-date calibration according to manufacturer and railroad SMP requirements, especially for critical measurement devices.
  3. Proper Storage: Use labeled, secure storage in dry areas, isolate unused tools, and follow ergonomic handling to reduce fatigue and prevent contamination.

Consistent application of these procedures sustains operational integrity and safety.

Troubleshooting Common Installation Issues

camshaft bearing installation issues

Although camshaft bearing installation may seem straightforward, several common issues can compromise the reliability and longevity of your work. You’ll often encounter bearing distortion from improper bore geometry or use of generic tools. Installation misalignment—especially failing to square bearings in the bore—causes restricted camshaft rotation and premature wear. Always verify bore roundness and alignment with precision gauges before installing new bearings.

Misalignment of oil holes and grooves can starve the camshaft of lubrication, leading to increased friction and bearing failure. Use cam-specific tools to avoid pressing bearings unevenly. Don’t rush: improper chamfering or hammering bearings before they’re fully seated will shed metal shavings and reduce clearances. Finally, always match bearing material and dimensions to the engine block’s requirements.

ProblemPotential Consequence
Out-of-round boresBearing distortion
Misaligned oil holesLubrication failure
Generic installation toolsInstallation misalignment
No chamfer on bore edgesMetal shaving/galling
Material mismatchPremature bearing wear

Frequently Asked Questions

How Often Should Locomotive Camshaft Bearings Be Replaced?

You should determine your locomotive camshaft bearing replacement schedule by following rigorous bearing maintenance protocols and OEM recommendations, typically every 1,000–2,000 engine hours. Don’t ignore warning signs like increased oil consumption, power loss, or visible bearing wear. Always track service intervals and bearing condition in your maintenance logs. Prioritize safety by inspecting for contamination and misalignment, ensuring you replace bearings promptly to prevent catastrophic engine damage and maintain peak locomotive performance.

What Are Signs of Worn Camshaft Bearings During Operation?

When monitoring for bearing wear, you’ll notice operational signs like knocking, chirping, or metallic noises that match engine RPM—these often worsen at startup. Watch for low oil pressure, erratic engine behavior, or excessive crankcase pressure. If you detect overheating, surface discoloration, or rhythmic clattering, act immediately. Always prioritize safety: shut down the engine and inspect the bearings closely, since ignoring these symptoms can lead to catastrophic failure or further component damage.

Can Upgraded Bearings Improve Locomotive Performance or Lifespan?

When you install upgraded bearings, you’ll see clear performance enhancements thanks to advanced bearing technology. You’ll benefit from improved load capacity, better lubrication, and longer lifespan, all of which support high-RPM, high-torque locomotive engines. Always align oil holes precisely and use specialized hydraulic tools to prevent misalignment or bearing damage. Prioritize safety by maintaining anti-contamination protocols and applying correct load-control—these steps maximize both reliability and operational efficiency for your locomotive.

Are OEM and Aftermarket Bearings Interchangeable?

You can’t always interchange OEM and aftermarket bearings due to differences in OEM compatibility and bearing quality. OEM bearings offer precise tolerances, seamless construction, and consistent materials, critical for safety and performance. Aftermarket options may lack exact fitment, have variable quality, or require special tools, risking misalignment or failure. Always check dimensional specs, material composition, and manufacturer guidelines before attempting substitution to guarantee safe, reliable operation and to avoid voiding warranties.

What Safety Precautions Should Be Taken During Bearing Replacement?

Don’t throw caution to the wind—always prioritize safety when replacing bearings. You should wear proper safety gear like gloves and eye protection to guard against debris and lubricant splashes. Ascertain your work environment is clean, well-lit, and free of trip hazards. Isolate all power sources before starting. Use tools as recommended, avoid shortcuts, and follow lockout/tagout procedures. Double-check components for secure handling and alignment to prevent workplace accidents.

EMD Diesel Camshaft Bearing Replacement Specs Guide

EMD Diesel Camshaft Bearing Replacement Specs Guide

When replacing EMD diesel camshaft bearings, always use OEM-approved parts matched by exact part numbers for your engine series. Torque fasteners per EMD specs—typically 1,800 ft-lbs for crab nuts—using calibrated tools, and verify alignment with a dial indicator. Carefully measure housing bores with a ball micrometer, check for uniform gasket compression, and document all clearances for traceability. Strictly follow torque sequence and lubrication practices to guarantee reliability. For model-specific nuances, important fitment checks, and troubleshooting tips, explore further.

Key Takeaways

  • Verify camshaft bearing part numbers and compatibility using the EMD Parts Catalog and engine model identification.
  • Measure camshaft bearing bores for straightness and correct size with a dial indicator and ball micrometer before installation.
  • Install bearings with proper orientation and confirm seating, ensuring alignment and uniform interference fit per EMD specifications.
  • Torque bearing cap fasteners to EMD-specified values, following the prescribed tightening sequence for even load distribution.
  • Document all measurements, part numbers, and torque values for traceability and future maintenance reference.

Torque Settings and Fastener Tightening Procedures

torque settings ensure reliability

Before you begin reassembling the EMD diesel engine, understanding the correct torque settings and fastener tightening procedures is critical to confirm mechanical integrity and operational safety. You’ll encounter several fastener types—crab nuts, main bearing nuts, fork rod capscrews, split basket bolts, and flywheel coupling bolts—each with specific torque requirements. For example, cylinder head crab nuts on a 567-series require 1,800 ft-lbs, while main bearing nuts need 500-800 ft-lbs and must be retightened after thermal cycling.

Always follow the prescribed tightening sequence to confirm even load distribution; this is especially important for multi-piece assemblies like split baskets, where bottom bolts must be torqued to 75 ft-lbs. Use specialized tools such as the main bearing wrench set (8219512) and offset ratchets (8191591) to achieve precise results, particularly in confined spaces. Adhering to these parameters prevents distortion, maintains alignment, and confirms long-term reliability. Regularly inspect and verify proper torque specifications during maintenance operations to reduce the risk of premature bearing failure and extend the operational life of critical engine components.

Selecting and Sourcing Correct Replacement Parts

replacement camshaft bearing sourcing

Several precise steps are essential when selecting and sourcing replacement camshaft bearings for EMD diesel engines. Start by confirming part compatibility—reference EMD’s part numbering protocols, such as B18 for 645 series main bearings or B26 for camshaft drive gear trains. Always match part numbers exactly to your engine model and series, guaranteeing interchangeability within the specified engine family. Use a ball micrometer and dial indicator to verify critical dimensions, aligning with clearance tolerances (for example, 0.08–0.15 mm between governor drive gear and stub shaft).

When sourcing replacement camshaft bearings, it is crucial to consider the bearing and bushing specifications—such as oversize or undersize options—to ensure the correct fit and function within your engine assembly.

For sourcing strategies, prioritize OEM-approved or EMD-licensed suppliers. Cross-reference offerings—such as 40004756 cam bearing kits—against technical documentation, and request supplier certifications and warranties. Don’t overlook the importance of component traceability; document all part numbers and measurements for future reference. By adhering to these steps, you’ll confirm reliable part compatibility and maintain operational integrity throughout the camshaft bearing replacement process.

Model-Specific Camshaft Bearing Recommendations

model specific camshaft bearing recommendations

While EMD diesel engines share foundational design principles, each model demands specific camshaft bearing considerations based on cylinder configuration, lubrication routing, and mechanical loads. For 567C engines, use flanged camshaft segment bearings designed for oil feed through the camshaft center bore and flanged caps, ensuring compatibility with both four-exhaust-valve heads and the inline-8, -12, or -16 layouts. Choose bearing materials that withstand the high loads imposed by the 7.5″ or 6.5″ crankshaft journals and select camshaft types that match your engine’s firing order and phasing—critical for V-type 8-cylinder and long-span 12-cylinder configurations.

In 645 Series engines, prioritize bearings capable of supporting the idler gear assembly’s additional drive loads and maintaining oil flow integrity through the camshaft center bore. Always verify torque specs for bearing capscrews, stubshaft brackets, and head crab nuts. Matching bearing materials to engine-specific requirements maximizes camshaft longevity and overall operational reliability.

Precision Measurement and Alignment Techniques

precision alignment and measurement

You’ll rely on dial indicators to measure camshaft bearing bore straightness and detect any alignment deviations exceeding permissible limits. Use a ball micrometer to verify precise housing bore dimensions and confirm correct bearing sizing for ideal fit. Proper positioning of bearings is crucial to avoid damage, so always ensure correct orientation during installation. Accurate readings from both tools are critical to prevent premature wear and guarantee reliable camshaft operation.

Dial Indicator Usage

A single misstep in dial indicator setup can introduce significant measurement error when replacing EMD diesel camshaft bearings. Start by confirming indicator calibration—adjust both pointers to zero using a certified test bar or base plate. Securely mount the indicator on a stable base to prevent vibration or movement that would undermine measurement accuracy. Align the spindle precisely with the measurement direction to eliminate cosine error; a 12° stylus angle is ideal, and never exceed manufacturer-specified angle limits.

Position the indicator surface parallel to the camshaft bearing surface, whether horizontal or vertical. Select contact point stiffness and geometry appropriate for your load and angle requirements. The travel range of a dial indicator—typically up to 100 mm—should be chosen to match the dimensional variation expected in camshaft bearing measurement. Always verify repeatability and retrace error by repeating measurements. Periodically check against national standards to confirm ongoing indicator calibration.

Ball Micrometer Application

Once the dial indicator confirms camshaft bearing alignment, focus shifts to precision measurement—where the ball micrometer becomes your primary tool. Begin by cleaning the ball and anvils thoroughly to eliminate contamination. Maintain environmental stability to prevent thermal expansion errors. Before proceeding, perform ball micrometer calibration using certified gauge blocks; this step validates measurement accuracy and verifies the instrument’s 0.001mm resolution.

Position the ball on a V-notched saddle for stability, centering it perpendicular to the anvils. Apply controlled, frictionless gaging pressure to avoid deformation. Measure at least three radial positions—typically at 3:00, 9:00, and 12:00—to account for out-of-roundness, then average results for statistical reliability. Take multiple measurements for reliability, as small measurement variations can impact performance. Document each reading, maintaining traceability and guaranteeing compliance with EMD diesel camshaft bearing replacement specifications.

Inspection Protocols Before and After Installation

camshaft bearing installation checks

Before installing new camshaft bearings, you’ll need to measure diametral clearances using a ball micrometer or dial indicator to confirm they meet EMD tolerances. Don’t overlook gasket inspection—verify all seals and gaskets for uniform compression and absence of defects to prevent leakage. Bearings reduce friction between the camshaft and engine block, so ensuring proper lubrication and fit is critical for longevity. After installation, recheck clearances and visually confirm gasket integrity to guarantee reliable operation.

Measuring Bearing Clearances

Even minor deviations in camshaft bearing clearance can lead to premature wear or catastrophic failure, so precise measurement protocols are essential before and after installation. Begin by measuring the main housing bore and camshaft journal diameters with calibrated micrometers, ensuring all readings are at room temperature to avoid thermal distortion. Verify bearing thickness to confirm it aligns with specified clearance tolerances; use .0003” per shell as your baseline for bimetal bearings.

Apply plastic gauges between journal and bearing shell, then torque to 650 ft-lbs, noting the compressed strip width to determine actual clearance. Document six radial bore measurements to detect out-of-round conditions. After installation, recheck clearances, compare against OEM limits, and inspect for scoring or misalignment to validate proper assembly integrity. Accurate measurement is critical for engine performance and ensures that oil clearance is within optimal specifications.

Assessing Gasket Integrity

Accurate bearing clearance measurements set the foundation for reliable camshaft operation, but maintaining gasket integrity is equally important to prevent fluid leaks and guarantee long-term engine performance. Before installation, inspect all sealing surfaces for cracks, misalignment, or signs of gasket deterioration using borescopes and visual checks. Clean surfaces thoroughly, removing old sealant and debris, then confirm flatness and roughness meet EMD specifications.

Regular inspection with fiber optic endoscopes helps identify potential failures before catastrophic damage occurs. Apply an even layer of approved sealant to critical interfaces, ensuring proper alignment of pins and bosses. After assembly, execute pressure testing and thermal cycling to detect leaks and assess gasket resilience under operational stresses. Monitor for micro-leaks, warping, or coolant seepage. Log inspection and test results, scheduling periodic follow-ups to track gasket performance and confirm ongoing seal integrity.

Best Practices for Maintenance and Longevity

camshaft bearing maintenance strategies

A disciplined approach to camshaft bearing maintenance is essential for maximizing the reliability and lifespan of EMD diesel engines. You should always begin with a thorough pre-replacement inspection—check for bearing discoloration, verify oil filter cleanliness, and analyze lube oil quality. Use only OEM-grade parts and adhere to exact torque and alignment procedures during installation to guarantee proper fitment and stress minimization. For effective longevity strategies, regular lubrication management is critical: replace turbocharger oil filters every 1,400 hours, use only approved lubricants, and flush lubrication systems during overhauls. During each major maintenance event, be sure to clean oil strainers to prevent debris buildup that could compromise bearing performance.

StepActionFrequency/Detail
Oil Filter ReplacementInstall new turbo filtersEvery 1,400 hours
Oil AnalysisCheck for contaminants/degradationPre-replacement, quarterly
Bearing Age LoggingRecord install/service datesAt every replacement
Manual ChecksInspect for roughness/heat1 & 3 months post-install
Lubricant SelectionUse OEM-approved oilsEvery fill/change

Document all maintenance actions and correlate them to boost operational longevity.

Common Fitment Issues and Troubleshooting

bearing fitment troubleshooting techniques

When replacing EMD diesel camshaft bearings, you’ll encounter several fitment challenges that can compromise engine reliability if left unaddressed. Common bearing fitment issues include selecting incorrect bearing sizes, which leads to misalignment and potential metal-on-metal contact. Verify bearings are oriented properly—misaligned or partially covered oil holes restrict lubrication, causing accelerated wear. Improper seating or insufficient interference fit allows bearing movement, resulting in camshaft flex and uneven support.

Excessive wear is often the result of improper installation or incorrect bearing sizes, and if not addressed promptly, it can lead to total bearing failure. Use troubleshooting techniques such as lift checks to confirm proper fitment before final installation. Always clean serrations in caps and frames to avoid uneven seating, and inspect for high spots or machining errors that can distort bearing geometry. After installation, check for adequate bearing contact patterns and perform post-installation rotating effort checks to identify misalignment or torque errors. Address debris contamination by thoroughly cleaning all block and cap surfaces, preventing foreign material from compromising lubrication and bearing life.

Reference Tools and Catalog Resources

emd camshaft bearing replacement resources

Technical manuals and catalog resources serve as essential references throughout EMD diesel camshaft bearing replacement. You’ll rely on the Square EMD 567C Maintenance Manual for engine-specific data like torque specs, firing orders, and journal diameters. This manual details the torque values for hardened (85 in-lbs) and non-hardened (65 in-lbs) fasteners, critical for precise reassembly.

For catalog organization, the EMD 645 Parts Catalog No. 302 assigns unique codes—such as A07 for camshaft and connecting rod bearings—streamlining parts identification across assemblies. Component relationships for brackets, drive gears, and speed-trip mechanisms are clarified via tabular part lists, reducing errors in ordering and installation. Cross-reference charts are indispensable for distinguishing bearing specs between 567C, 645, and F/E variants, ensuring you match the correct part to your engine model. Specialized tools like ball micrometers and dial indicators, referenced in manuals, enable accurate measurement and verification during the replacement process.

Frequently Asked Questions

How Long Does a Typical Camshaft Bearing Replacement Take?

Think of camshaft bearing replacement like performing surgery on a heavy-duty engine—precision’s essential. You’ll spend 10-30 hours, depending on engine size and access. For efficient camshaft maintenance tips, always use dial indicators to verify axial play, and follow proven bearing installation techniques, like gradual press-fit and alignment checks. Don’t rush—timing verification and injector alignment add extra hours, so plan for a two-person team to guarantee accuracy and component safety throughout the process.

Can I Reuse Old Camshaft Bearings if They Look Undamaged?

Even if old camshaft bearings look undamaged during bearing inspection, you shouldn’t reuse them. Visual checks can’t catch internal fatigue or subtle wear that compromises engine longevity. Industry standards require you to follow scheduled replacement intervals, since reused bearings risk premature failure, hidden cracks, and disrupted oil flow. Always install new bearings and hardened washers to maintain proper alignment, oil film thickness, and warranty coverage. Don’t rely on appearance—prioritize proven maintenance protocols.

You’ll notice that safety goggles, gloves usage, and steel-toe boots all coincide as essential PPE when replacing camshaft bearings. Equip yourself with impact-resistant safety goggles to shield your eyes, and heavy-duty gloves to prevent cuts and chemical burns. Don’t forget a face shield respirator for fume protection, coveralls for spill barriers, and oil-resistant matting for grip. Always keep a fire extinguisher and emergency eye wash station close for unforeseen incidents.

How Do Ambient Temperatures Affect Camshaft Bearing Installation?

When installing camshaft bearings, you must factor in temperature considerations since ambient temperatures cause housing and bearing materials to expand or contract. If you ignore this, you risk improper clearances and misalignment. Always use installation techniques that account for these changes—install bearings at recommended ambient temperatures, and use precision alignment tools. Oversized reaming may be necessary in high-heat environments to prevent distortion, ensuring reliable operation and ideal bearing-to-housing fit.

Are There Video Tutorials Available for First-Time Replacers?

Think of video resources as your roadmap through unfamiliar territory—they guide you step by step. You’ll find several video tutorials online that offer beginner tips, demonstrate bearing puller kit usage, and show precise oil hole orientation. These videos cover industry procedures like seal protrusion measurement and proper bearing handling. Watching them, you’ll gain confidence in techniques such as tool-based insertion and torque specifications, ensuring your first replacement meets OEM standards and procedural accuracy.

You may also be interested in reading – EMD Engine Maintenance Manual 567b 4th Edition

Translate »